In this article we go over:
Adding an Appointment to Scheduler | Editing/Deleting a Recurring Series
Adding an Appointment to Scheduler
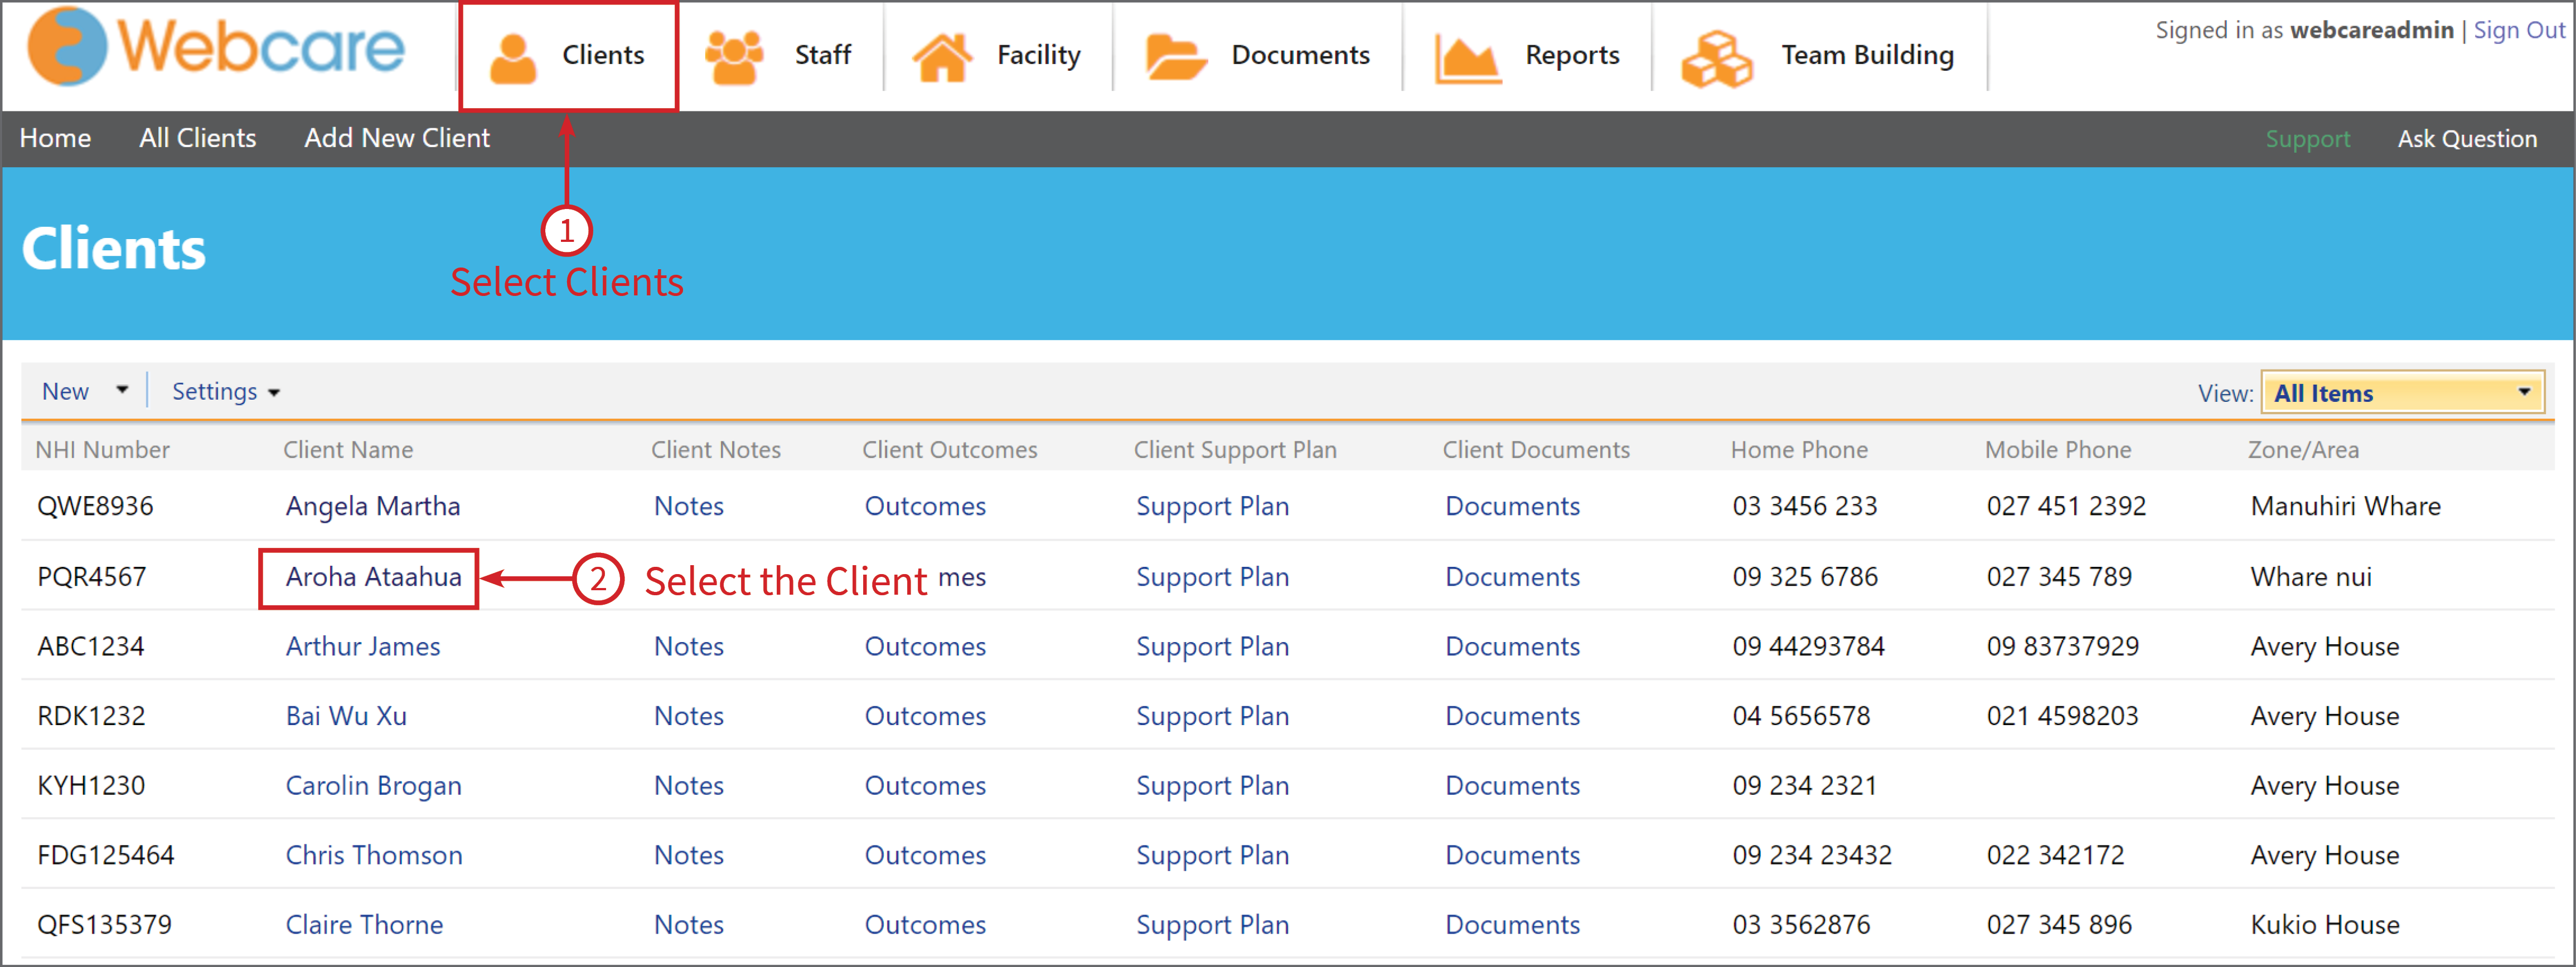
To access Schedule, click on Clients (1).
Depending on your system set up, Schedule will be able to be accessed in one of the column links next to the clients name, if so click here. Otherwise click on the clients name (2) to go to their Profile.
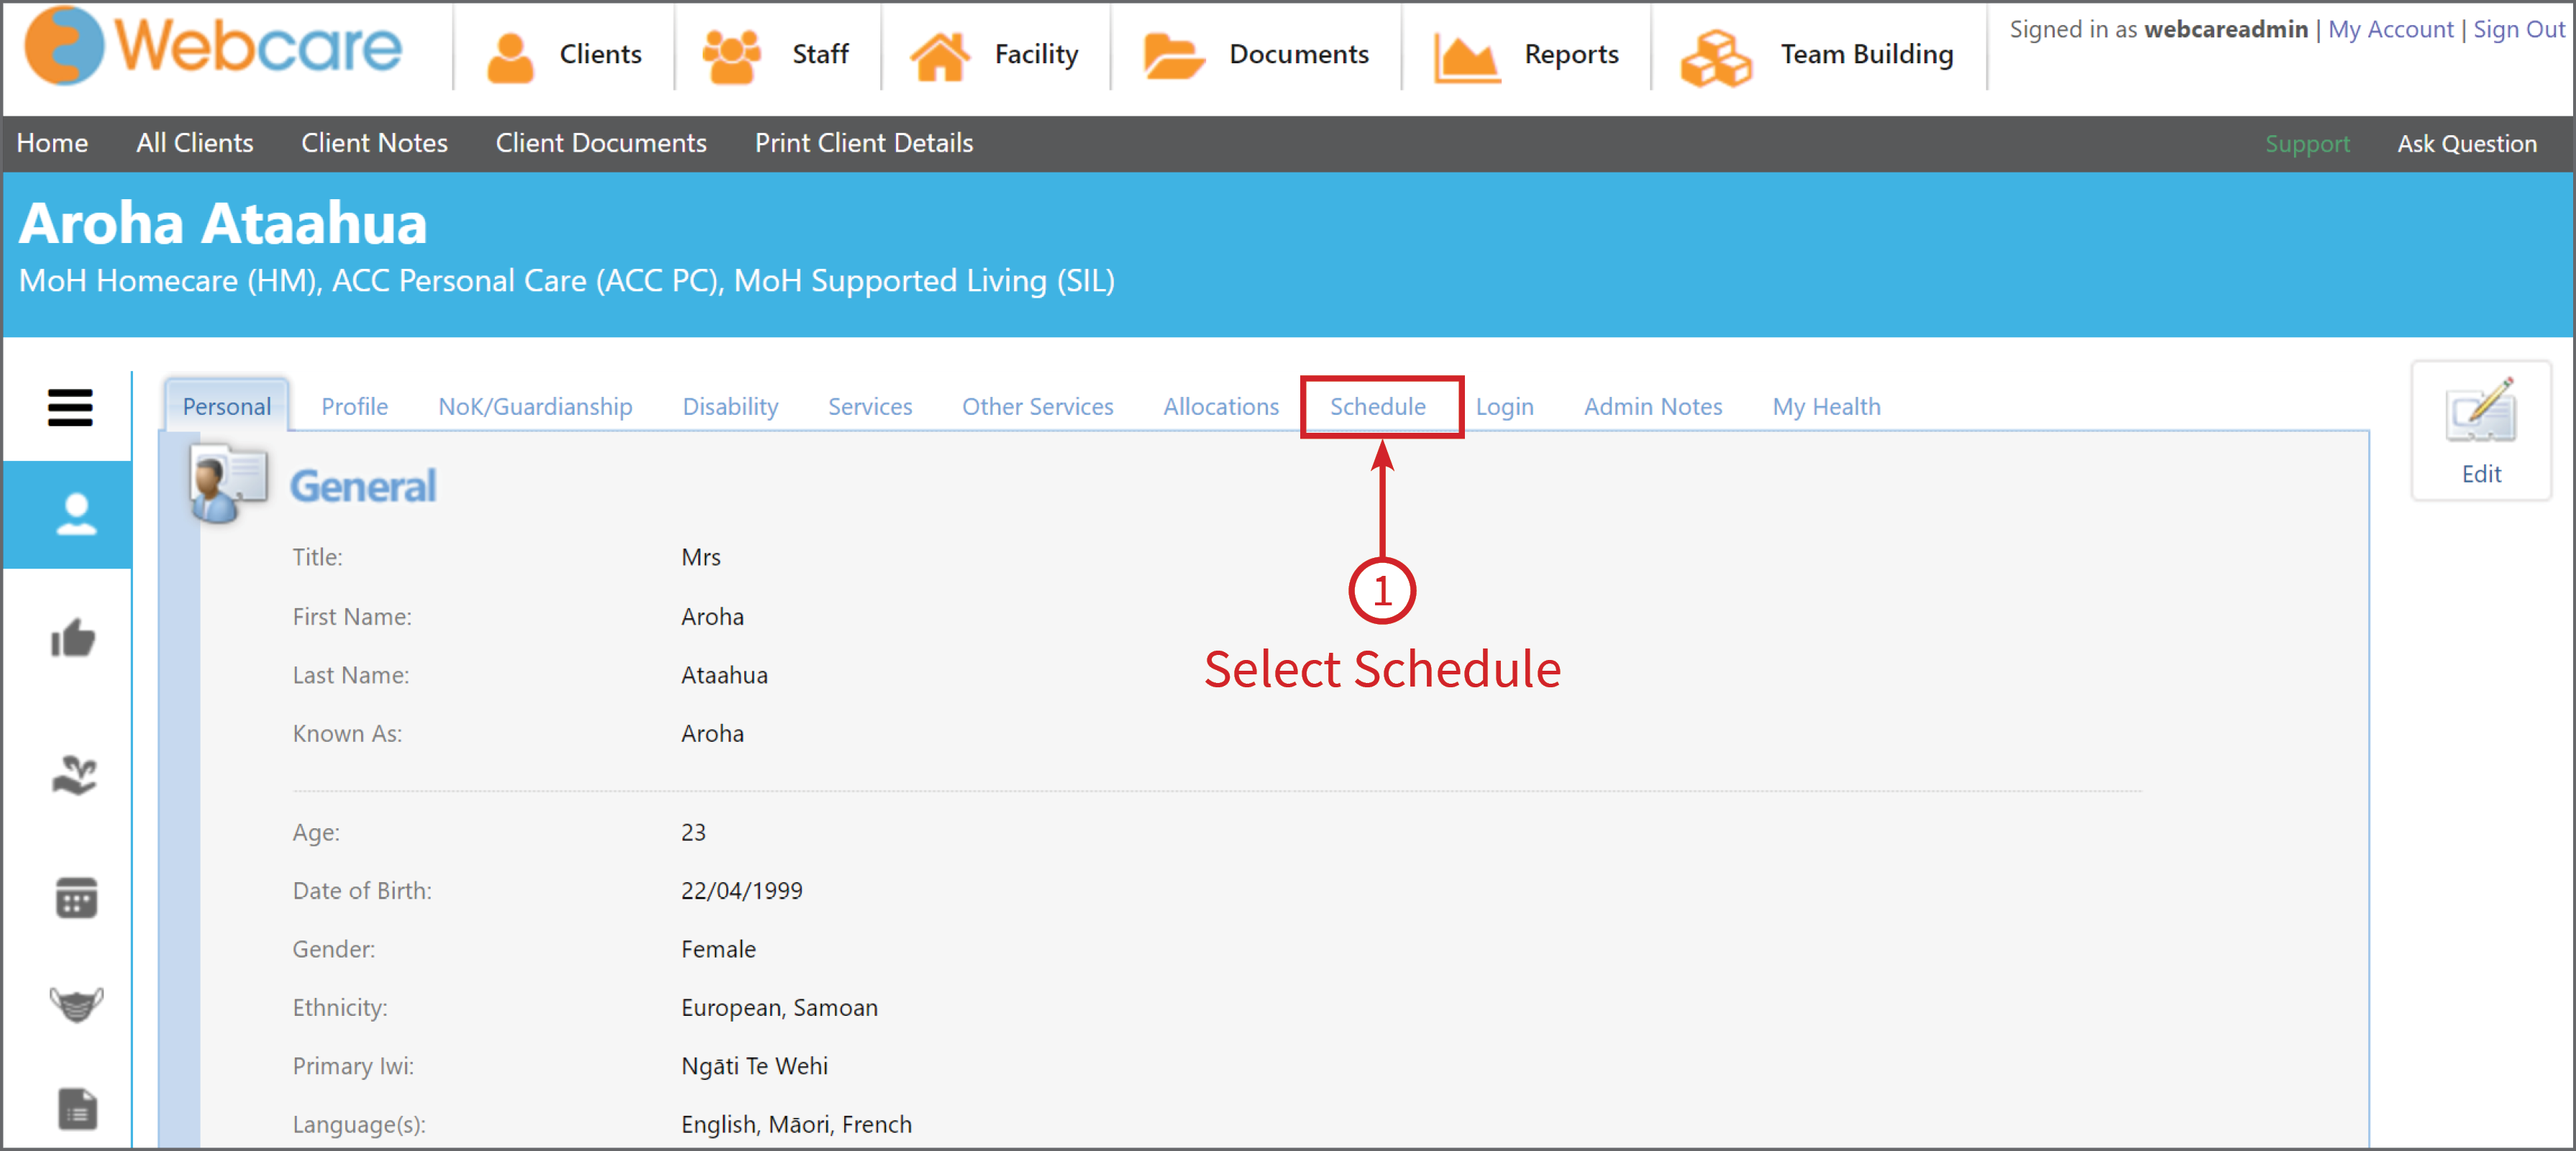
From here you can select Schedule (1).
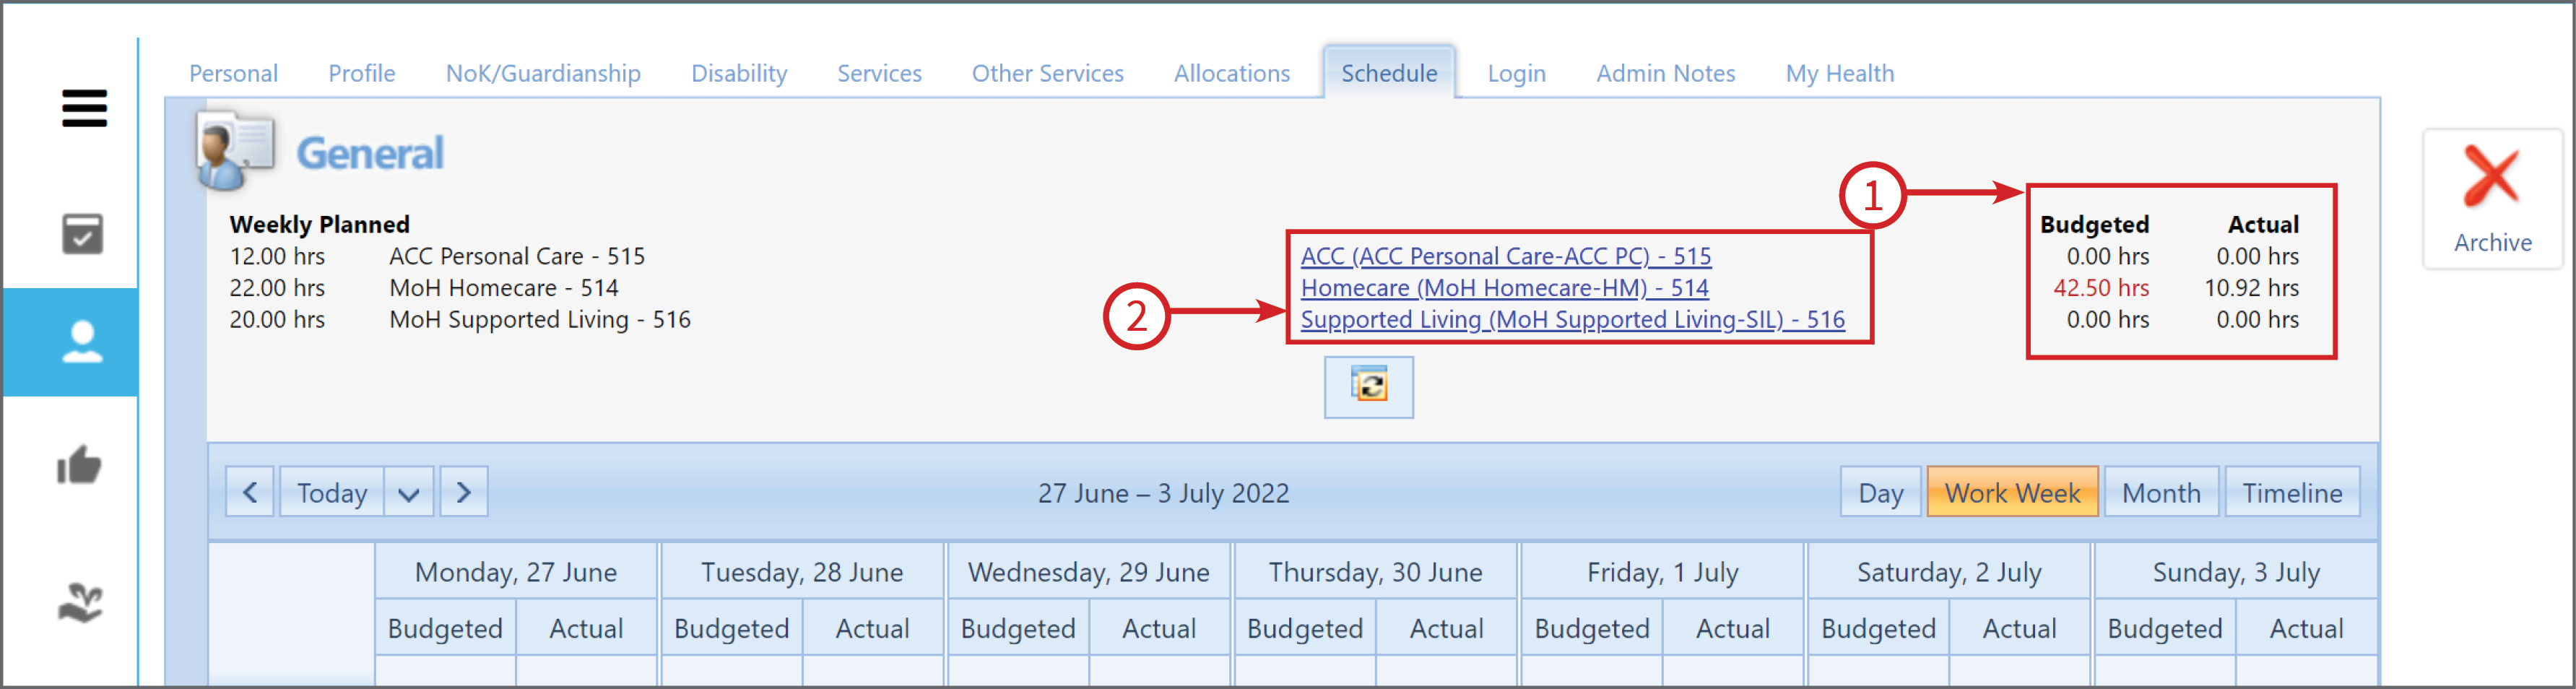
This will display the scheduled support for this client including budgeted hours/actual hours (1) and which support contracts (2) the client is entitled to.
To learn how to add a contact or edit contract information - Click here
To add an appointment, using your mouse click, hold and drag on a date/time slot on the calendar for the time period of the appointment (1).
Then right click on the mouse to bring up the menu. Select Schedule Staff Appointment(2).

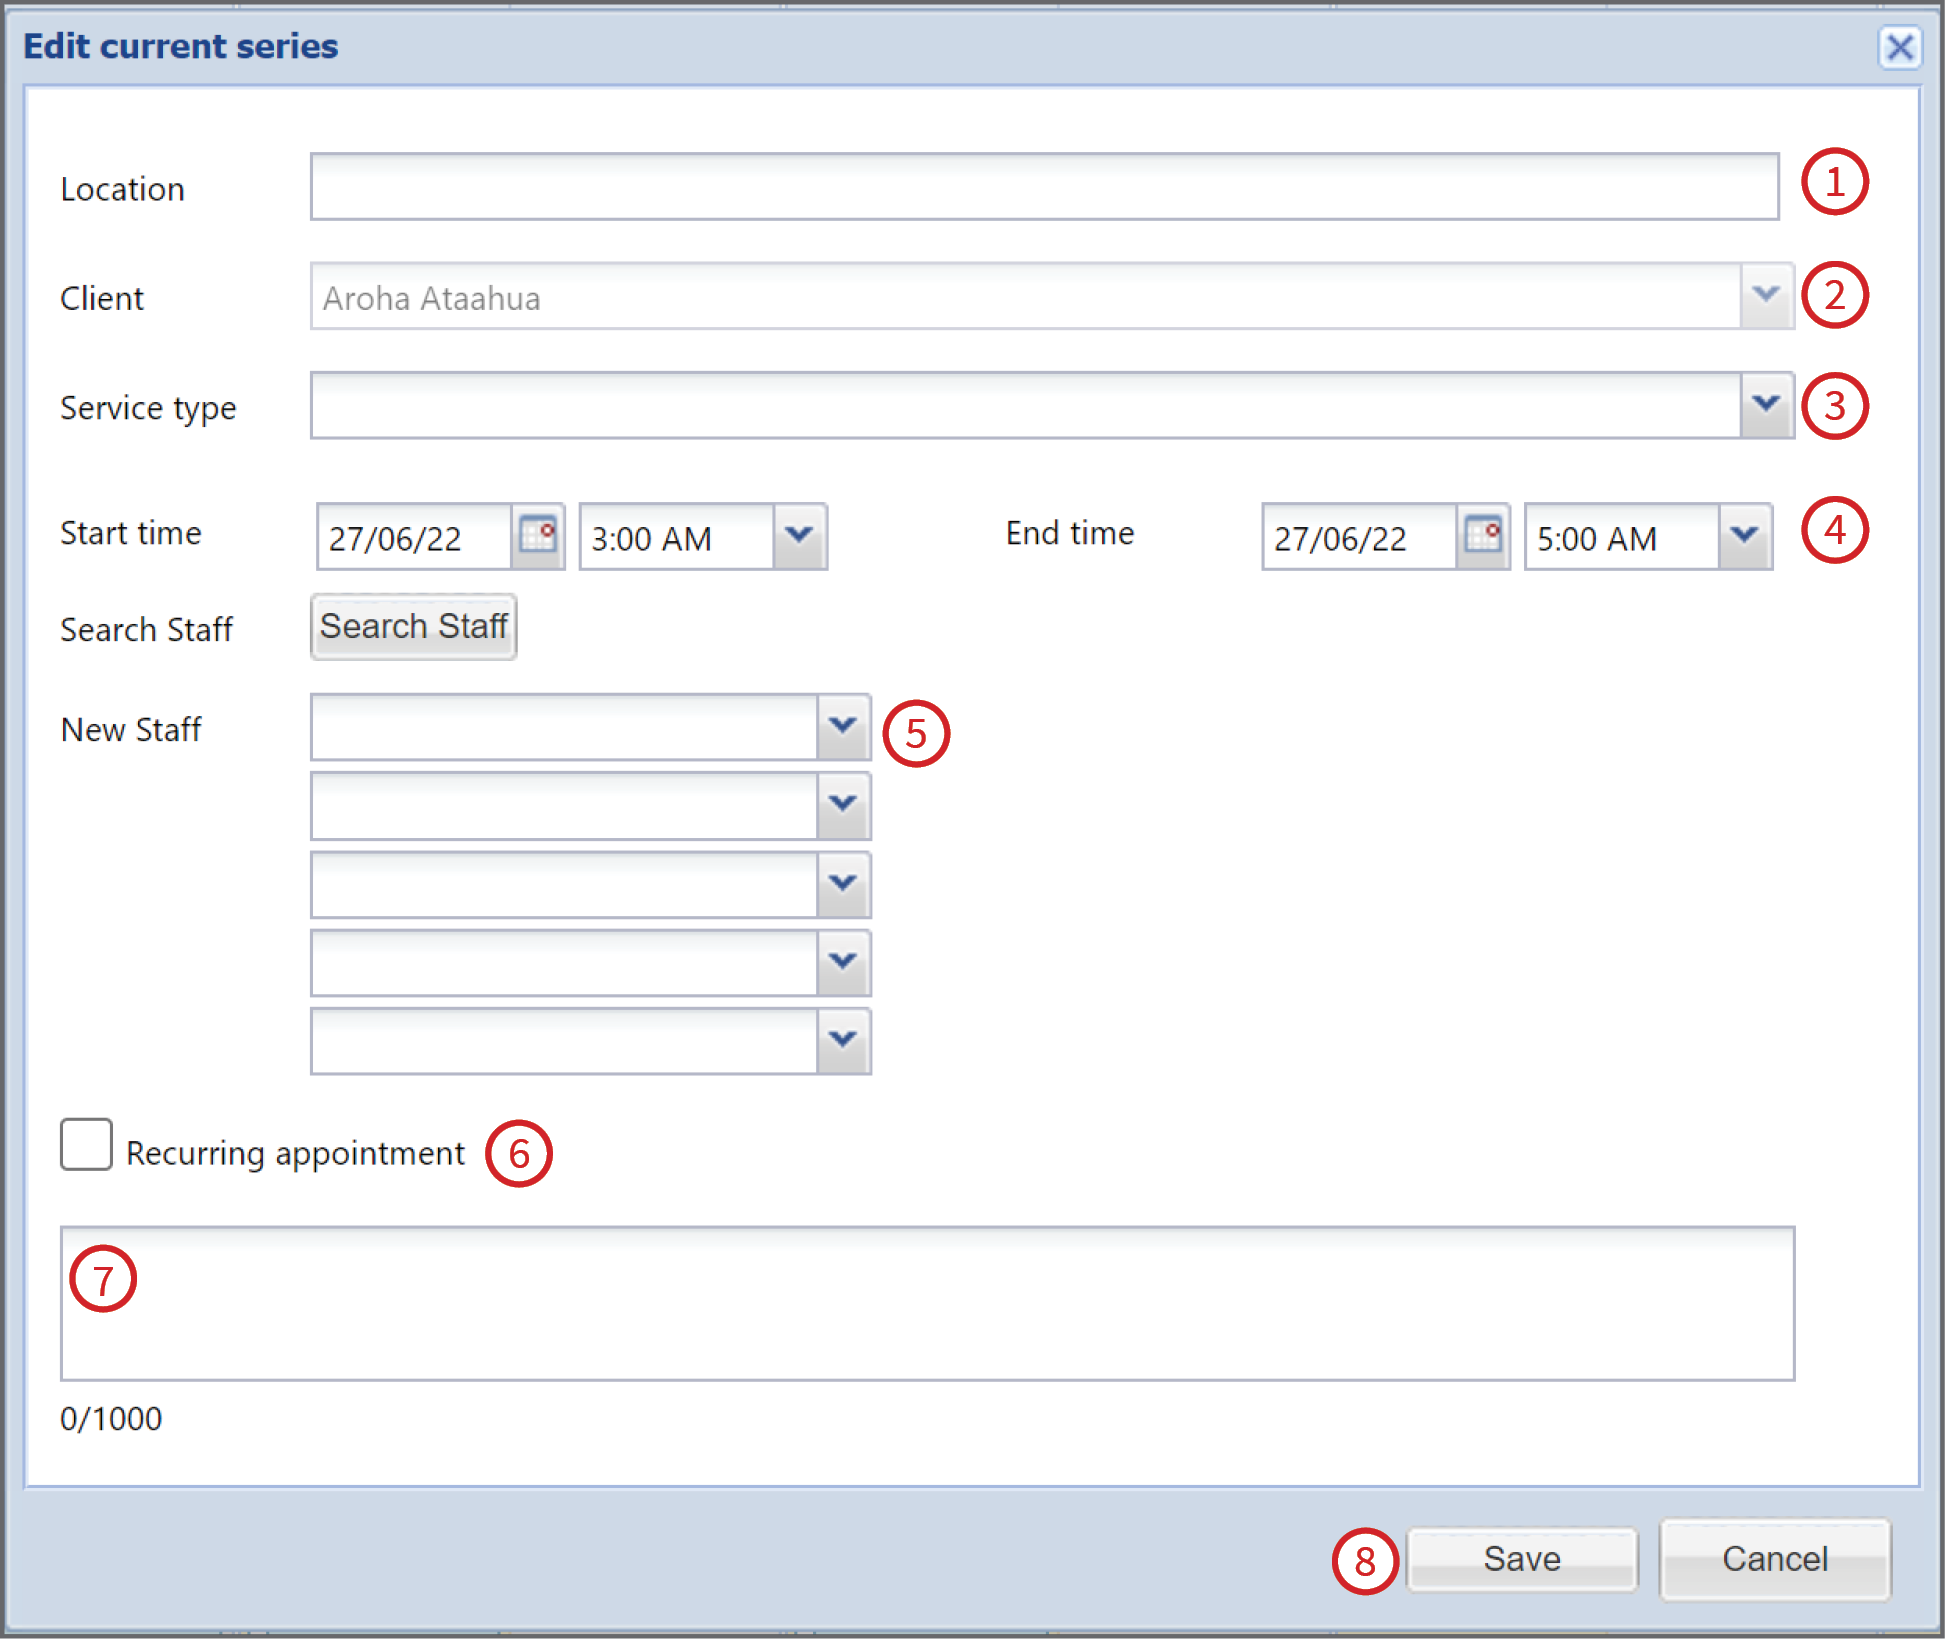
This will bring up the Edit Appointment box (see below).
Here you can enter the information:
- Location for where the appointment will take place.
- Check the Clients name is correct. (This is automatically generated as you have gone through the Client tab to access the Schedule.)
- Select which Service Type the appointment is related to from the drop down menu.
- Ensure the Start time and End time is correct.
- Select a Staff member from the drop down menu.
- If the appointment is Recurring, tick the box.
- Enter any Notes regarding the appointment.
- Save.
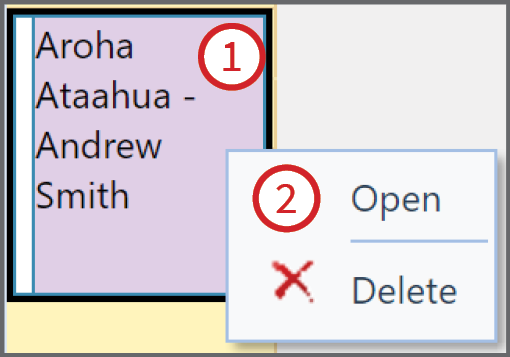
Once you have saved the appointment, it will show on your scheduler screen (1)
You can right click on your mouse to open a menu with options to Open or Delete (2).
If the appointment was recurring, you will also have the option to Edit Series.
See the next section of this article on Editing/Deleting a Recurring Series.
Editing/Deleting a Recurring Series
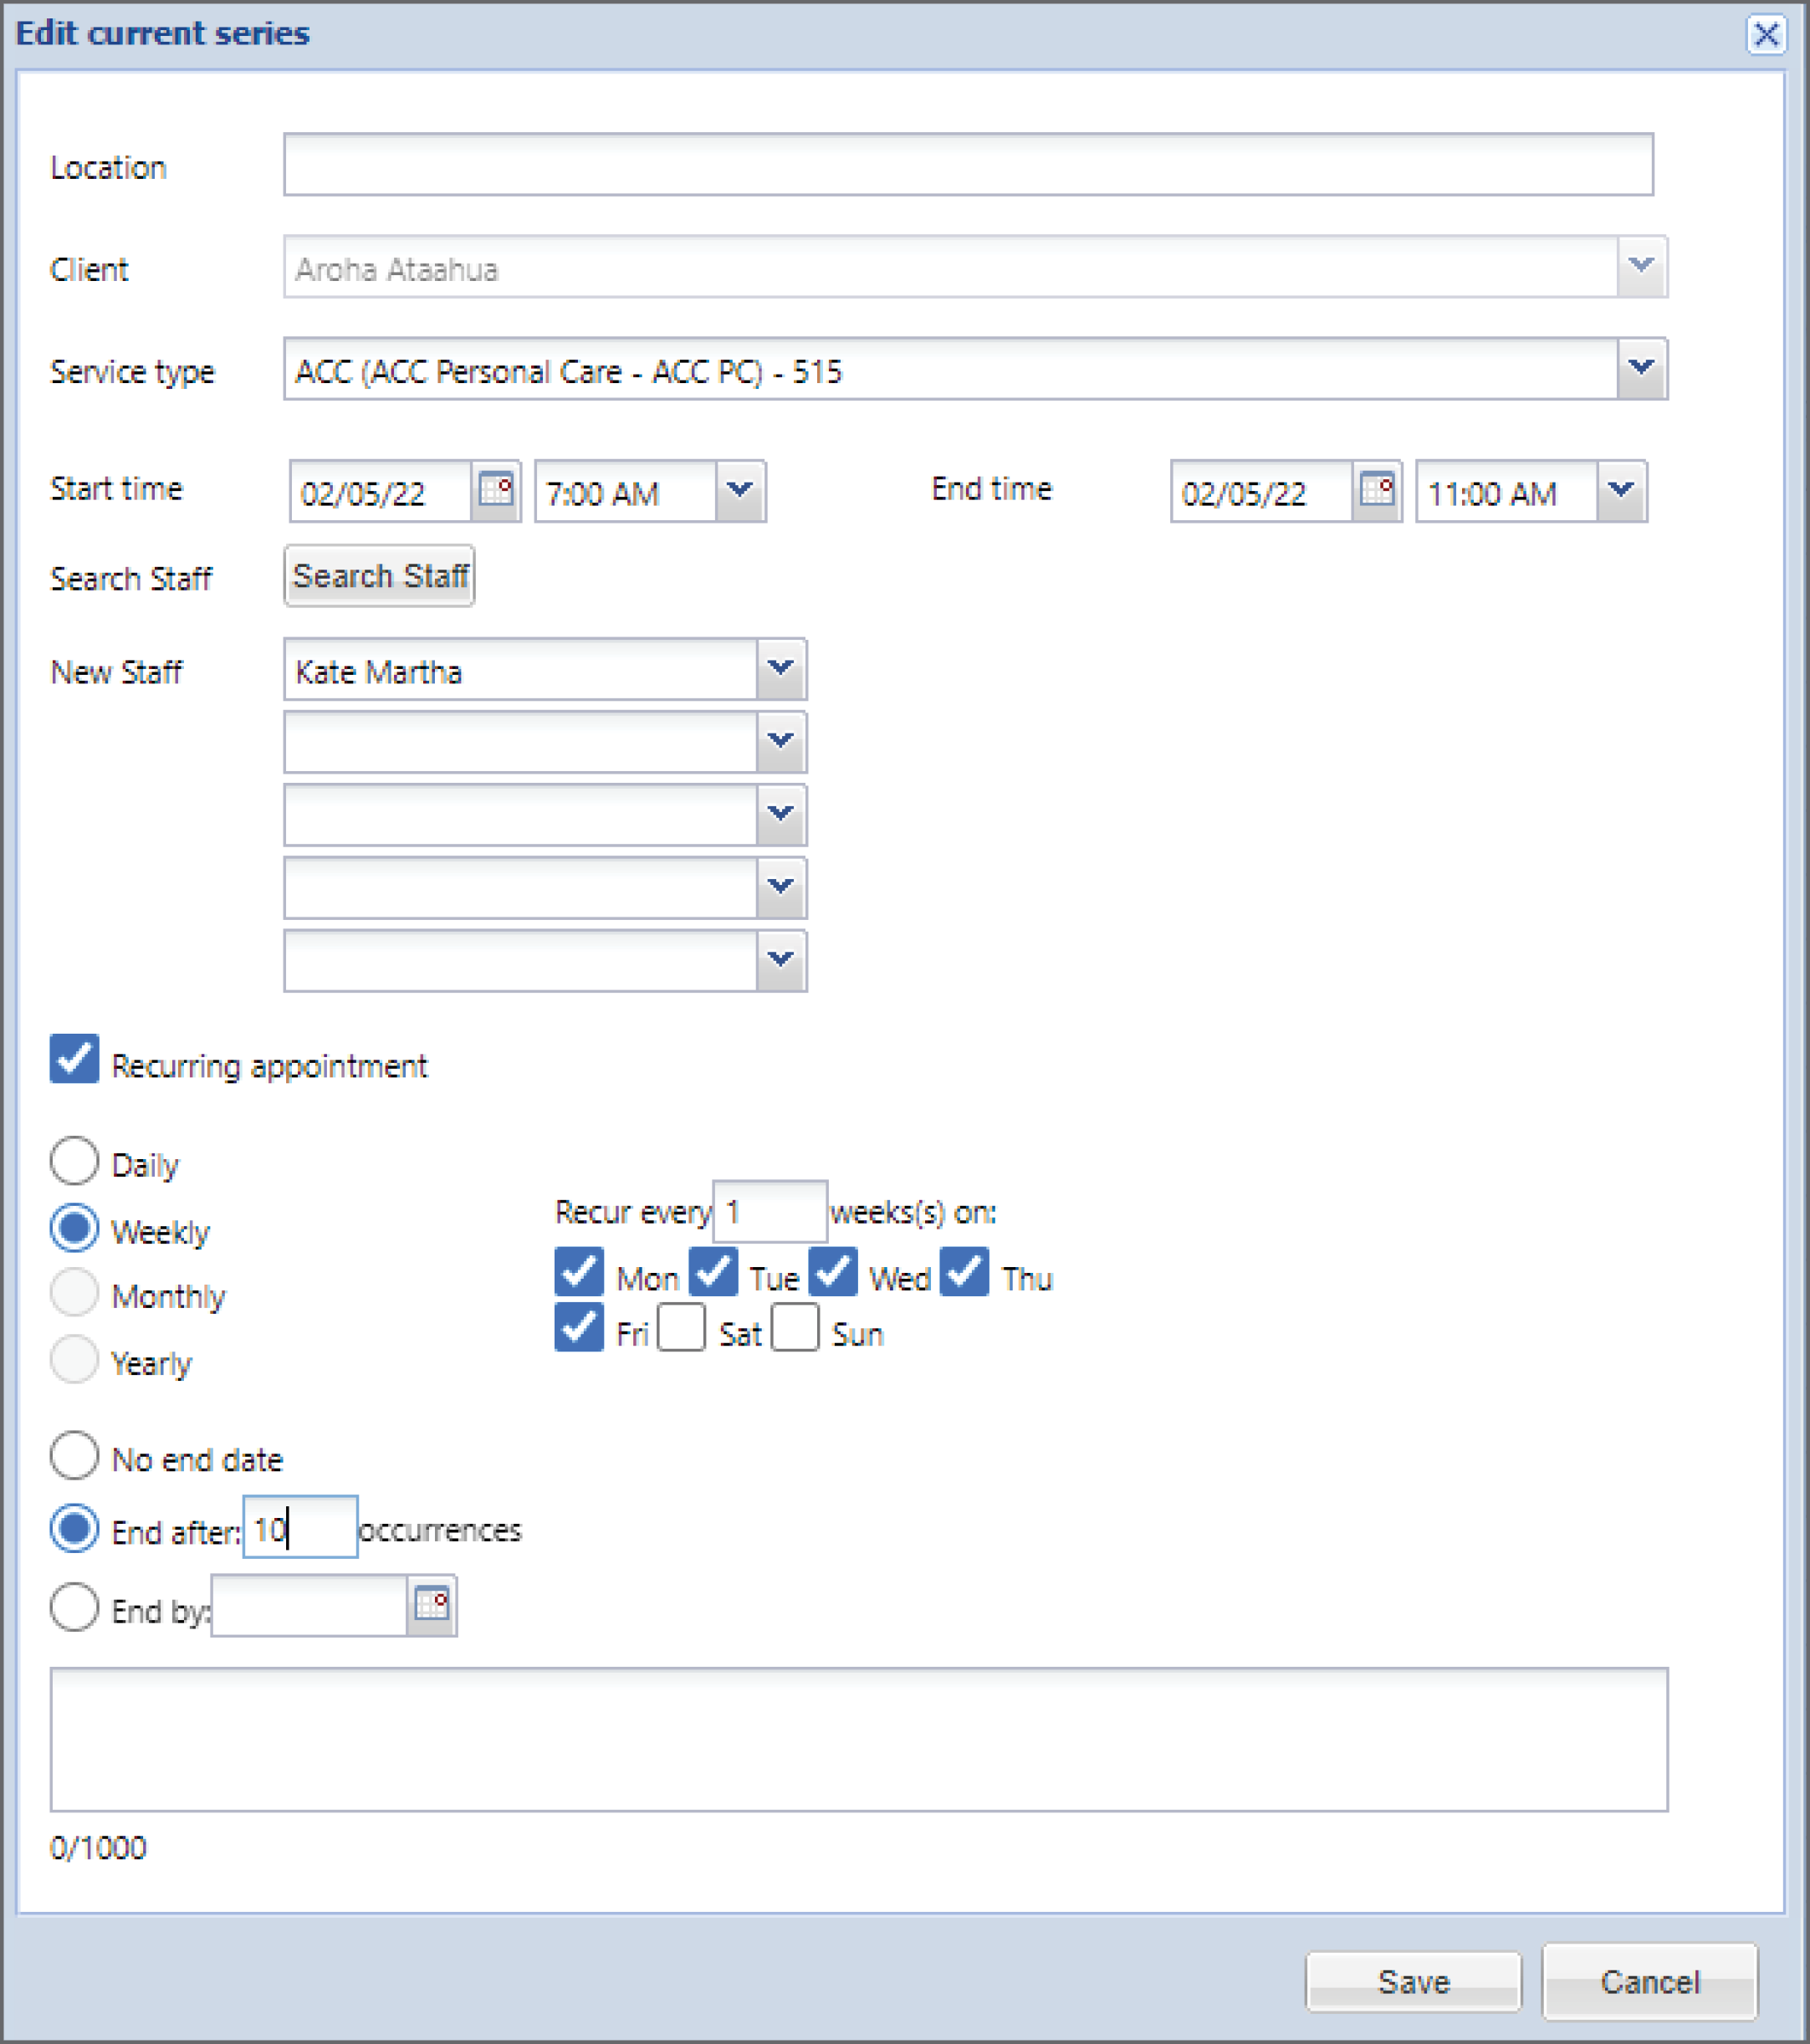
For editing the recurring series in client schedules, we can create a recurring appointment.
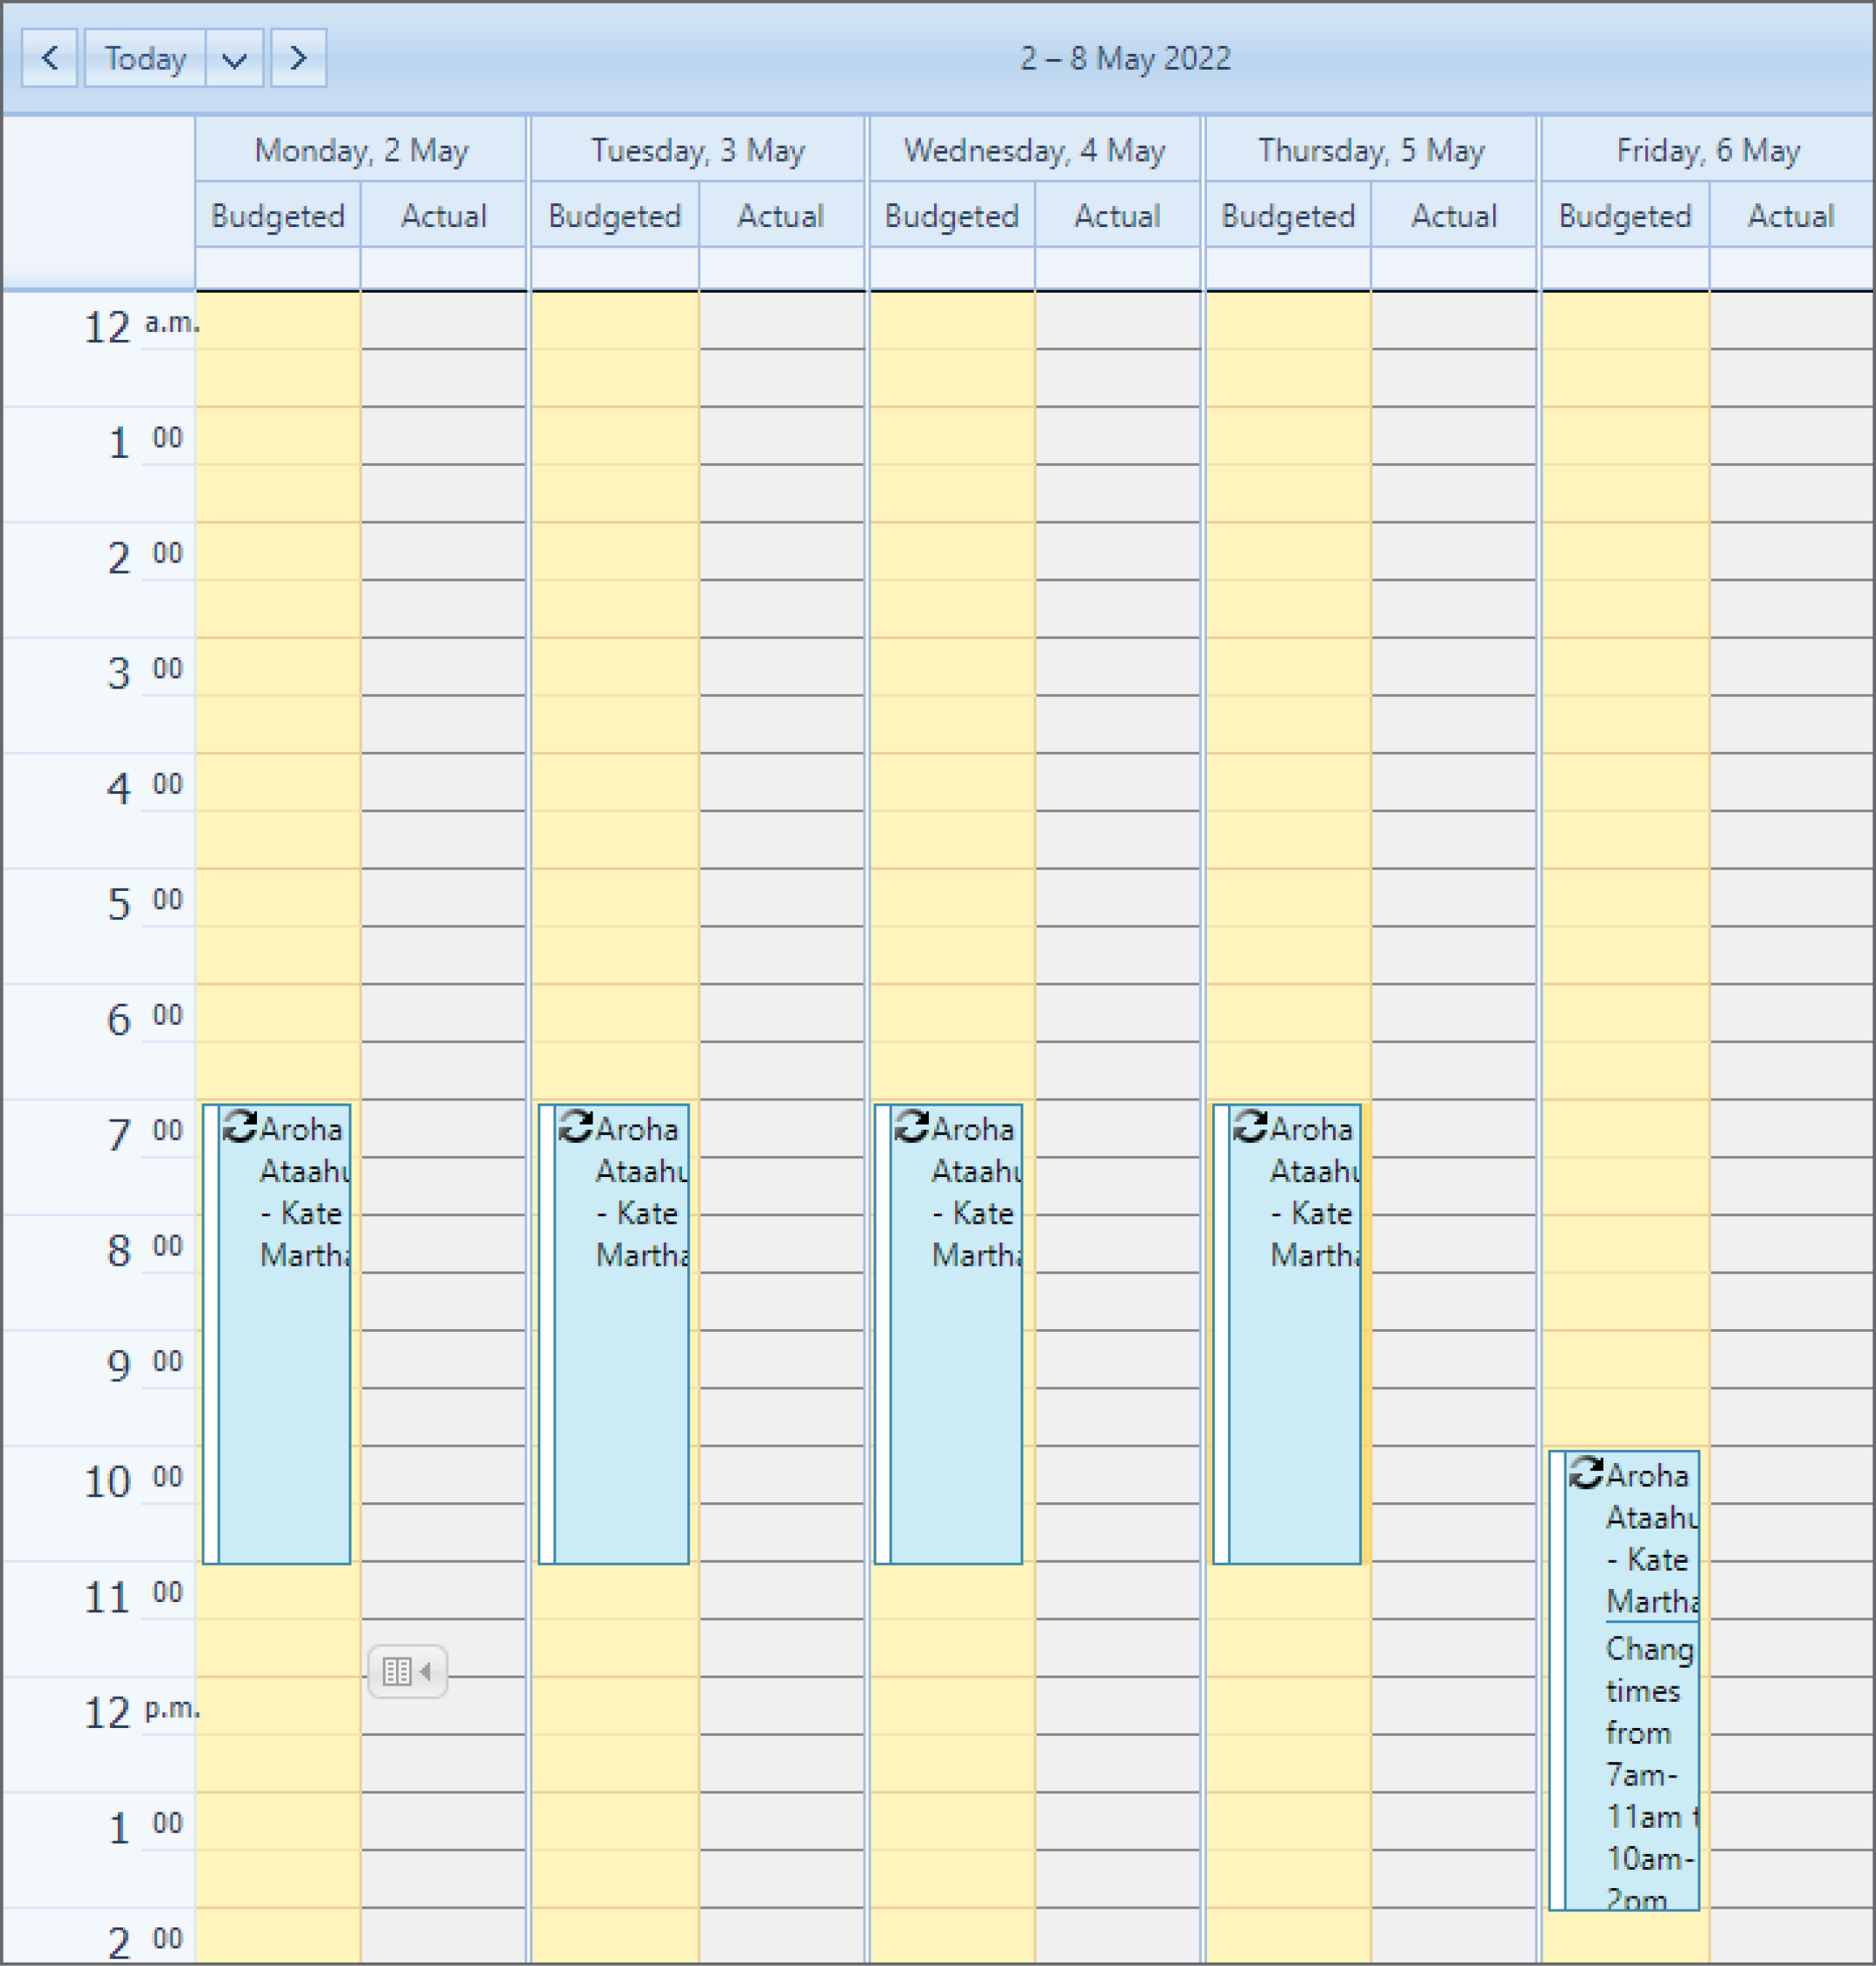
For instance, client Aroha, staff Kate, all weekdays, and the series is ending after 10 appointments:
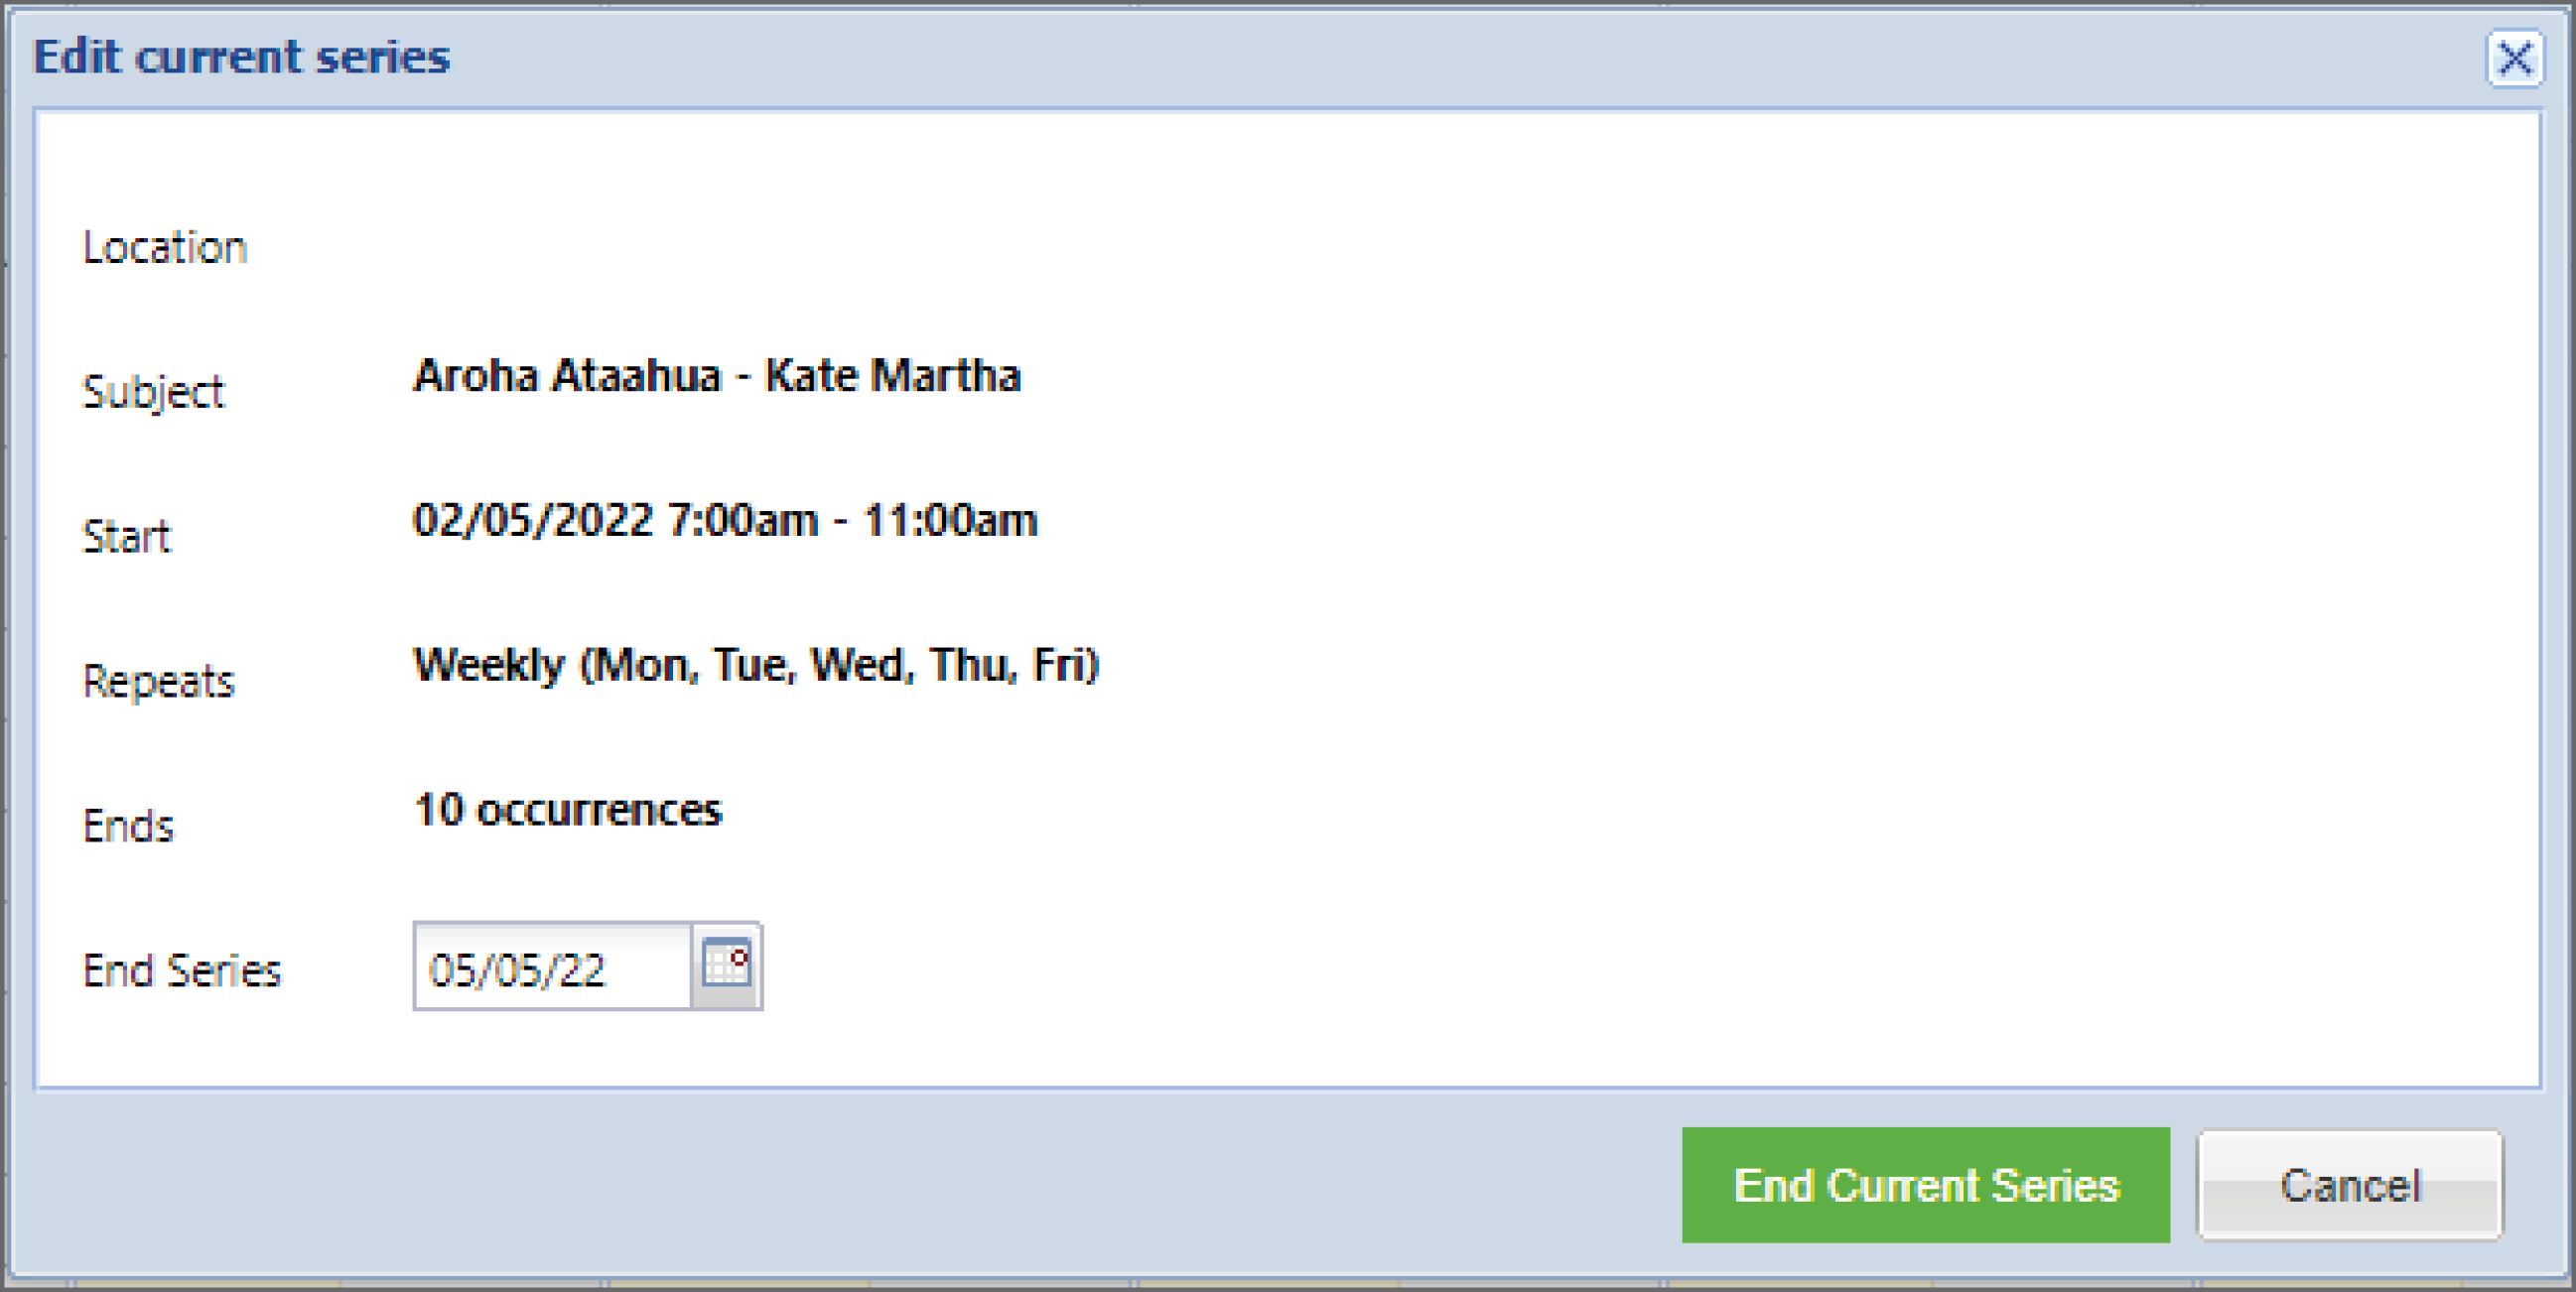
Now, if we wish to edit this series to change the times from 7am-11am to 10am-2pm, and the change needs to happen from 6th May, then we will select appointment on 5th May, and select 'Edit Series'.
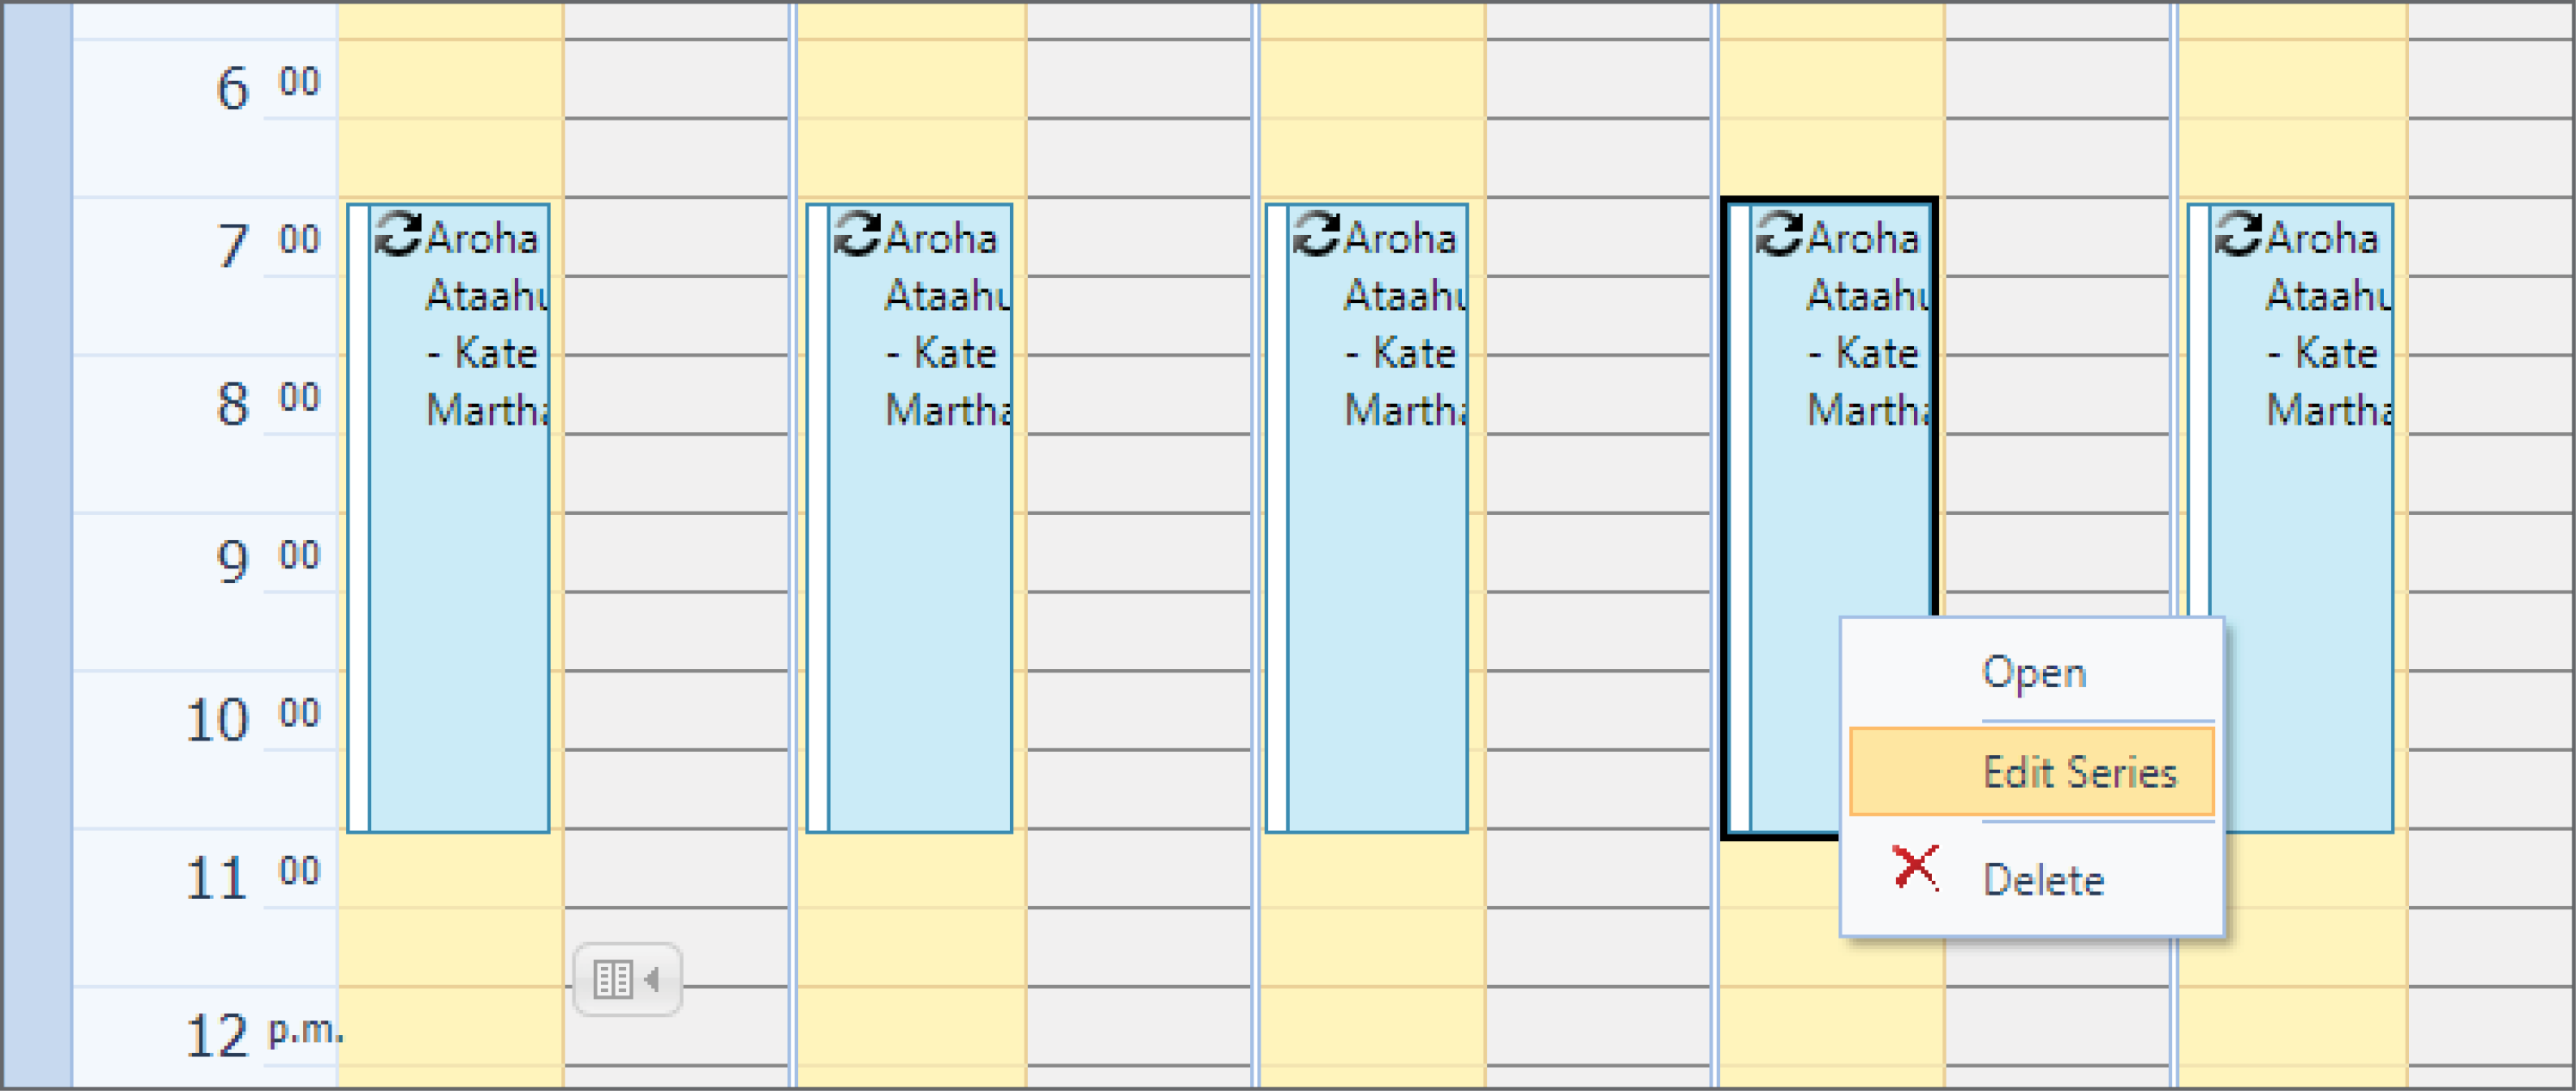
This will show the 'Edit current series' dialog, with the end date 5/05/2022. This means that we are ending the current series on 5th May
Once the series is ended, a dialog box will show with all the details of the previous series, but the Start date will now be 6/05/2022. You can then change the times to 10am-2pm. You can also change any other details (e.g. 'Staff' name, days, or 'End by' to any other date of your choice). In this step, we are potentially creating a new series so any details can be changed.
Please note that if you don't want to create a new series and simply want to end the old series, then please click 'Cancel' button. The cancel button will end the original series on 5th May but will not create a new series from 6th May.
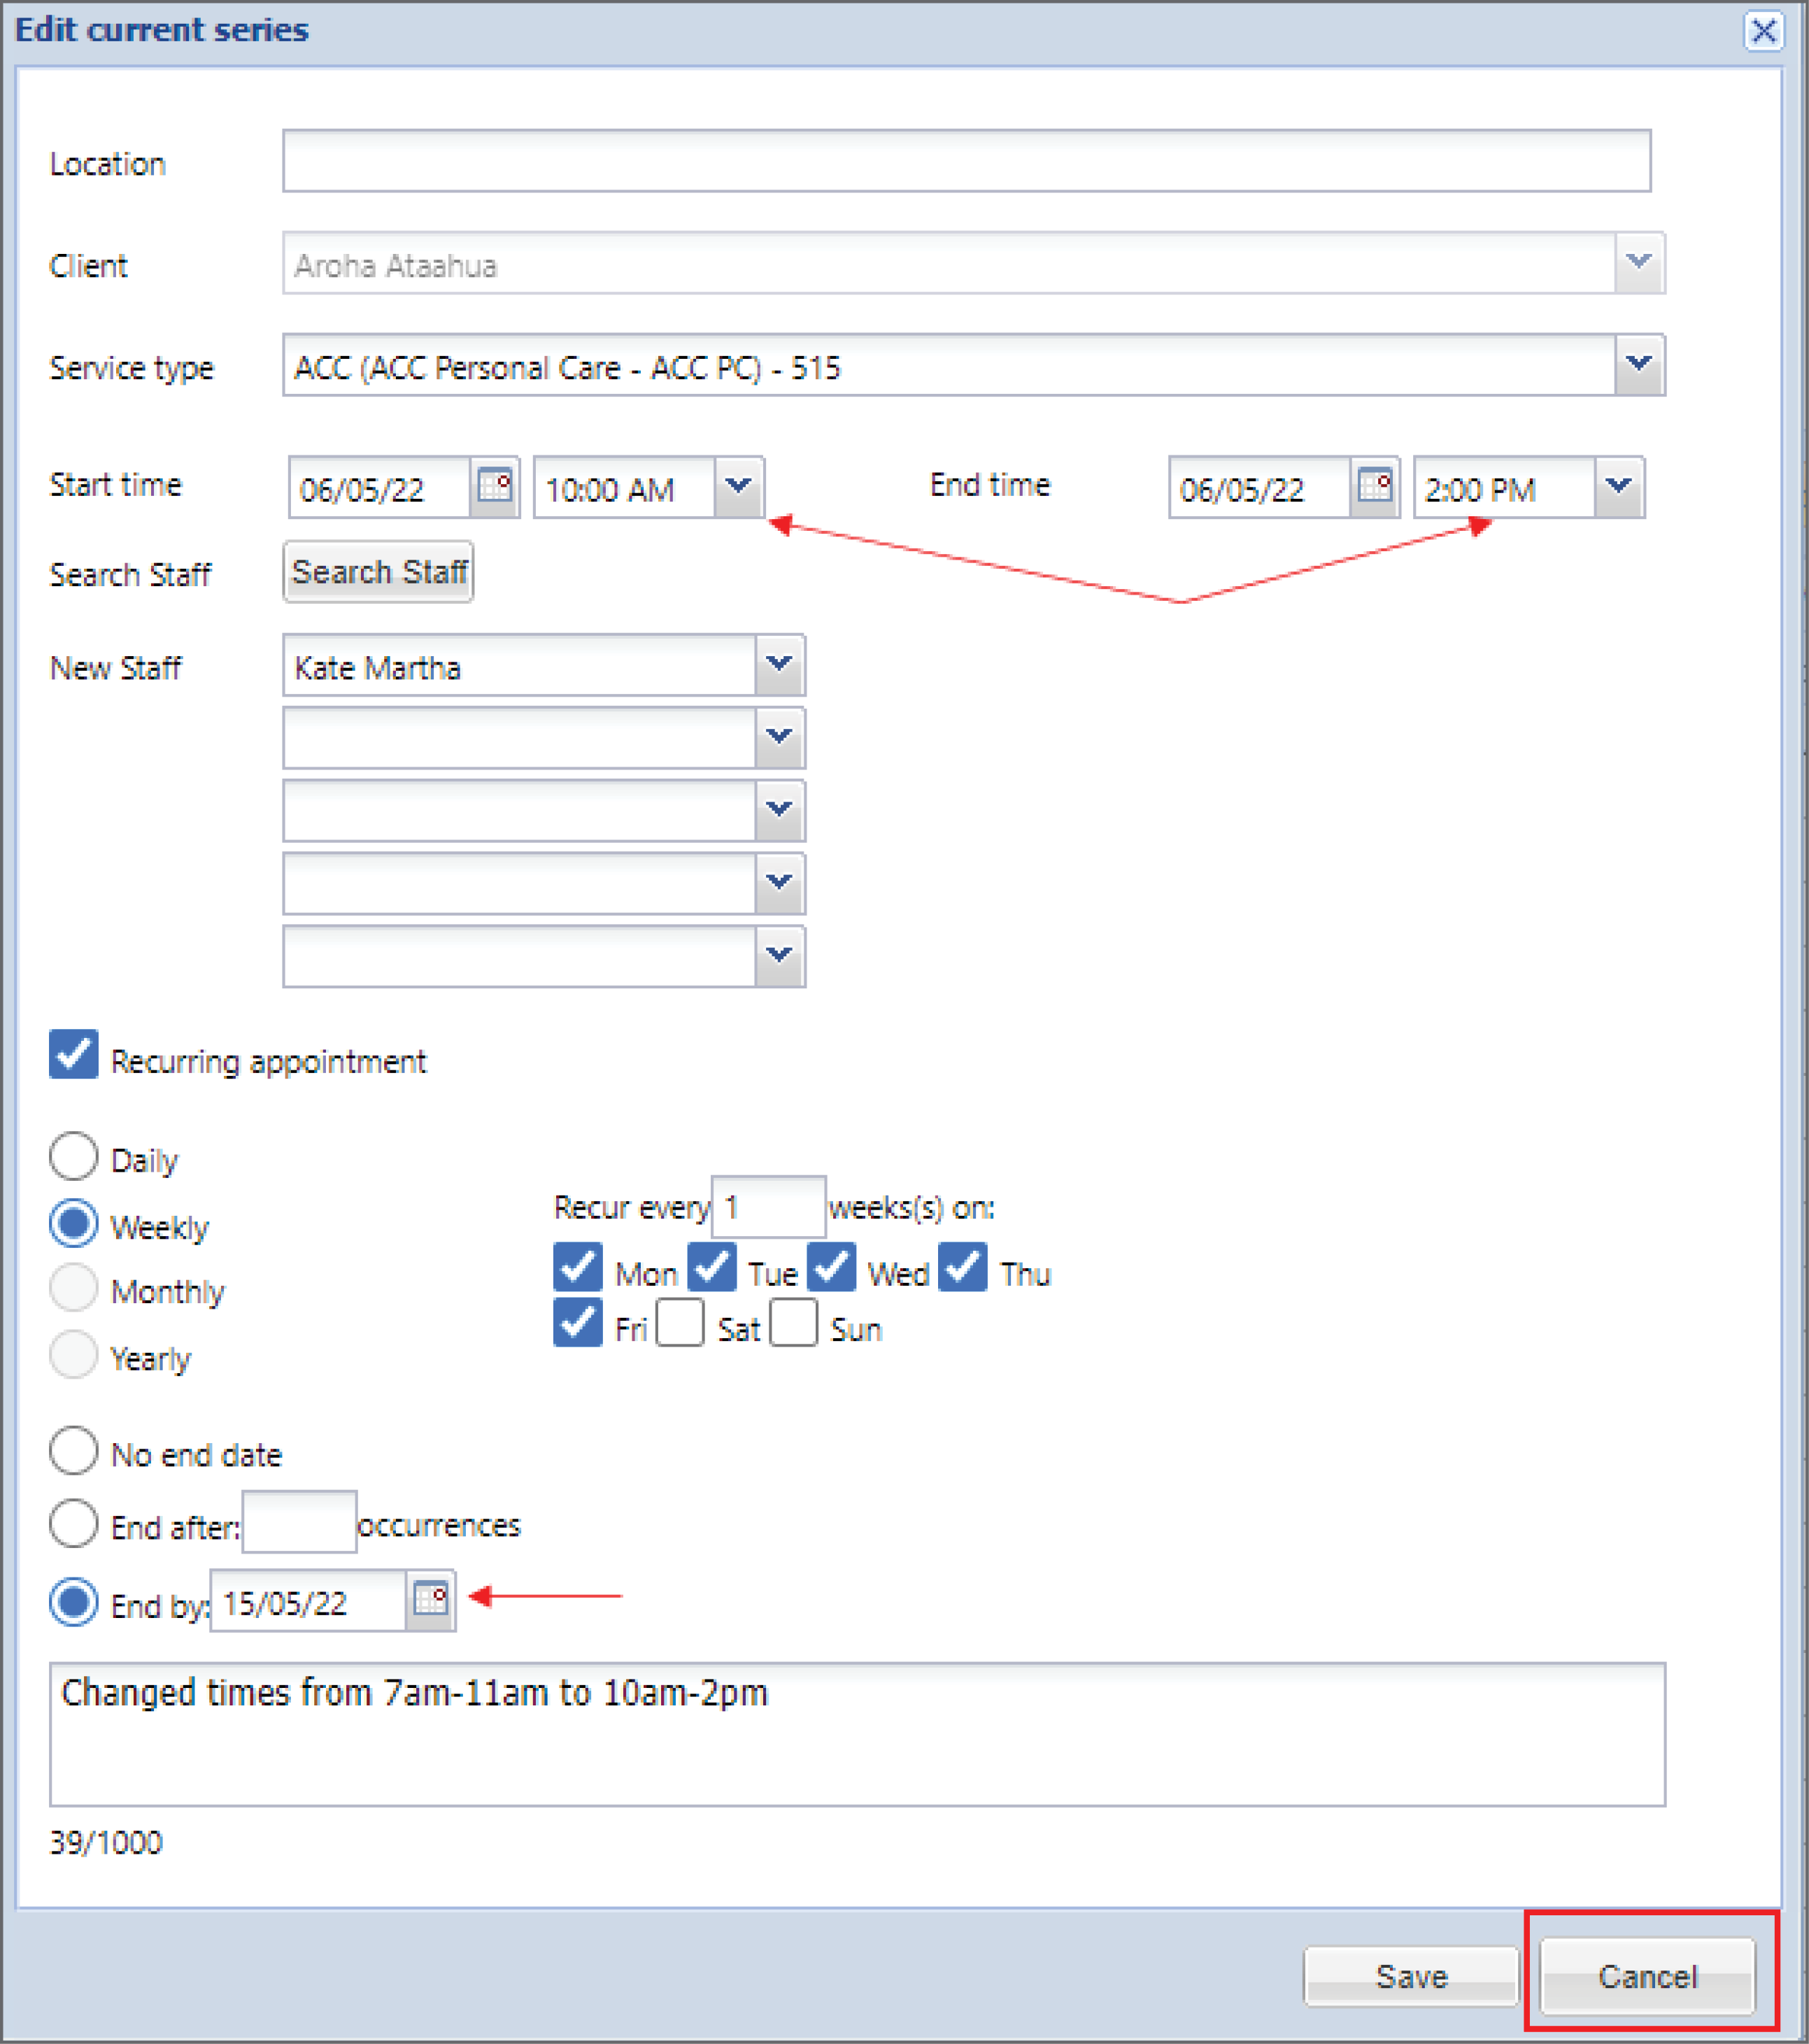
If we press Save button, then a new series is created. We can see that the previous series (7am-10am) was finished on 5th May and a new series is created from 6th May (10am-2pm).