Creating a view is where you decide what information you would like to see in a specific screen.
To Create a View | To Delete a View
To Create a View
Firstly, make sure you are in the screen you wish to update/create a view for. Below we will use the Incident Report screen as an example. It is the same process for creating a View, no matter what screen you are on.
Once you are on the chosen screen, click the arrow next to View.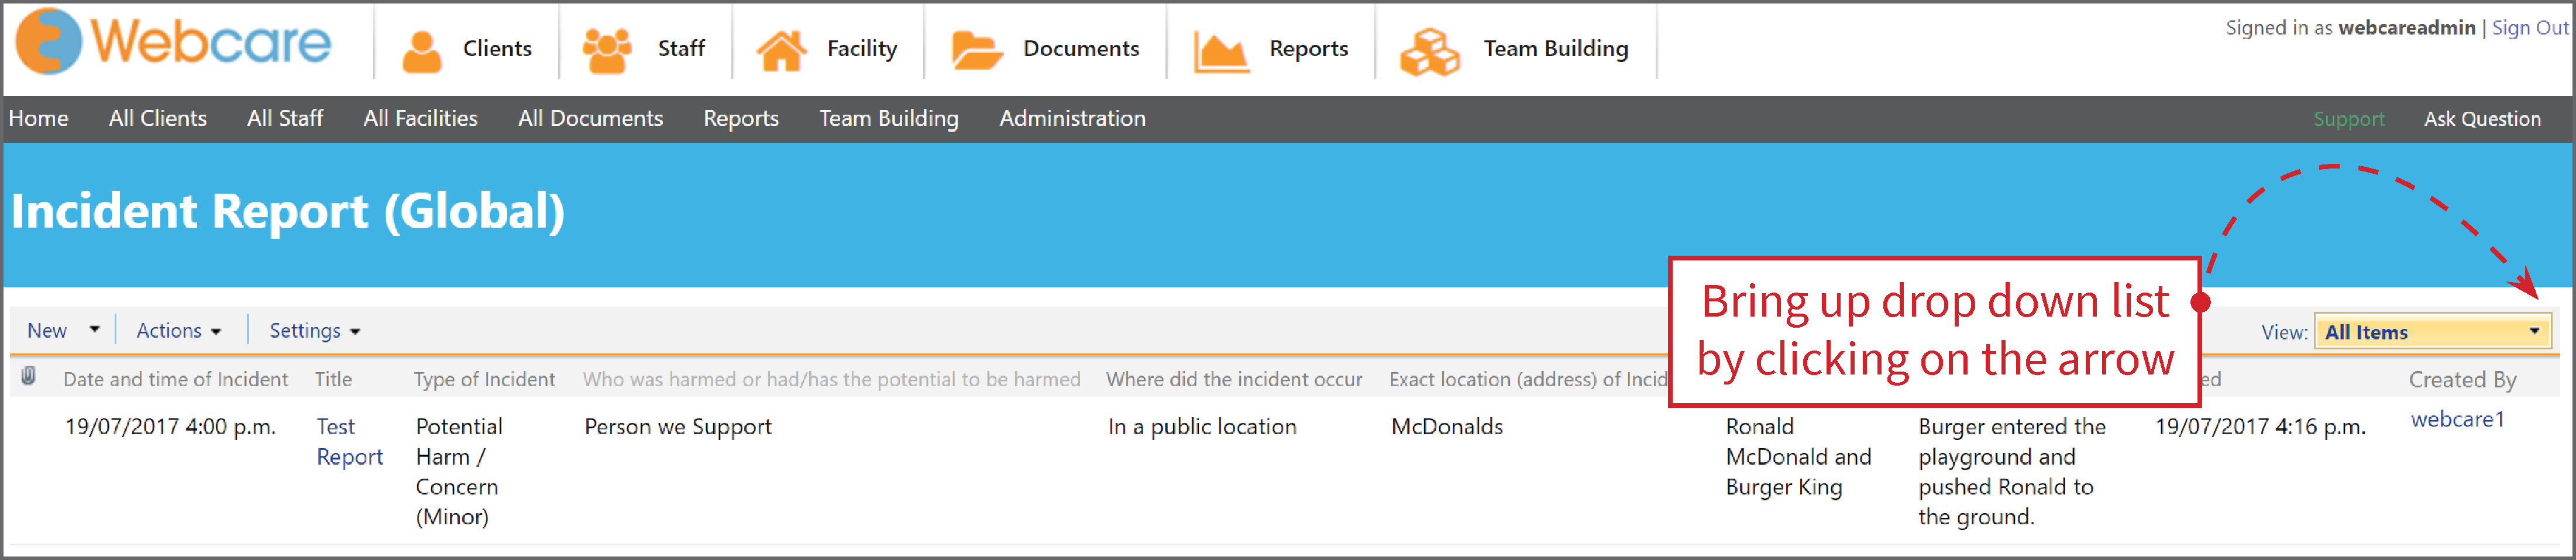
From the Drop down list, select Create View (1)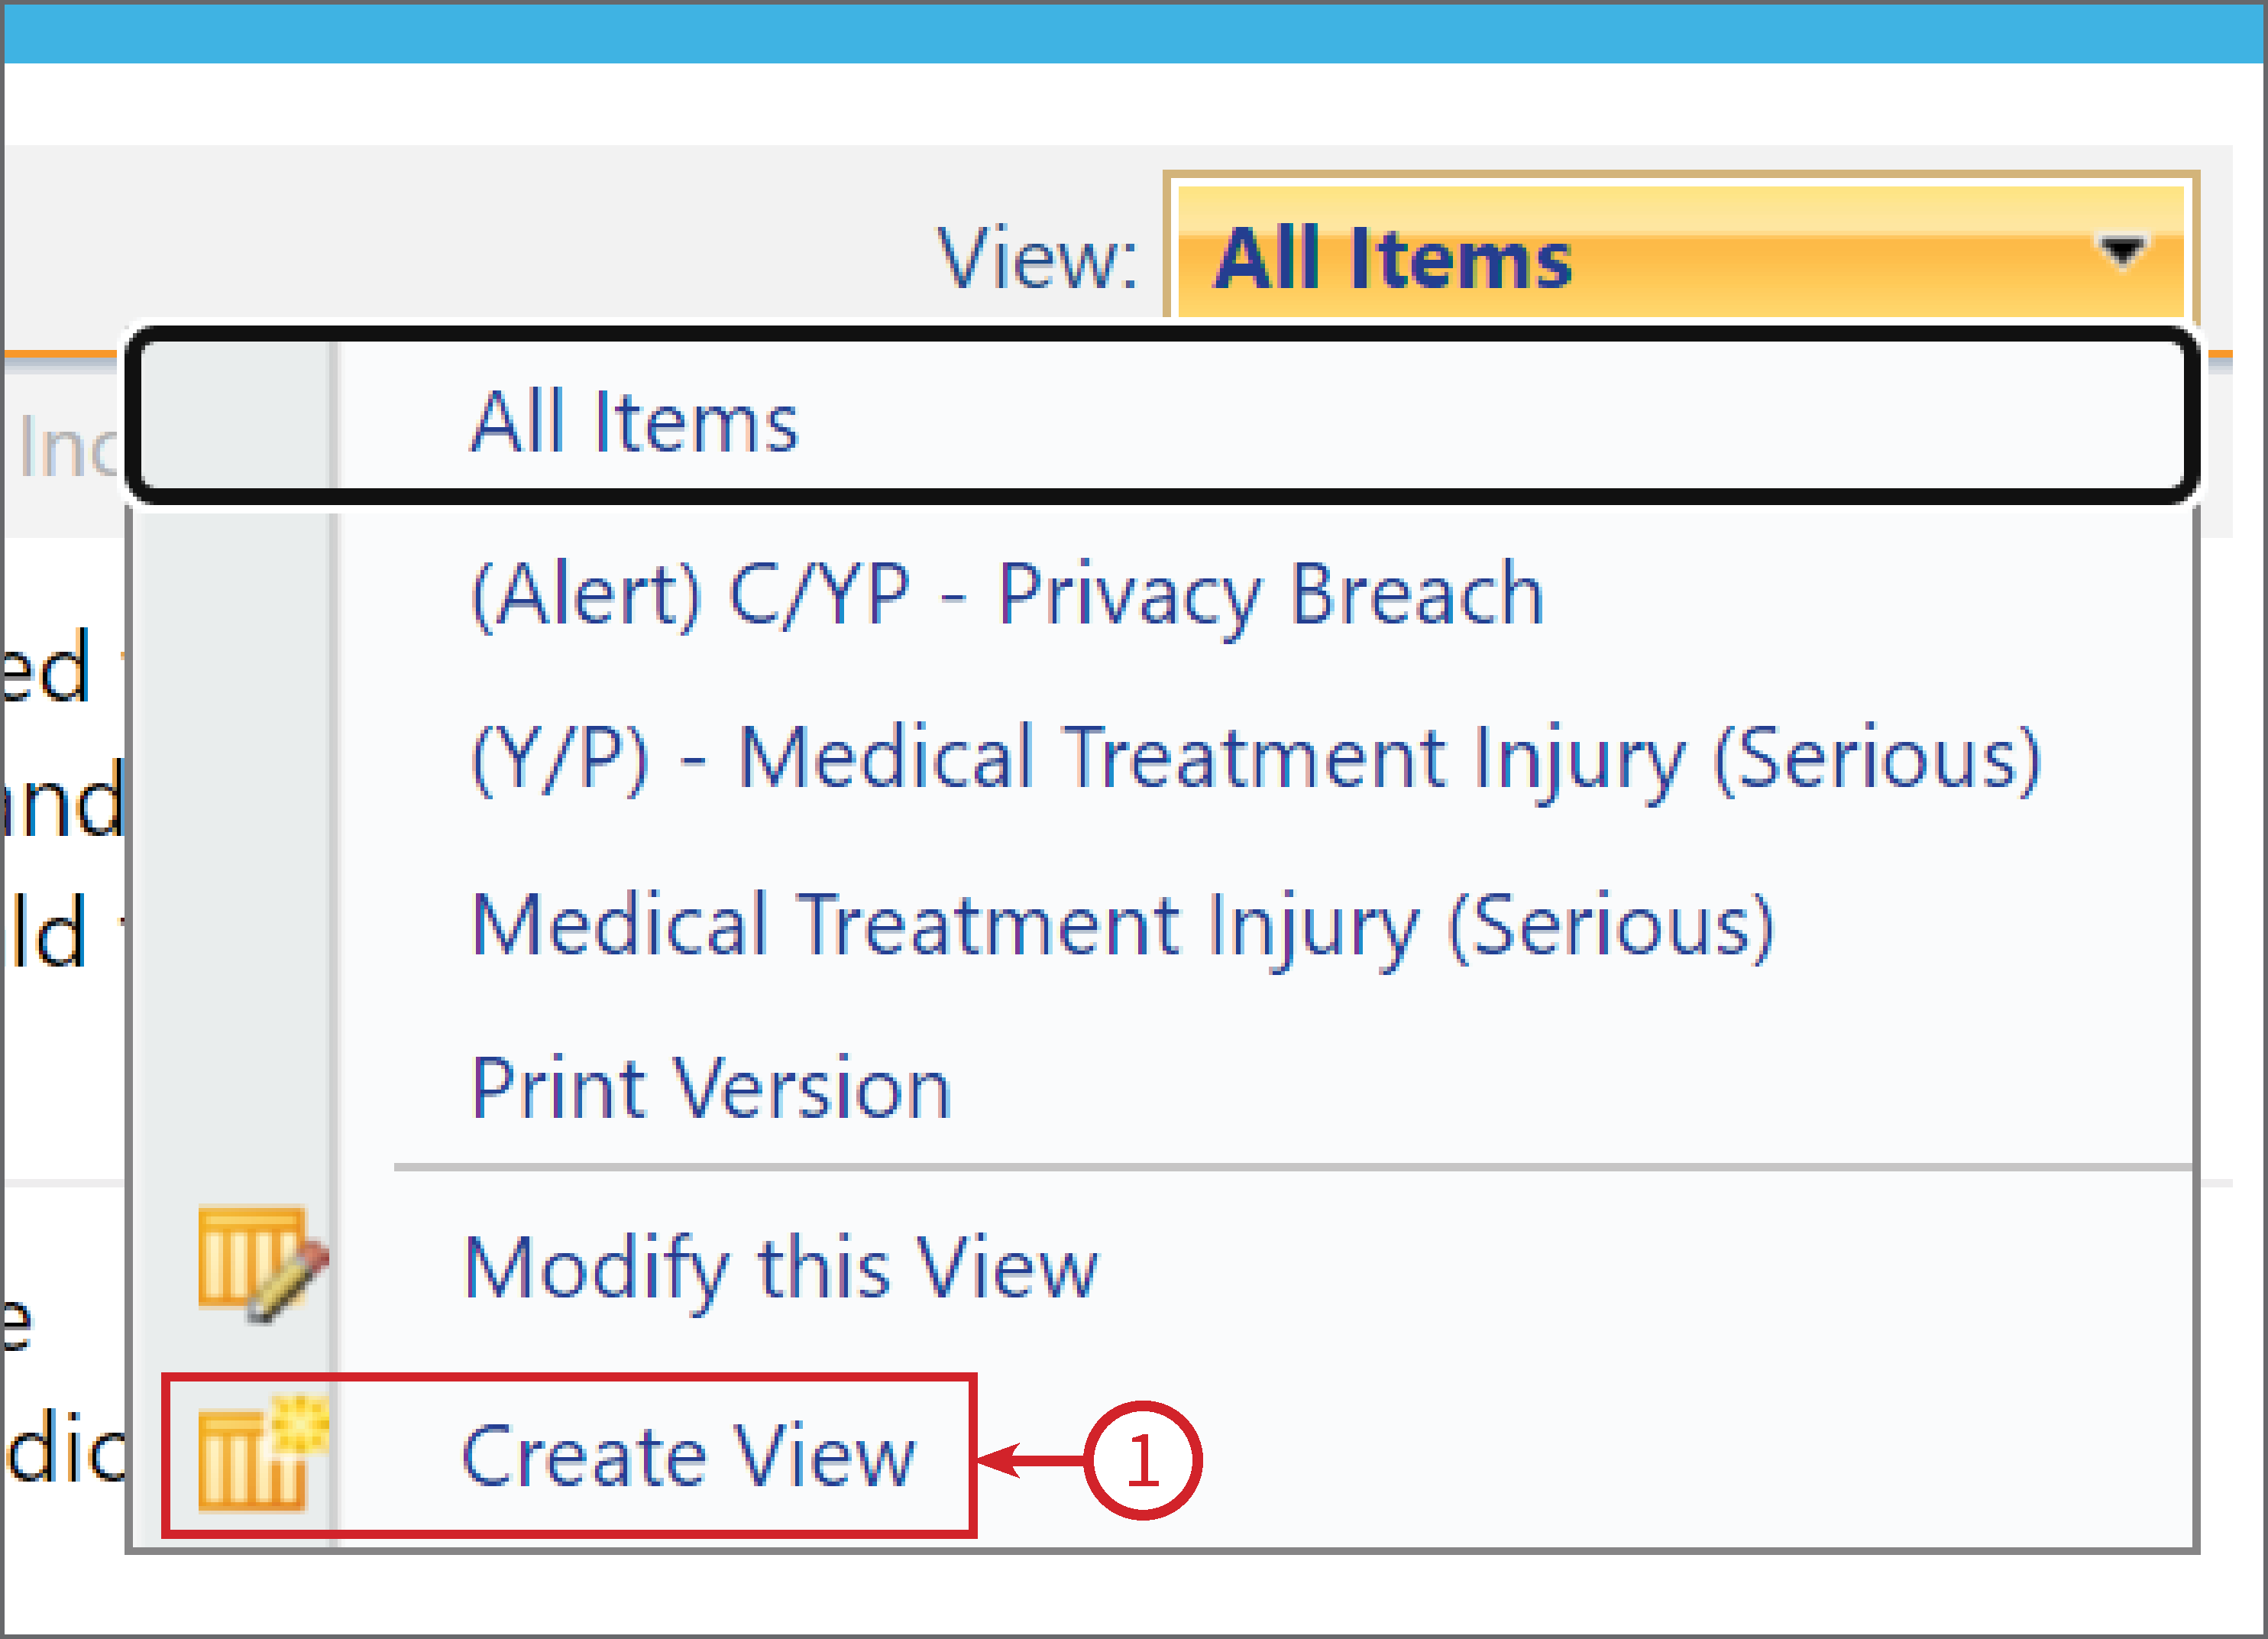
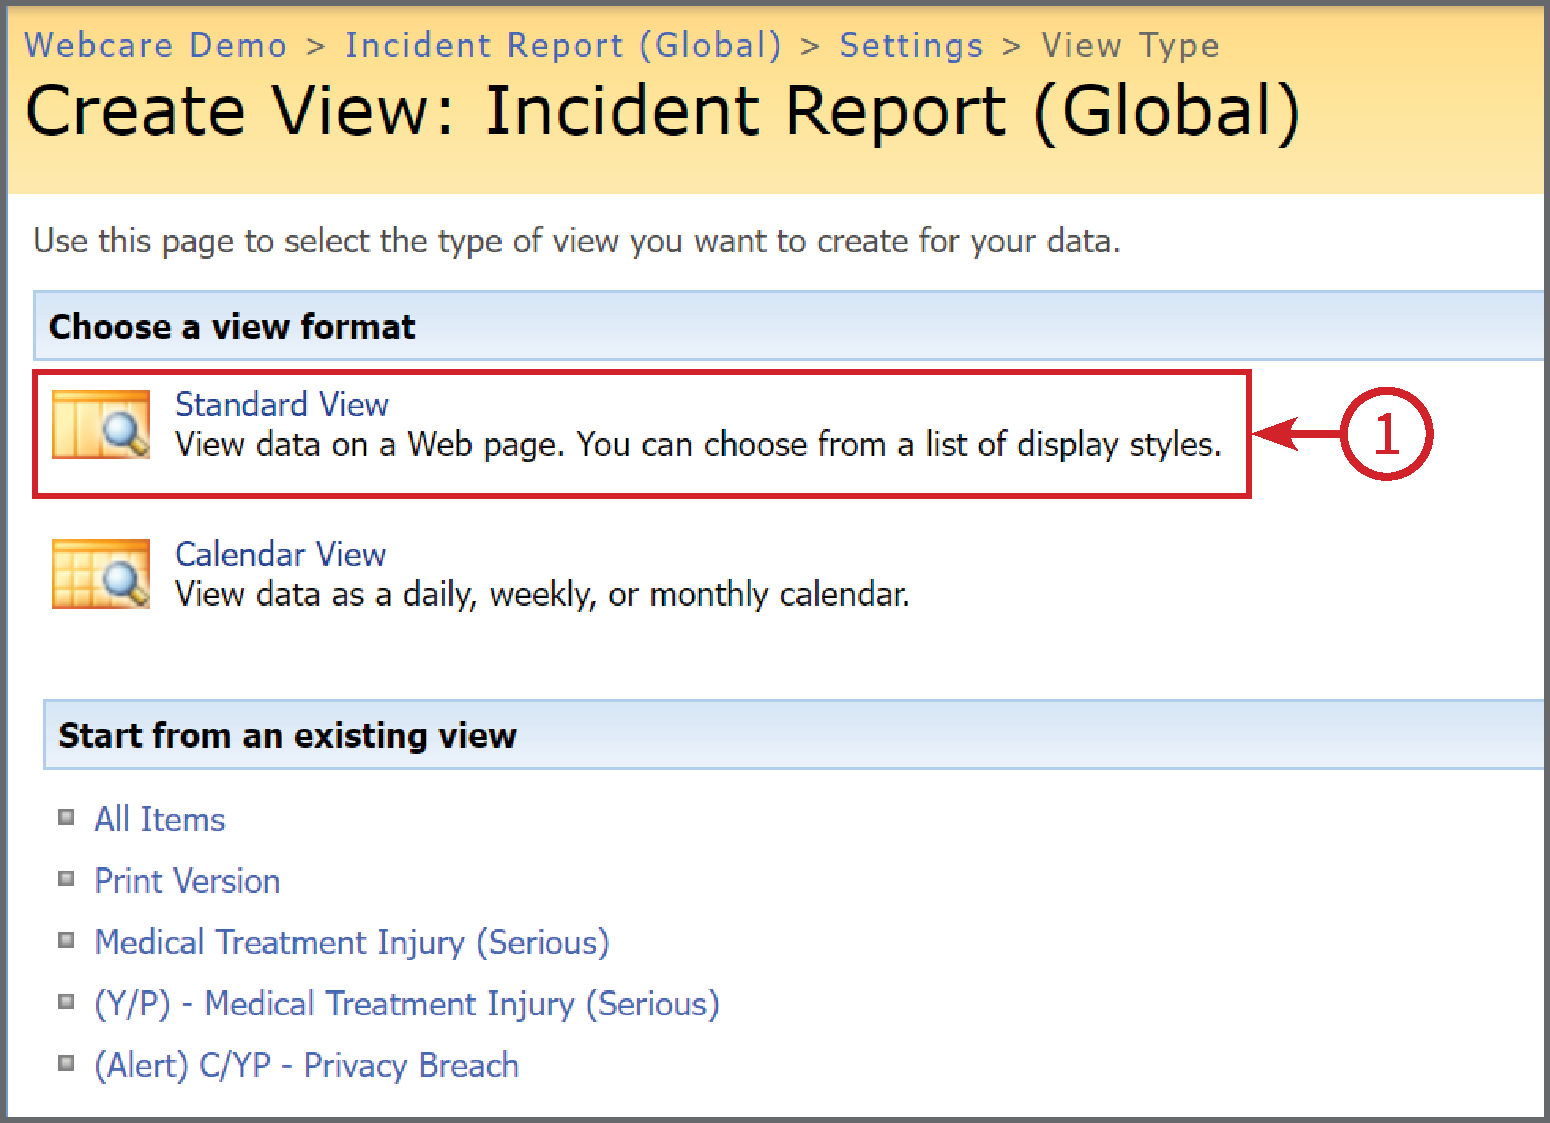
2) In the Create View screen, select Standard View (1) or the type of format of view you require.
We are using Standard view in this example.
3) From standard view follow the instructions to name, create and save your type of view.
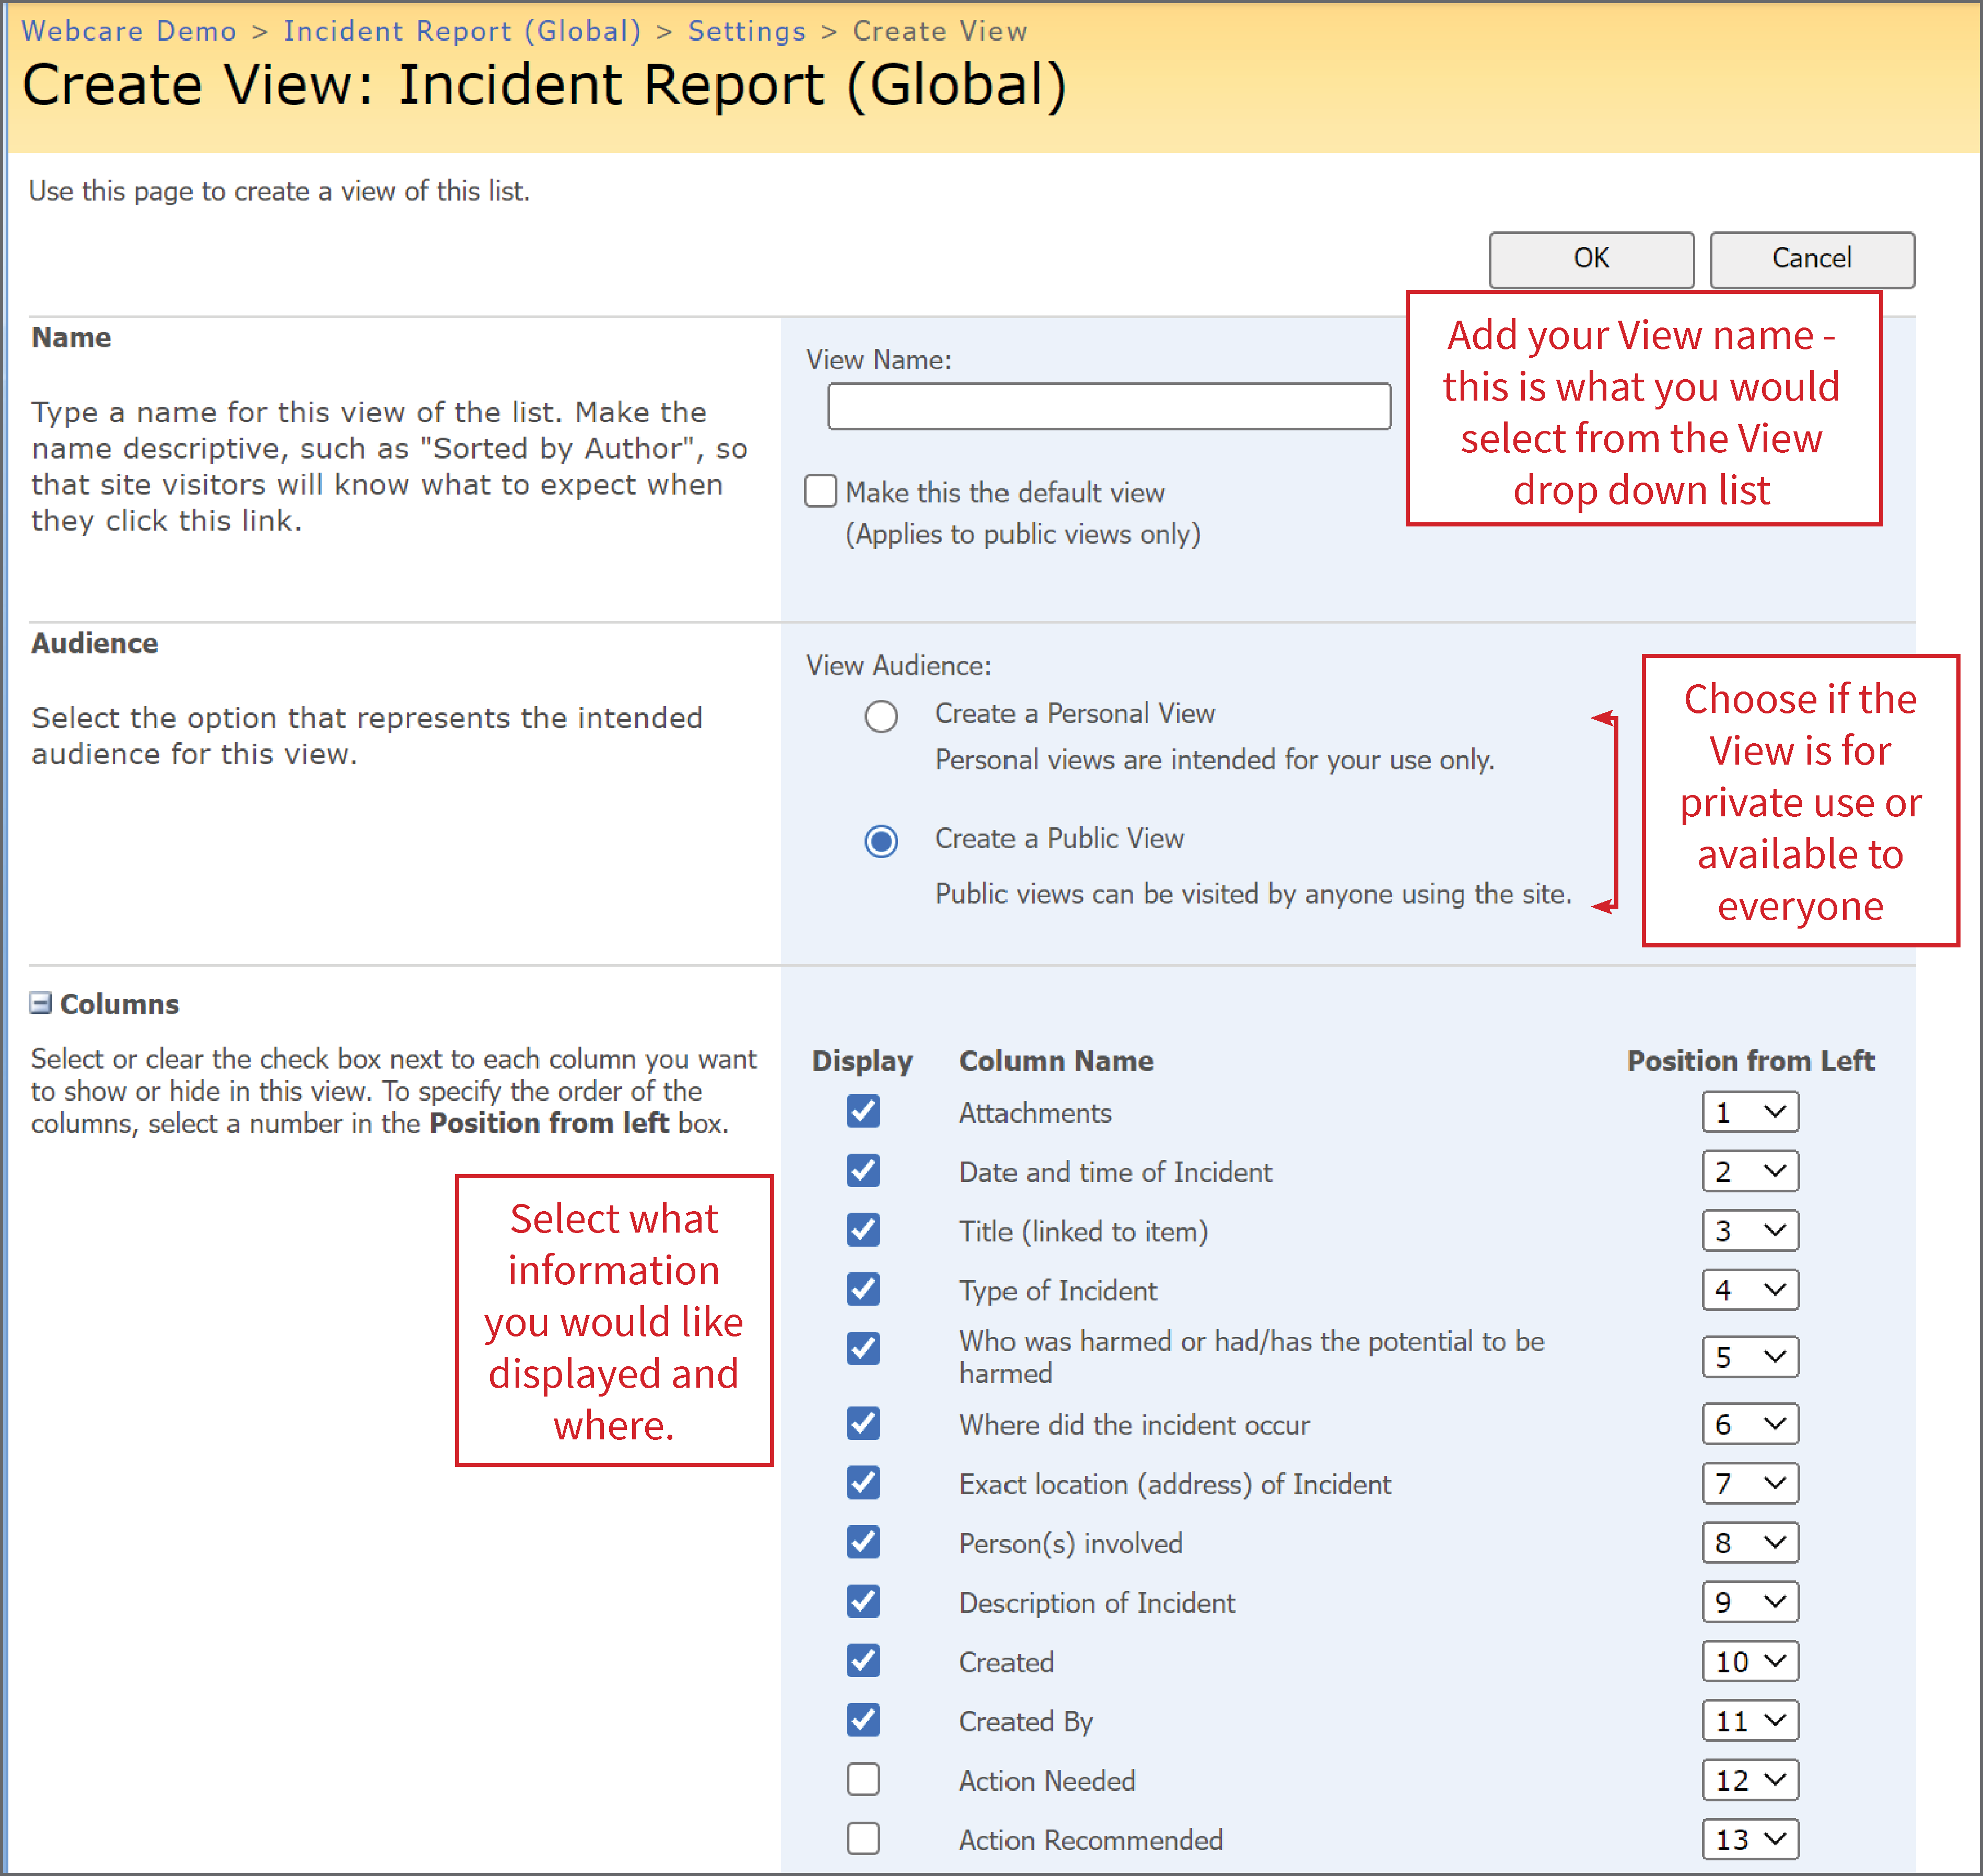
You can sort your columns however you choose, in the example below we have left it at the default, which is None.
Now it is time to define your filters. Filters allow us to define a group of criteria so only the data that matches those criteria is displayed. This is particularly useful for data evaluation, statistical analysis or when you are also wanting to create an alert for this particular View.
In the example below, we are Filtering (1) the View to: Type of Incident is equal to Medical Treatment Injury (Serious).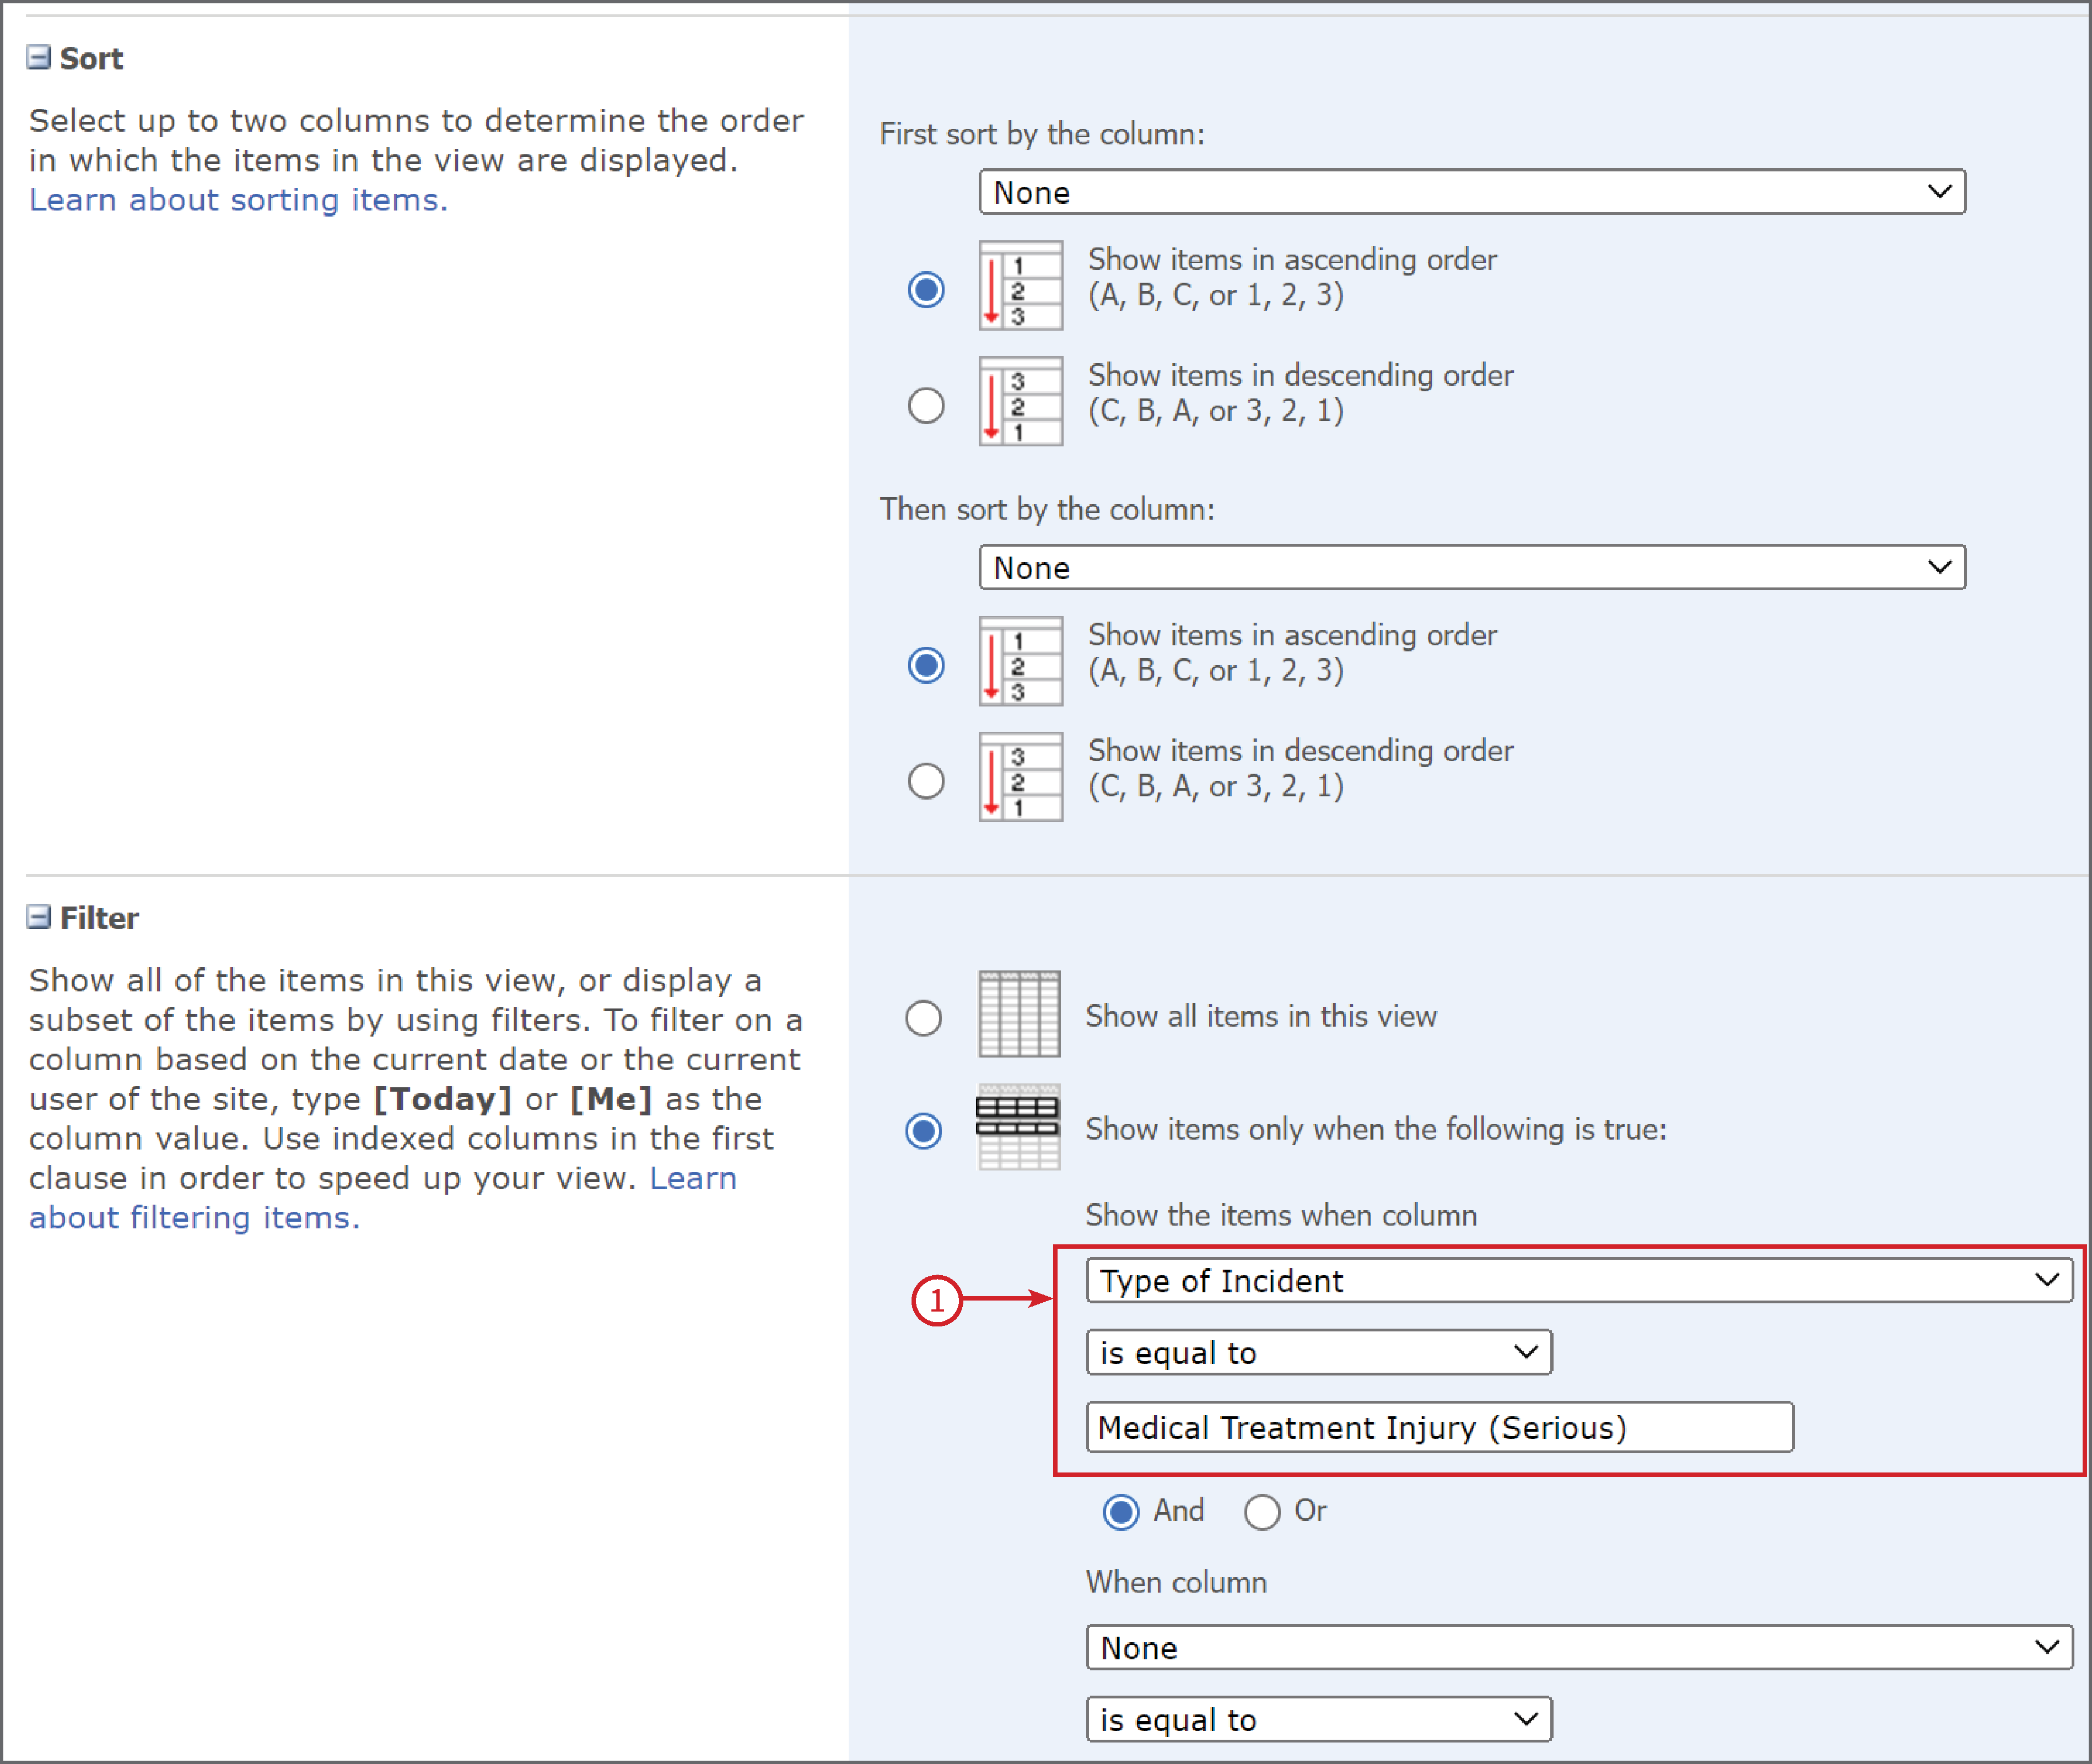
Once you have added all your filters etc. Click on OK at the top or bottom of the page to create the View.
To Delete a View
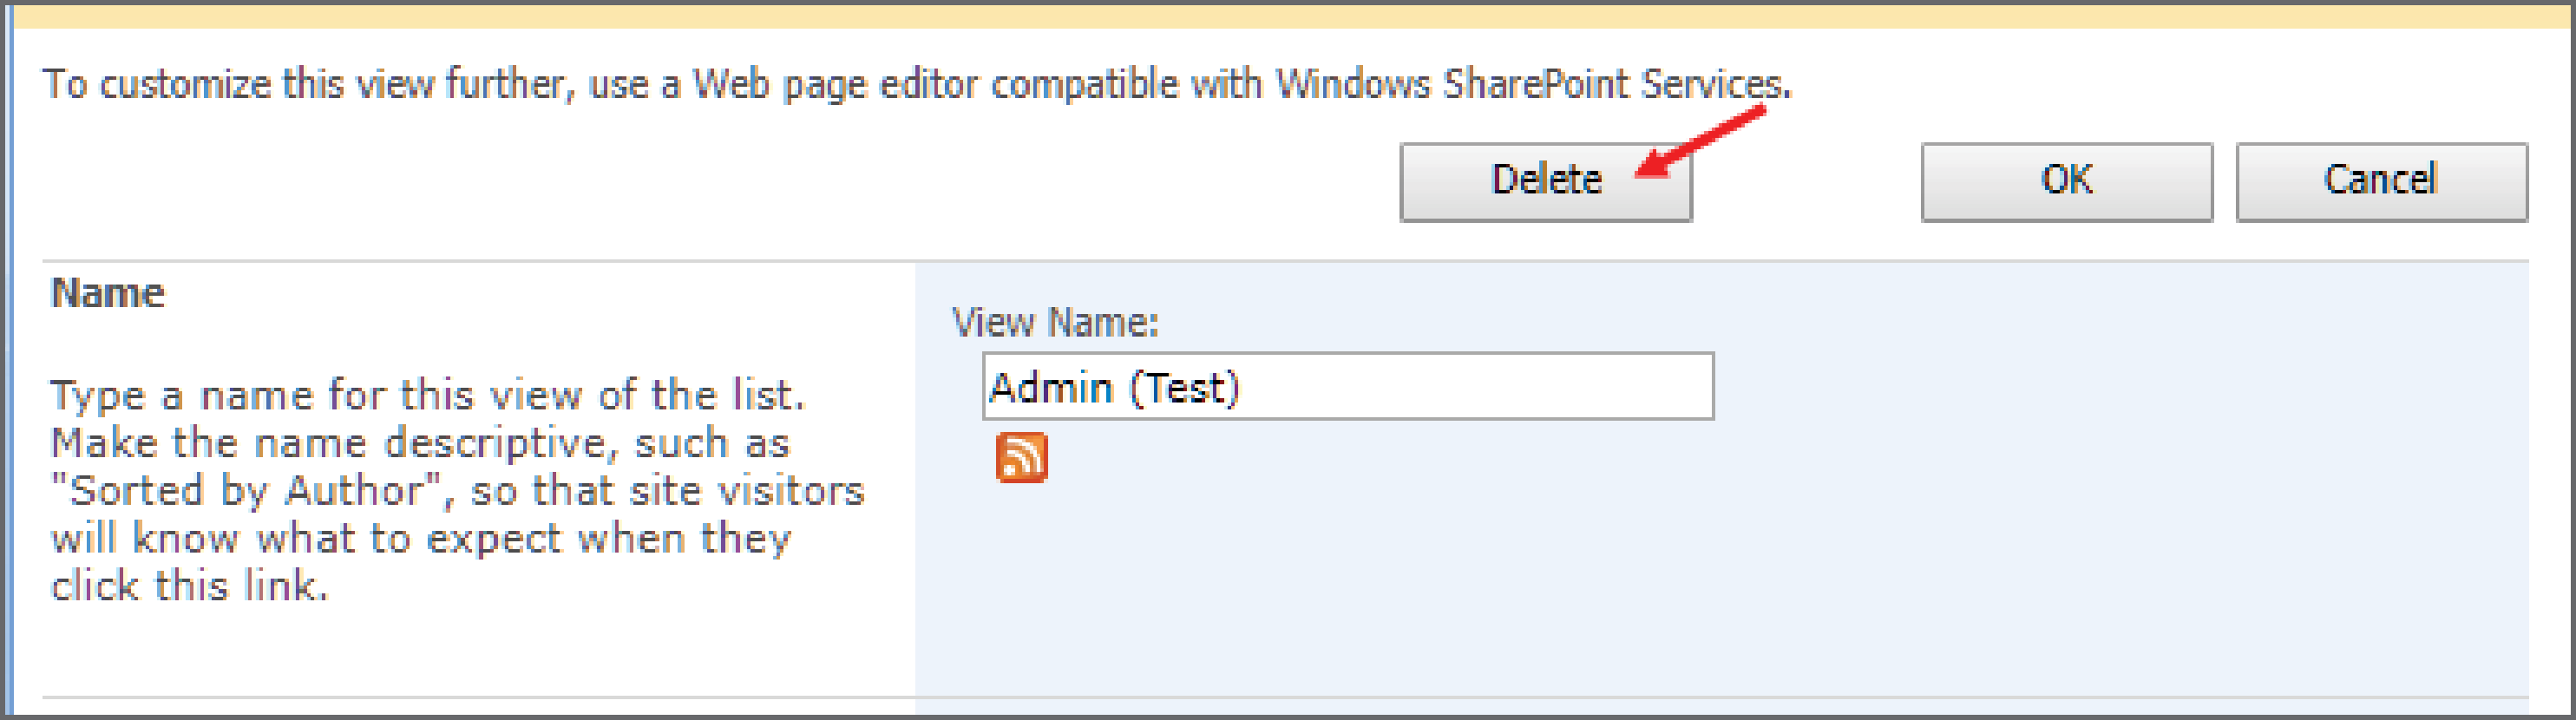
To delete a view, select the View from the dropdown list. If we wish to delete a view "Admin (Test)", we will select this view.
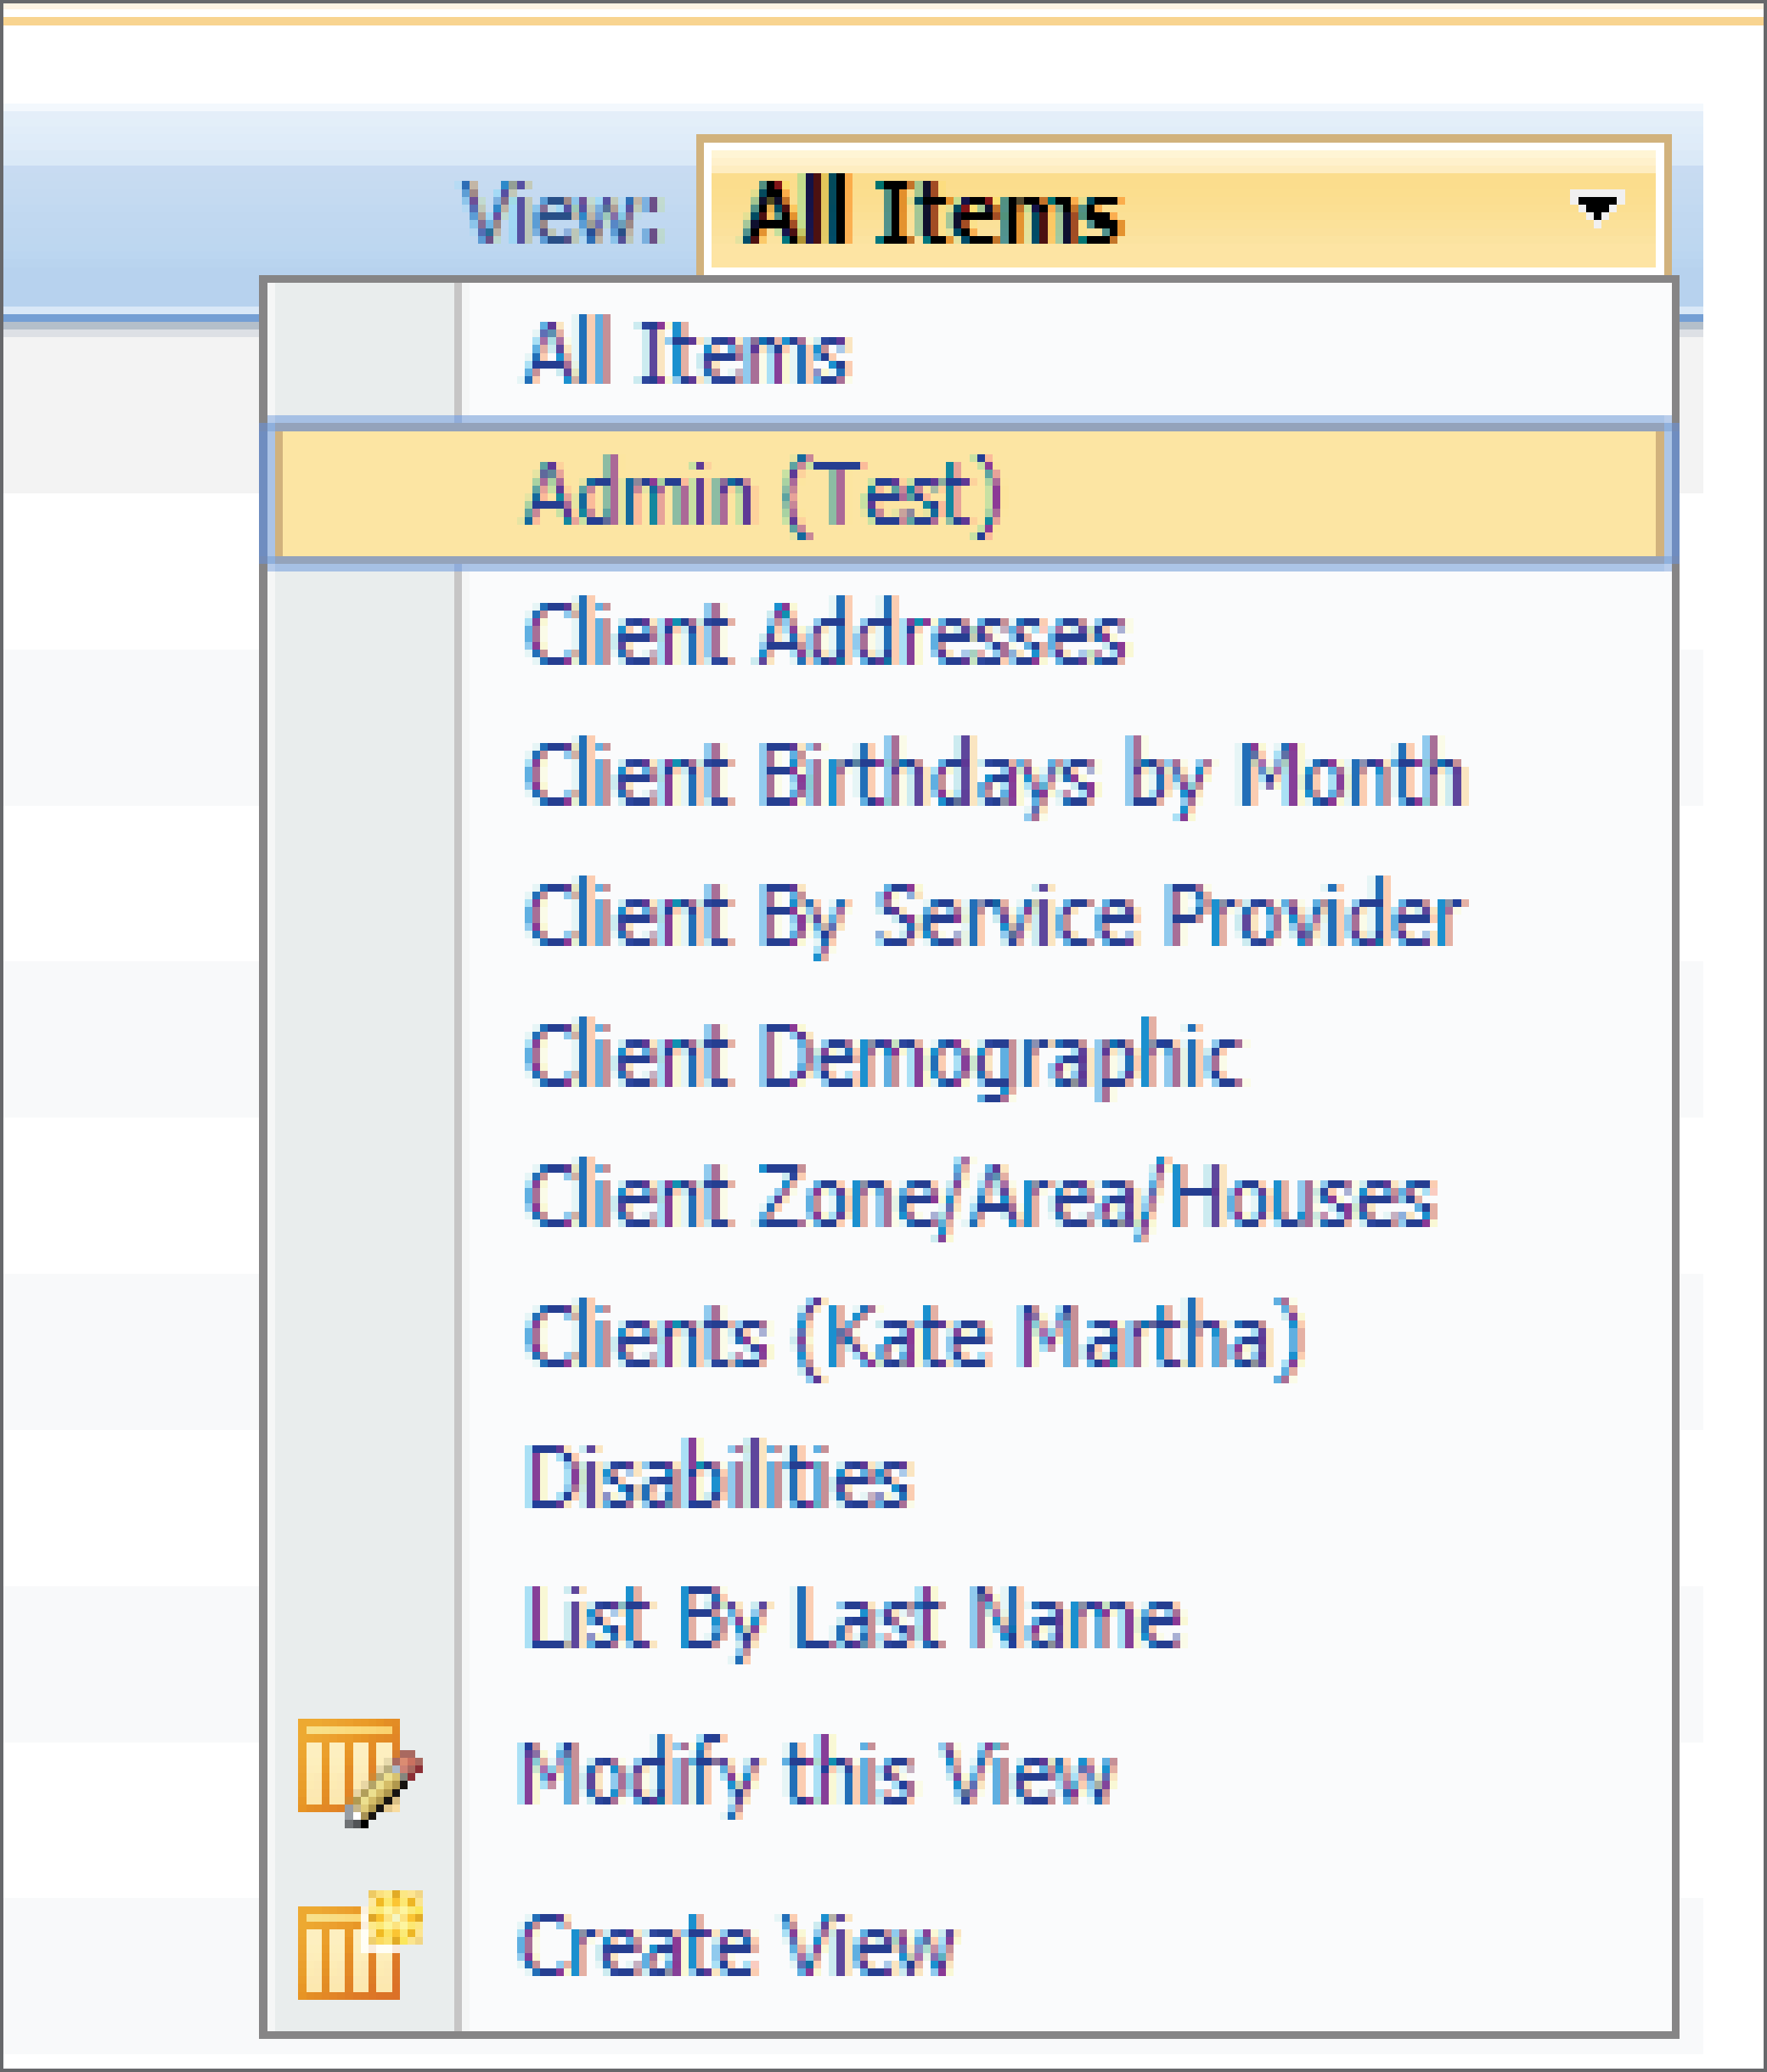
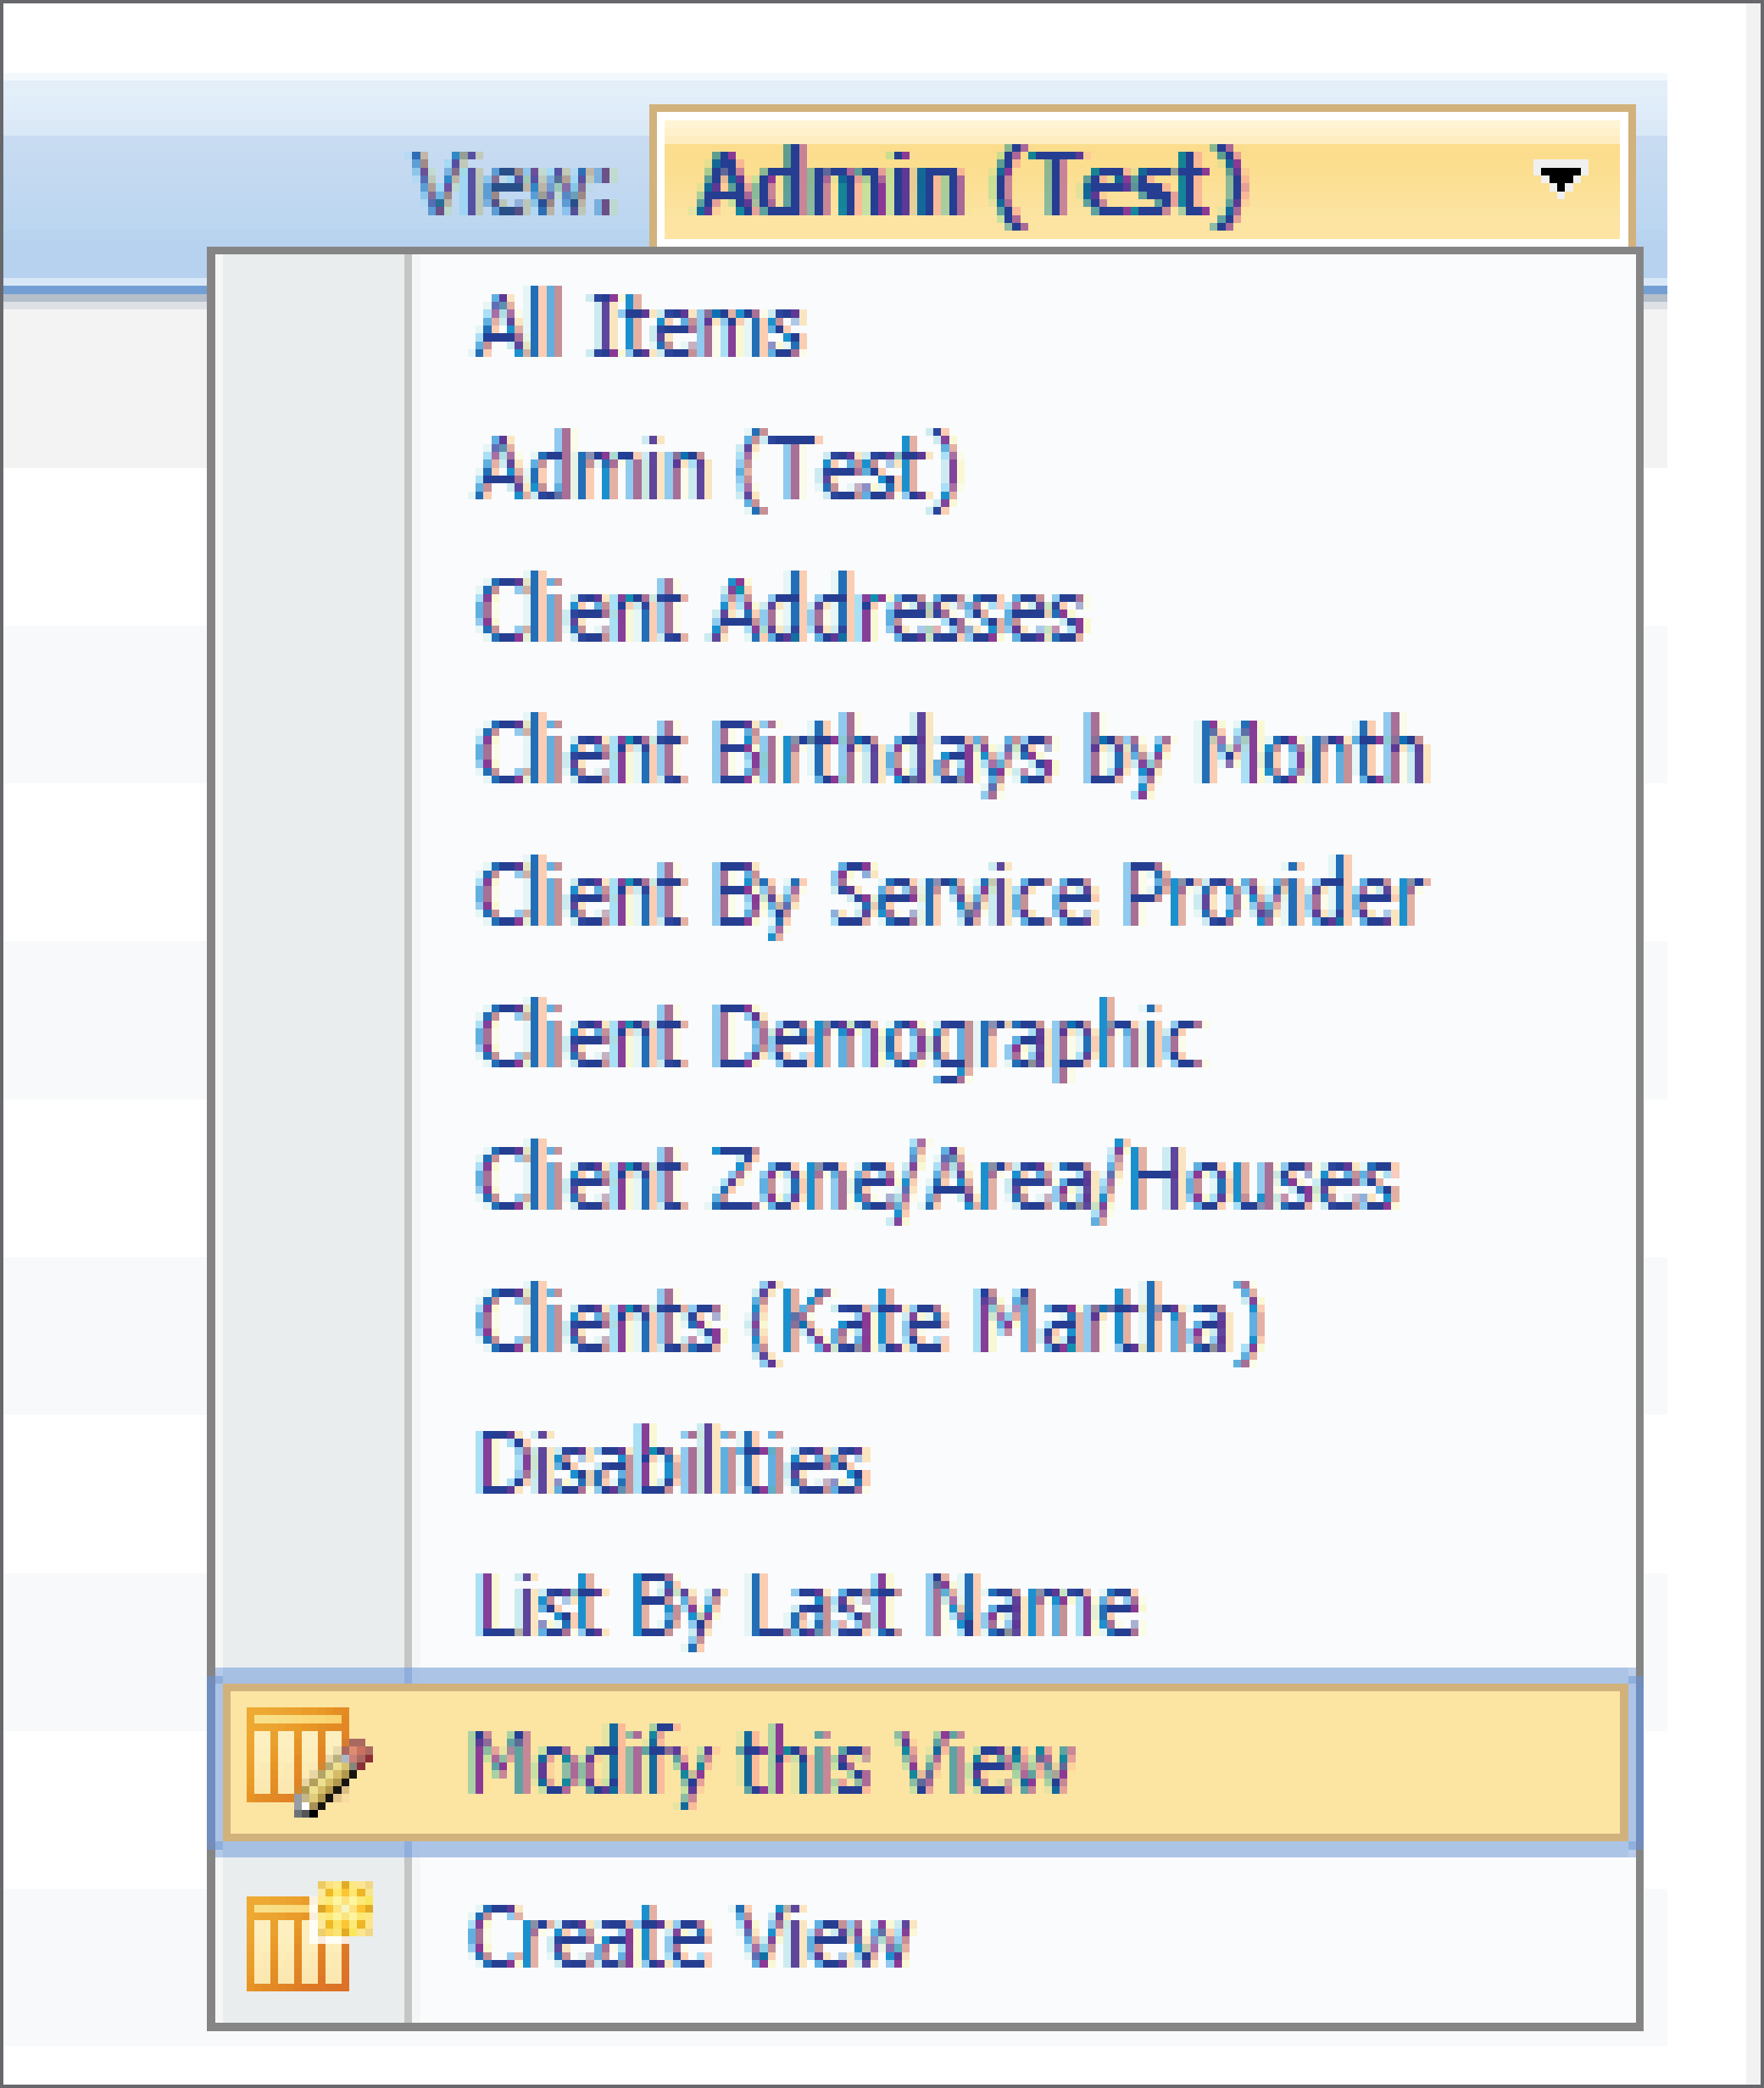
Once the required view is selected, click on the "View" dropdown list again and click "Modify this View".
3) Under Modify/Change View window, click "Delete" button.