
Top tip: You can manage the security permissions for the Goals & Outcomes module from the Permission Manager. Find out how to manage permissions here.
The Goals & Outcomes module is a standalone module to keep track of the Client or Person you Support goals. It is divided into five main tabs:
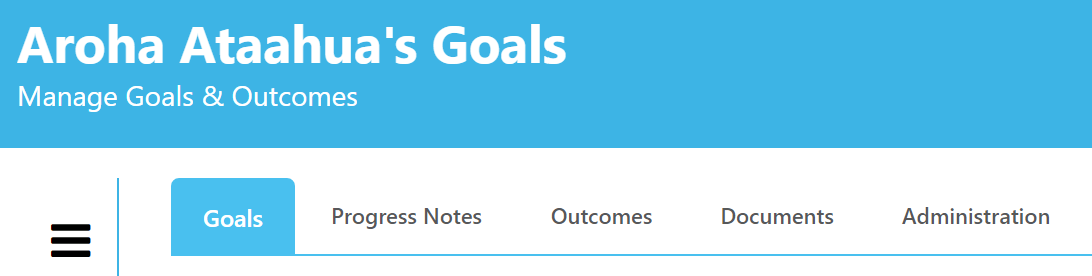
- Goals Attributes and Goals are managed
- Progress Notes Support Staff can enter daily progress notes and identify if a goal/milestone is achieved
- Outcomes Managers can review the status of each goal
- Documents Store documents related to the goals & outcomes of your client
- Administration Admin can update this module to your organisation's specific requirements
Goals
This section is used to record the goals for a client.
At the top of the screen, you can see a drop-down box named Attributes, this is where you can add in your client's Strengths, Areas of Dependence, and Health Checks (the categories within these headings can all be changed to fit your needs in the Administration tab).
To add an Attribute, click on the Green +Add button (1), select the category from the drop-down list (2), and then add any notes associated with your selection (3). Click Save (4).
You can also Edit or Delete an entry by selecting one from the category and clicking the Edit or Delete button.
Below the Attributes section, is the Goals section. Click on the Green +Add button (1), to add a new entry.
While defining a goal, staff can add:
- Goal: Title of the Goal
- Service Area: Area where this goal will be monitored and achieved (e.g. Day Services, Residential, Vocational)
- 3-Fold: Body, Soul, Spirit
- Start Date: Enter the start date of the goal
- Supervisor: Select the supervisor name from the drop-down list
- Risk Assessment: Type in any risks associated with the goal
- Capacity: identifies which aspect of the client’s life will this goal focus towards (e.g. Communication, Managing Self, Participating & Contributing, Physical Wellbeing)
- Status: In Progress, Achieved/Completed, Not Applicable, Abandoned. The Goals are colour coded based on the Status of the Goal (e.g. Blue: In Progress, Green: Completed, Red: Abandoned, Grey: Not Applicable)
- Review Date: Enter the date for review, this can be set up to send reminders
- Signed Off Date: Enter a date the goal is signed off on
- Notes: Type in any notes about the goal
- Save: Click Save to enter the new goal into the list
Each goal can then be divided into ‘Milestones’ to help identify the steps that your client can take to achieve the goal. Click on the Milestone link next to the goal you have just entered.
This will bring up a pop-up box to add in the milestones. Click Add+ to add the milestone. You can also Edit or Delete previously entered Milestones.
Once the goals are identified, they are available for Support Staff to write daily Progress Notes.
Progress Notes
The Progress Notes tab allows staff to write daily Progress Notes.
When adding a Progress Note, you can add the Date, Notes and a Category to define the type of Note (e.g. Communication, Dream and Aspirations, Activities, Health & Wellbeing, etc).
If a staff member has identified that a goal/milestone is achieved, they can select ‘Is Goal Related’ and then select the Goal and Milestone which it relates to from the drop-down lists.
Staff can also select a Label (e.g. Include this note in Outcomes Assessments) to further discuss the progress note in team meetings.
The values in ‘Category’ and ‘Label’ dropdown lists are customisable under the Administration tab.
You can also Edit or Delete Progress notes. Additionally, clicking Export will export the progress notes as an excel document.
Outcomes
Based on the Progress Notes, the ‘Outcomes’ tab helps in reviewing the status of each Goal. Based on the Progress Notes, the Goals and Milestones can be marked as completed.
Each Goal can also be reviewed individually using the 'Review' option. This will maintain a history of all the reviews for a Goal.
The Print button prints all the Goals and Milestones in a PDF booklet format that can be shared with Family/Whānau. (At the bottom of this article is an example booklet for download)
Documents
The Documents tab allows you to upload and download documents related to the Goals & Outcomes of your client.
1 - Documents tab
2 - Upload Document, click here to upload a file
3 - Previously uploaded files are located here. Depending on the file type, you can double click on a document to open a preview. Or it will download the file.
| Please Note: If this message box opens when you double click on a document, click 'Open this file in a new window.' |
To Upload a document, click on Upload Document. , then Attach File (2).
This will open the window to select the document from. Find and select your Document (3), then click Open (4).
Once you have selected your document, it will be Ready to upload (1). You can add a comment (2) that is displayed next to the file name in the Document Library. Then click Save (3).
You can now see below, our Document (Doc1) has now been added to the 'library'.
Clicking on the downward arrow icon will download a copy of the document. You will find it saved to the Downloads folder on your computer.
Clicking on the three dots & arrow on the right hand side of you document will open the dropdown menu.
Here you can Rename the document, Edit the comments and Delete.
To Rename - Click Rename (1), Enter the new File name and Save (2).
The document will now have a new name (3).
Editing the comments is the same process. Click Edit Comments - Change the text - click Save.
Clicking Delete will open a confirmation box. Click Yes and your document will be deleted. No, will cancel the deletion.
The security settings for the Documents section is located in Administration - Security - Manage Permissions - Client Outcomes tab.
Find out more details here.
Administration
In the Administration tab, you are able to change/edit some of the drop-down menus in the Goals and Outcomes module. The steps below apply to all sections within the Administration tab.
In the example below you can see that within the Administration tab in the Attributes section, we can add/edit the Strength section.
This correlates to the Goals tab Strengths /Areas of Independence.
Below we are adding a new Strength attribute called Other.
Click Add+, enter the name of the attribute, click Save. You can see that 'Other' is now listed.
If we go to the Goals tab, you can see that the attribute 'Other' is now available for selection when adding a new entry.
To delete, go to the Administration tab, select the entry you want to delete, click 'X Delete', then Confirm.