To manage permissions, a role needs to have a ‘Full Control’ permission for that library.
Access and Editing the Document Library Permissions | Remove User Permissions | Adding a User
Access and Editing the Document Library Permissions
To access the permissions of a document library, click Documents (1) along the main menu bar.
Here you will see the Key Policies Document Library (1) and the MOH Document Library (2).
In this example we are going access the permissions for the Key Policies.
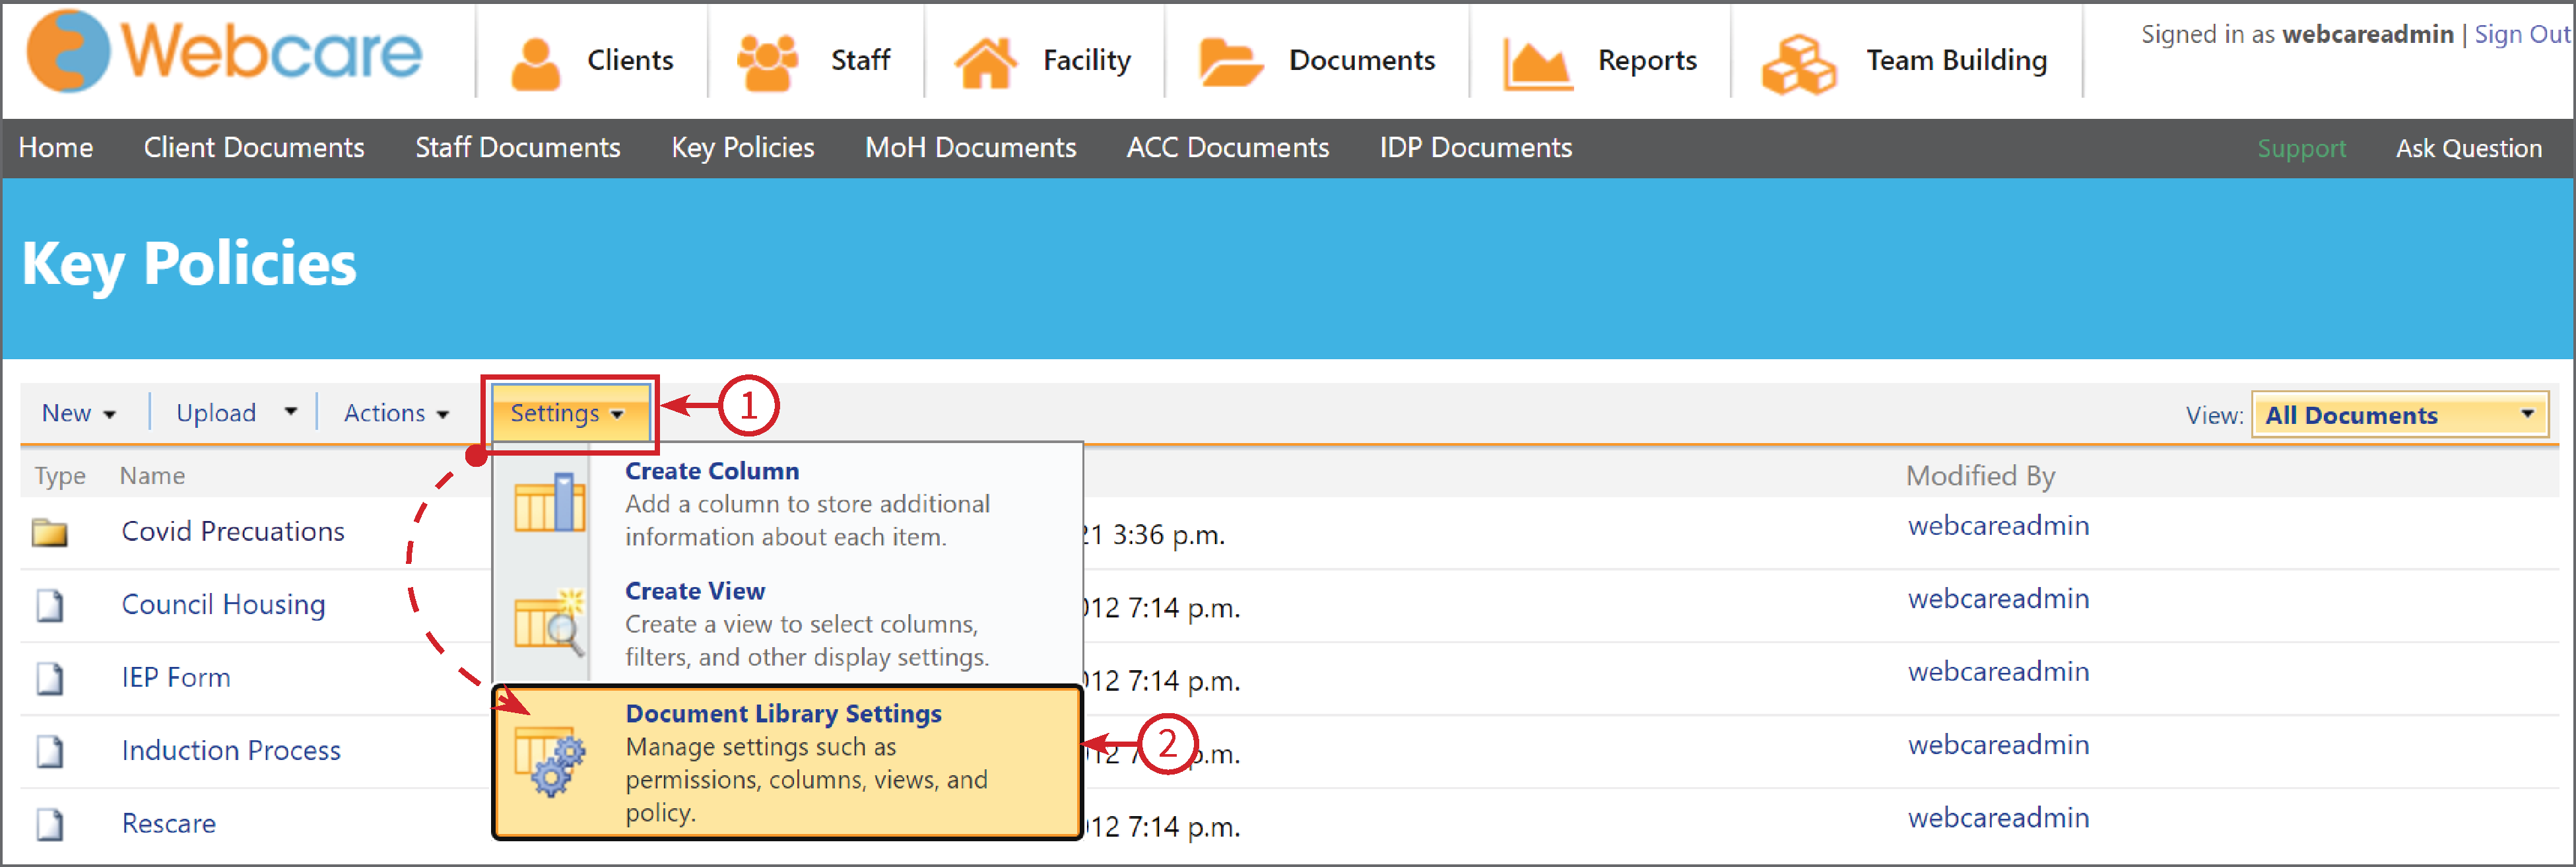
Click on Key Policies (1).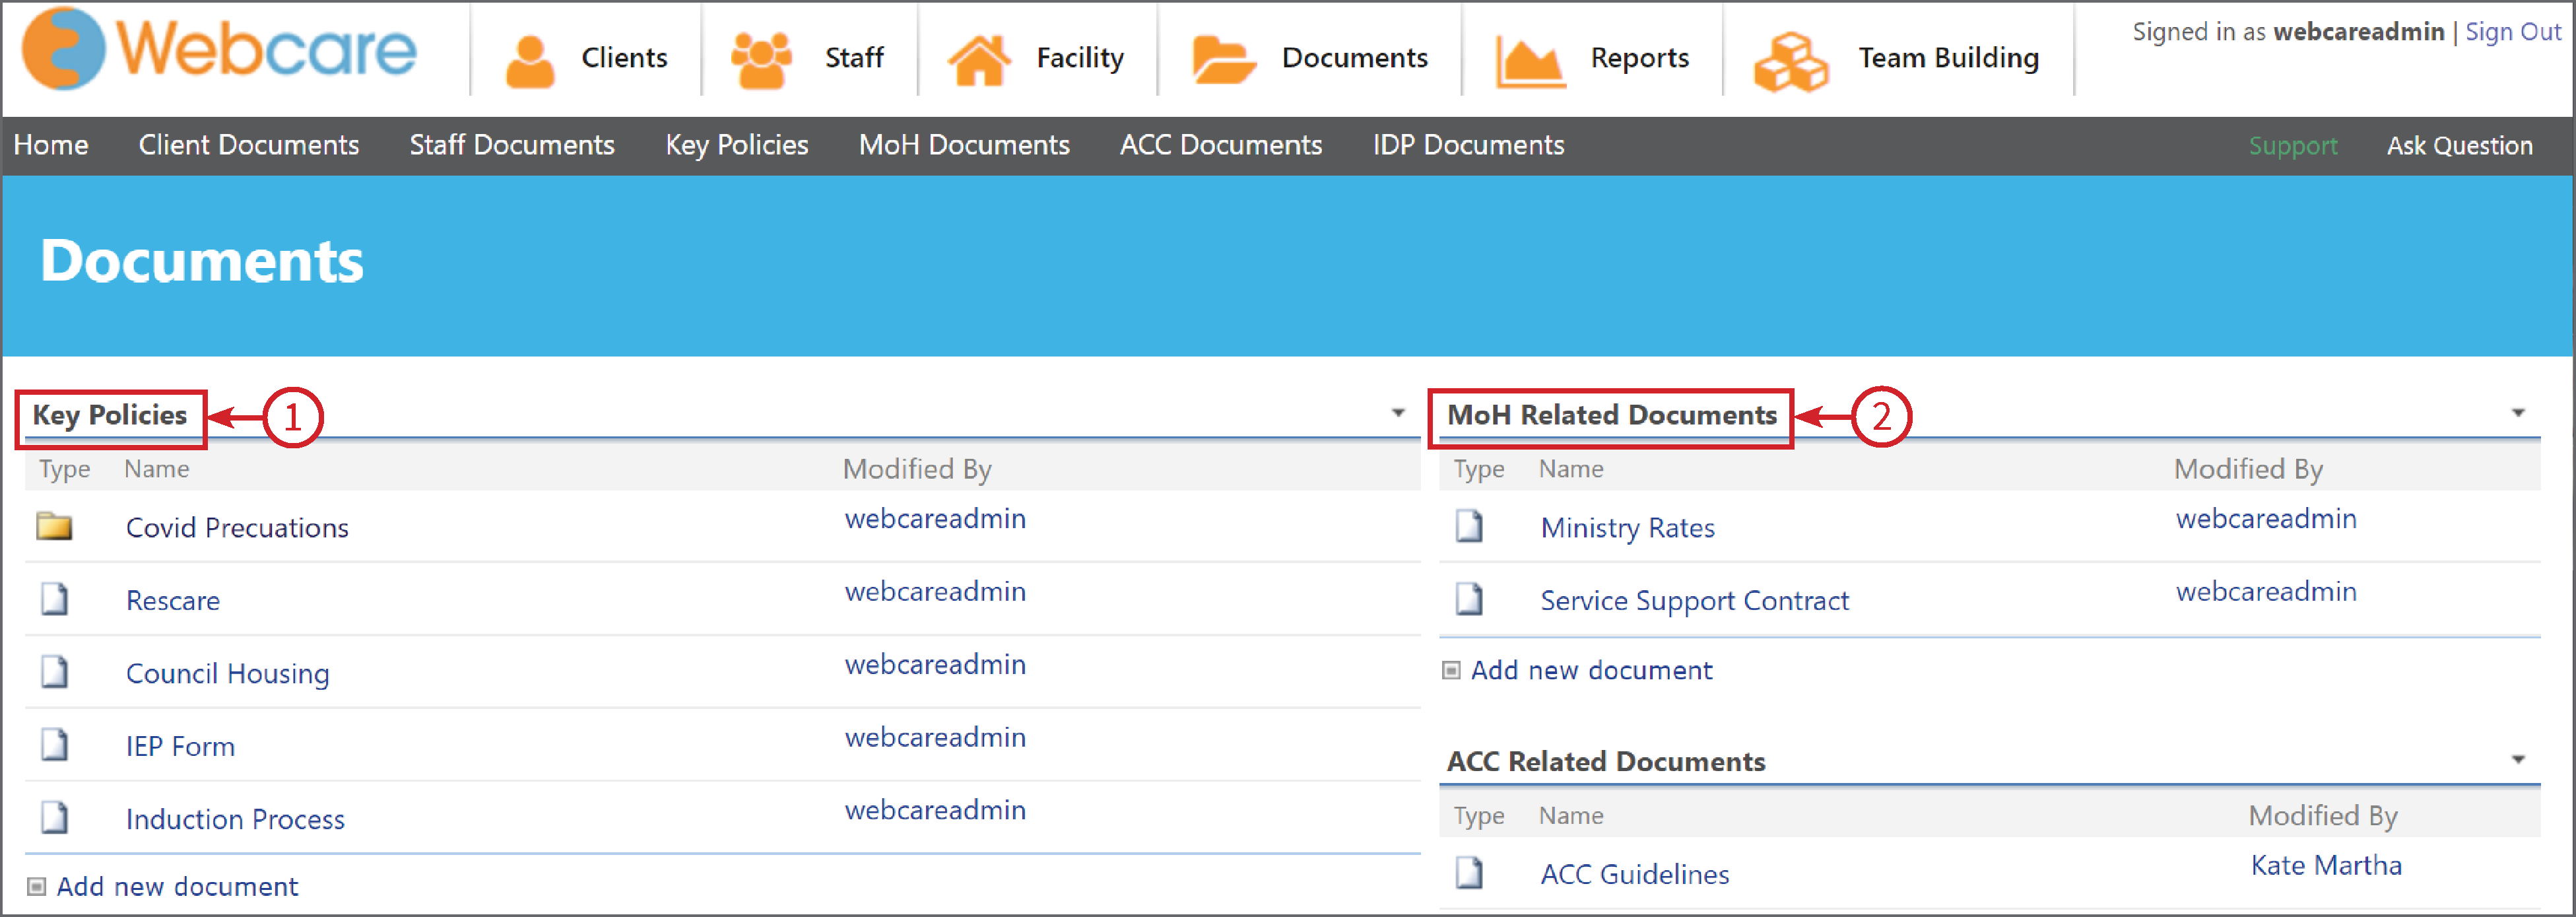
Click on Settings (1), then select Document Library Settings (2) from the drop down list.
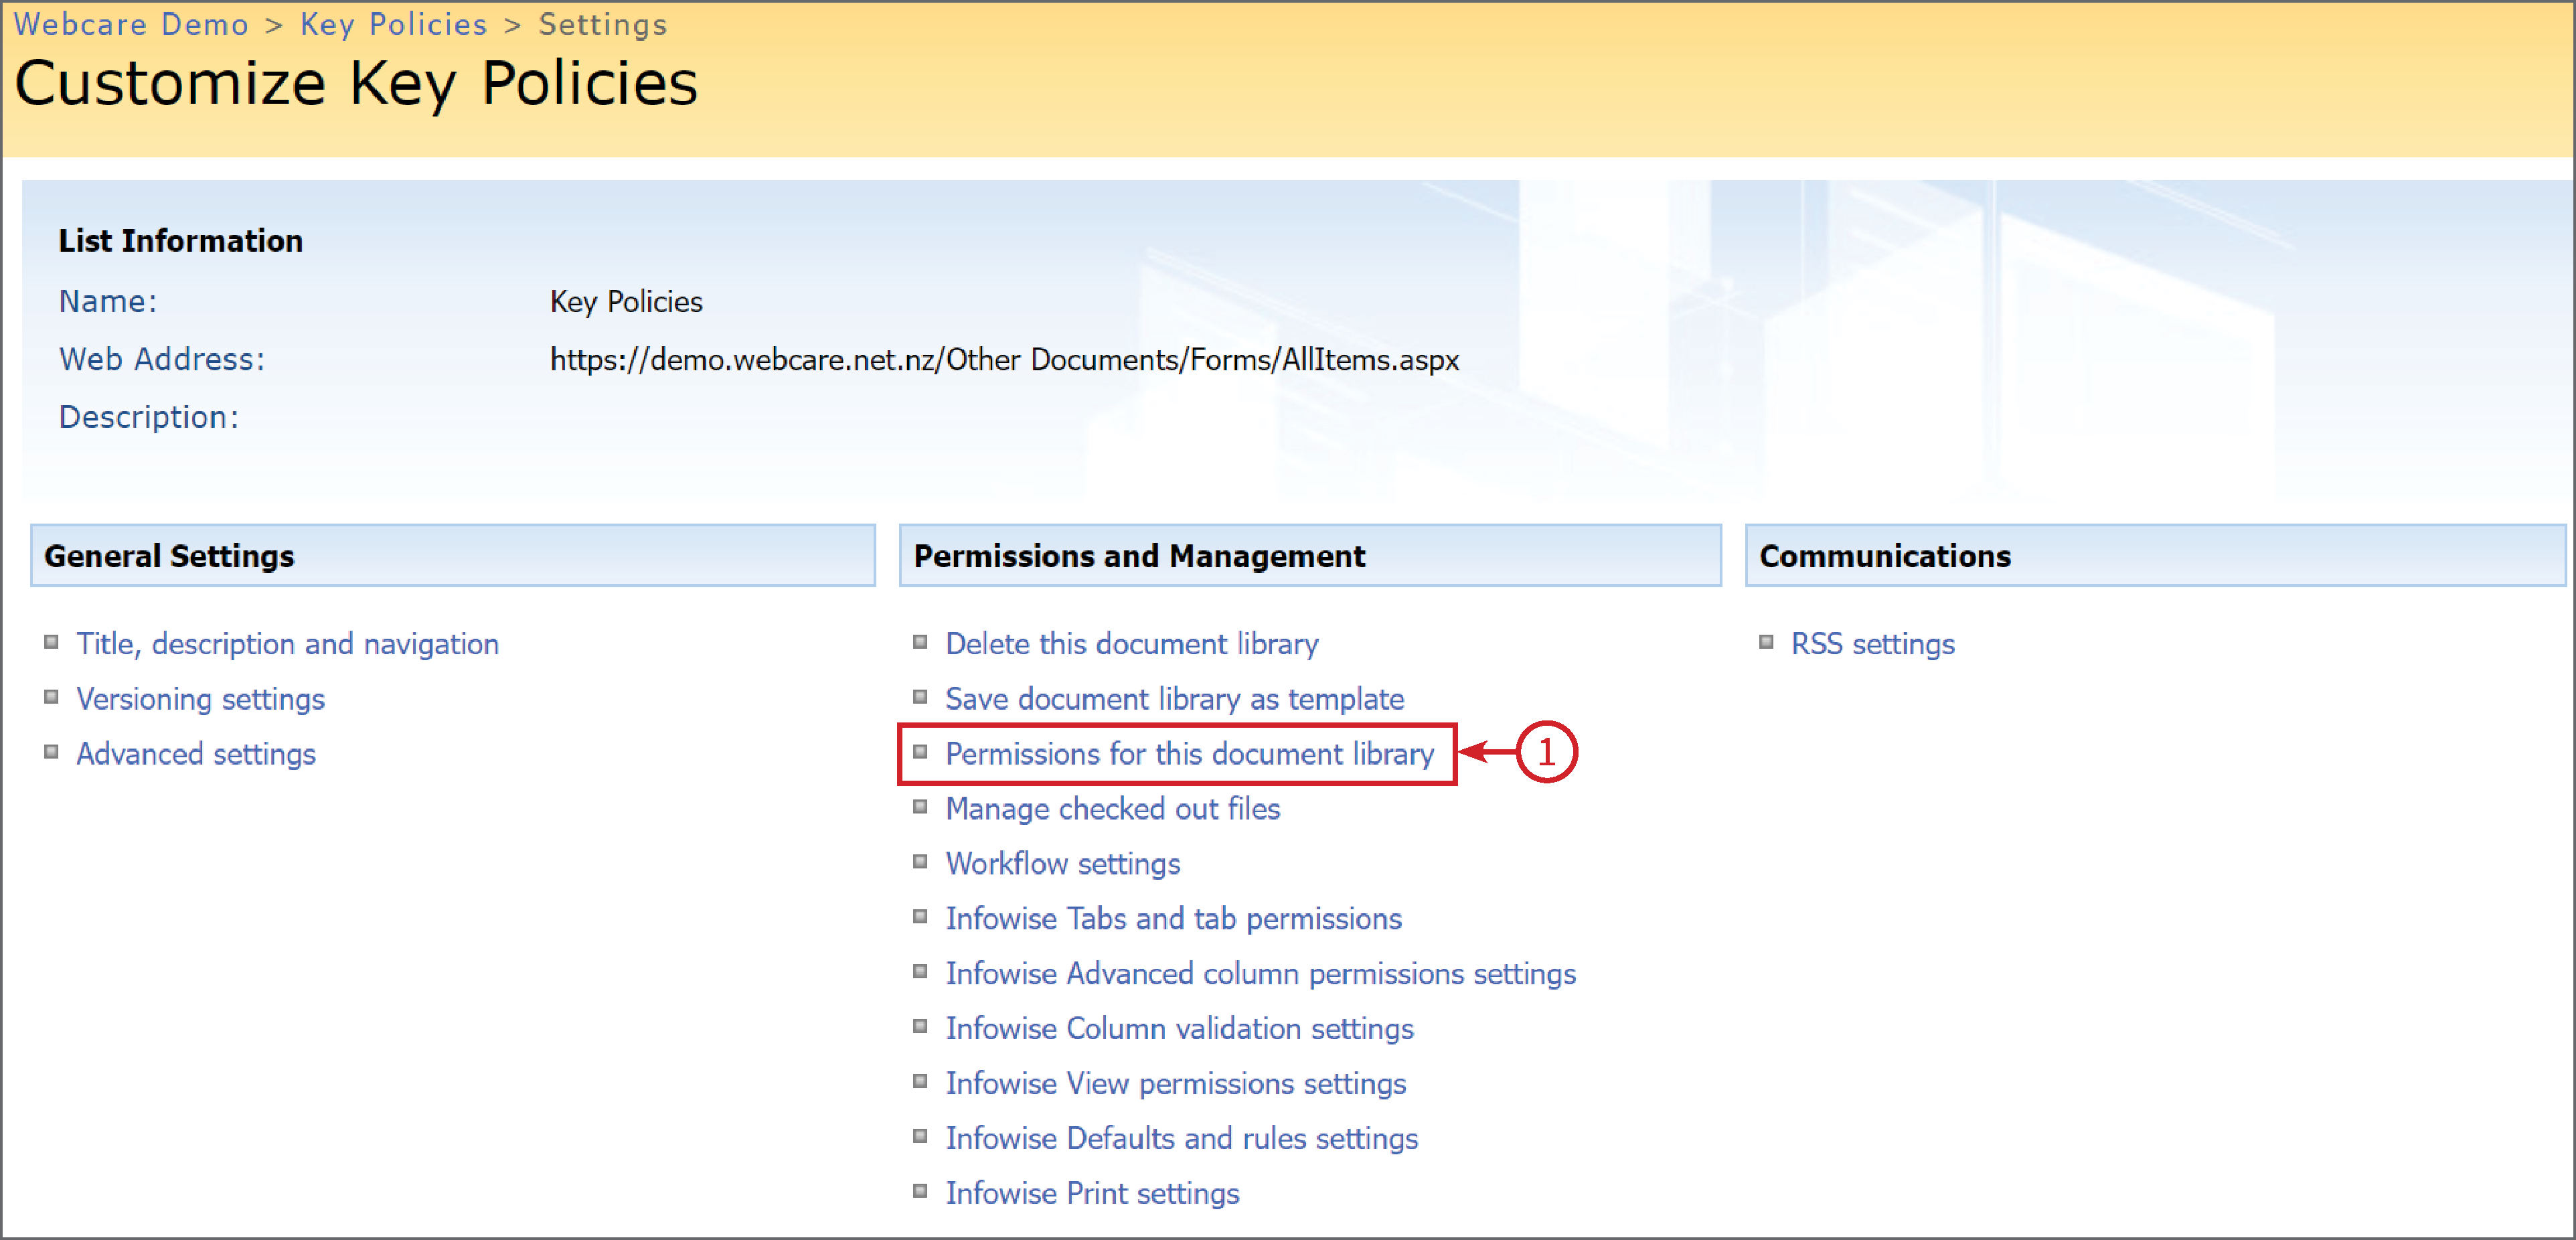
Select Permissions for this Document Library (1) from the Permissions and Management list.
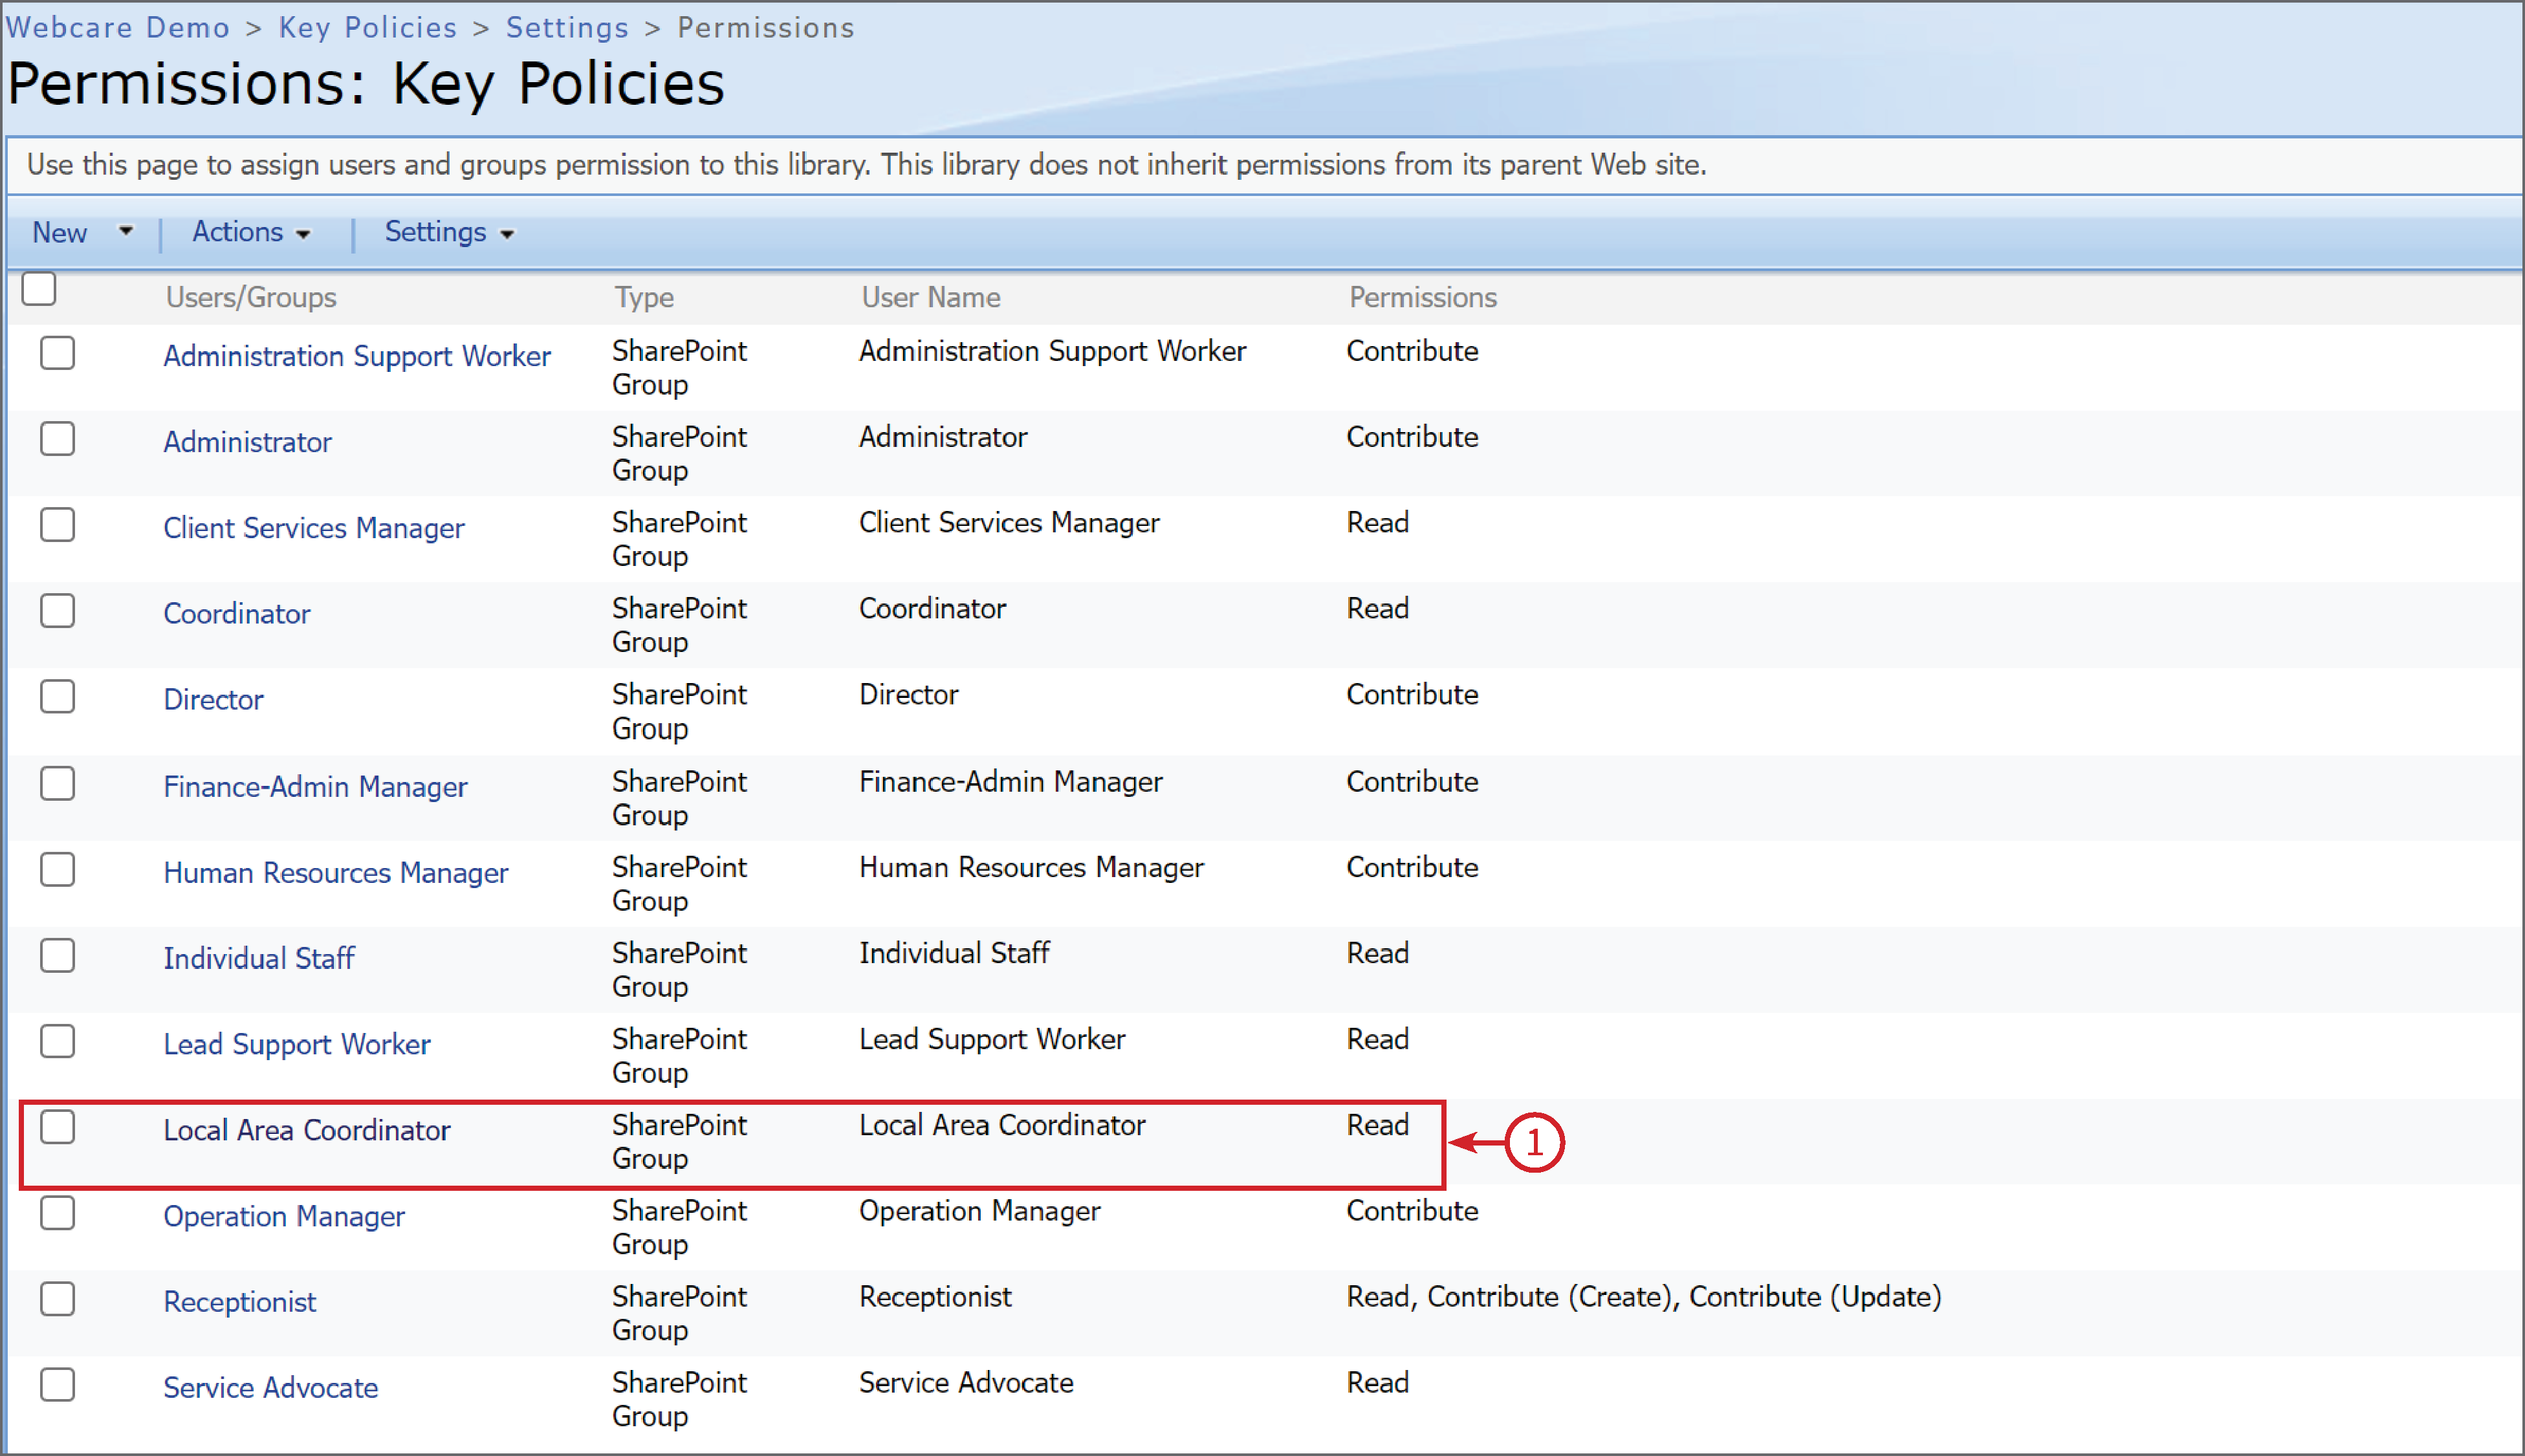
This will give you a list of the roles and their permission level.
A role can perform the following operations:
- Read-only: that role can only read documents
- Contribute (Create): can add new documents, create new folders, etc
- Contribute (Update): can overwrite existing documents (i.e. upload documents with the same name), rename an existing document, check out the document and make online changes
- Contribute (Delete): can delete documents
- Contribute: is macro permission that allows read, create, update, and delete access
- Design: allows a role to manage the version history of a document, track and approve changes
- Full Control: full access, can even delete this library
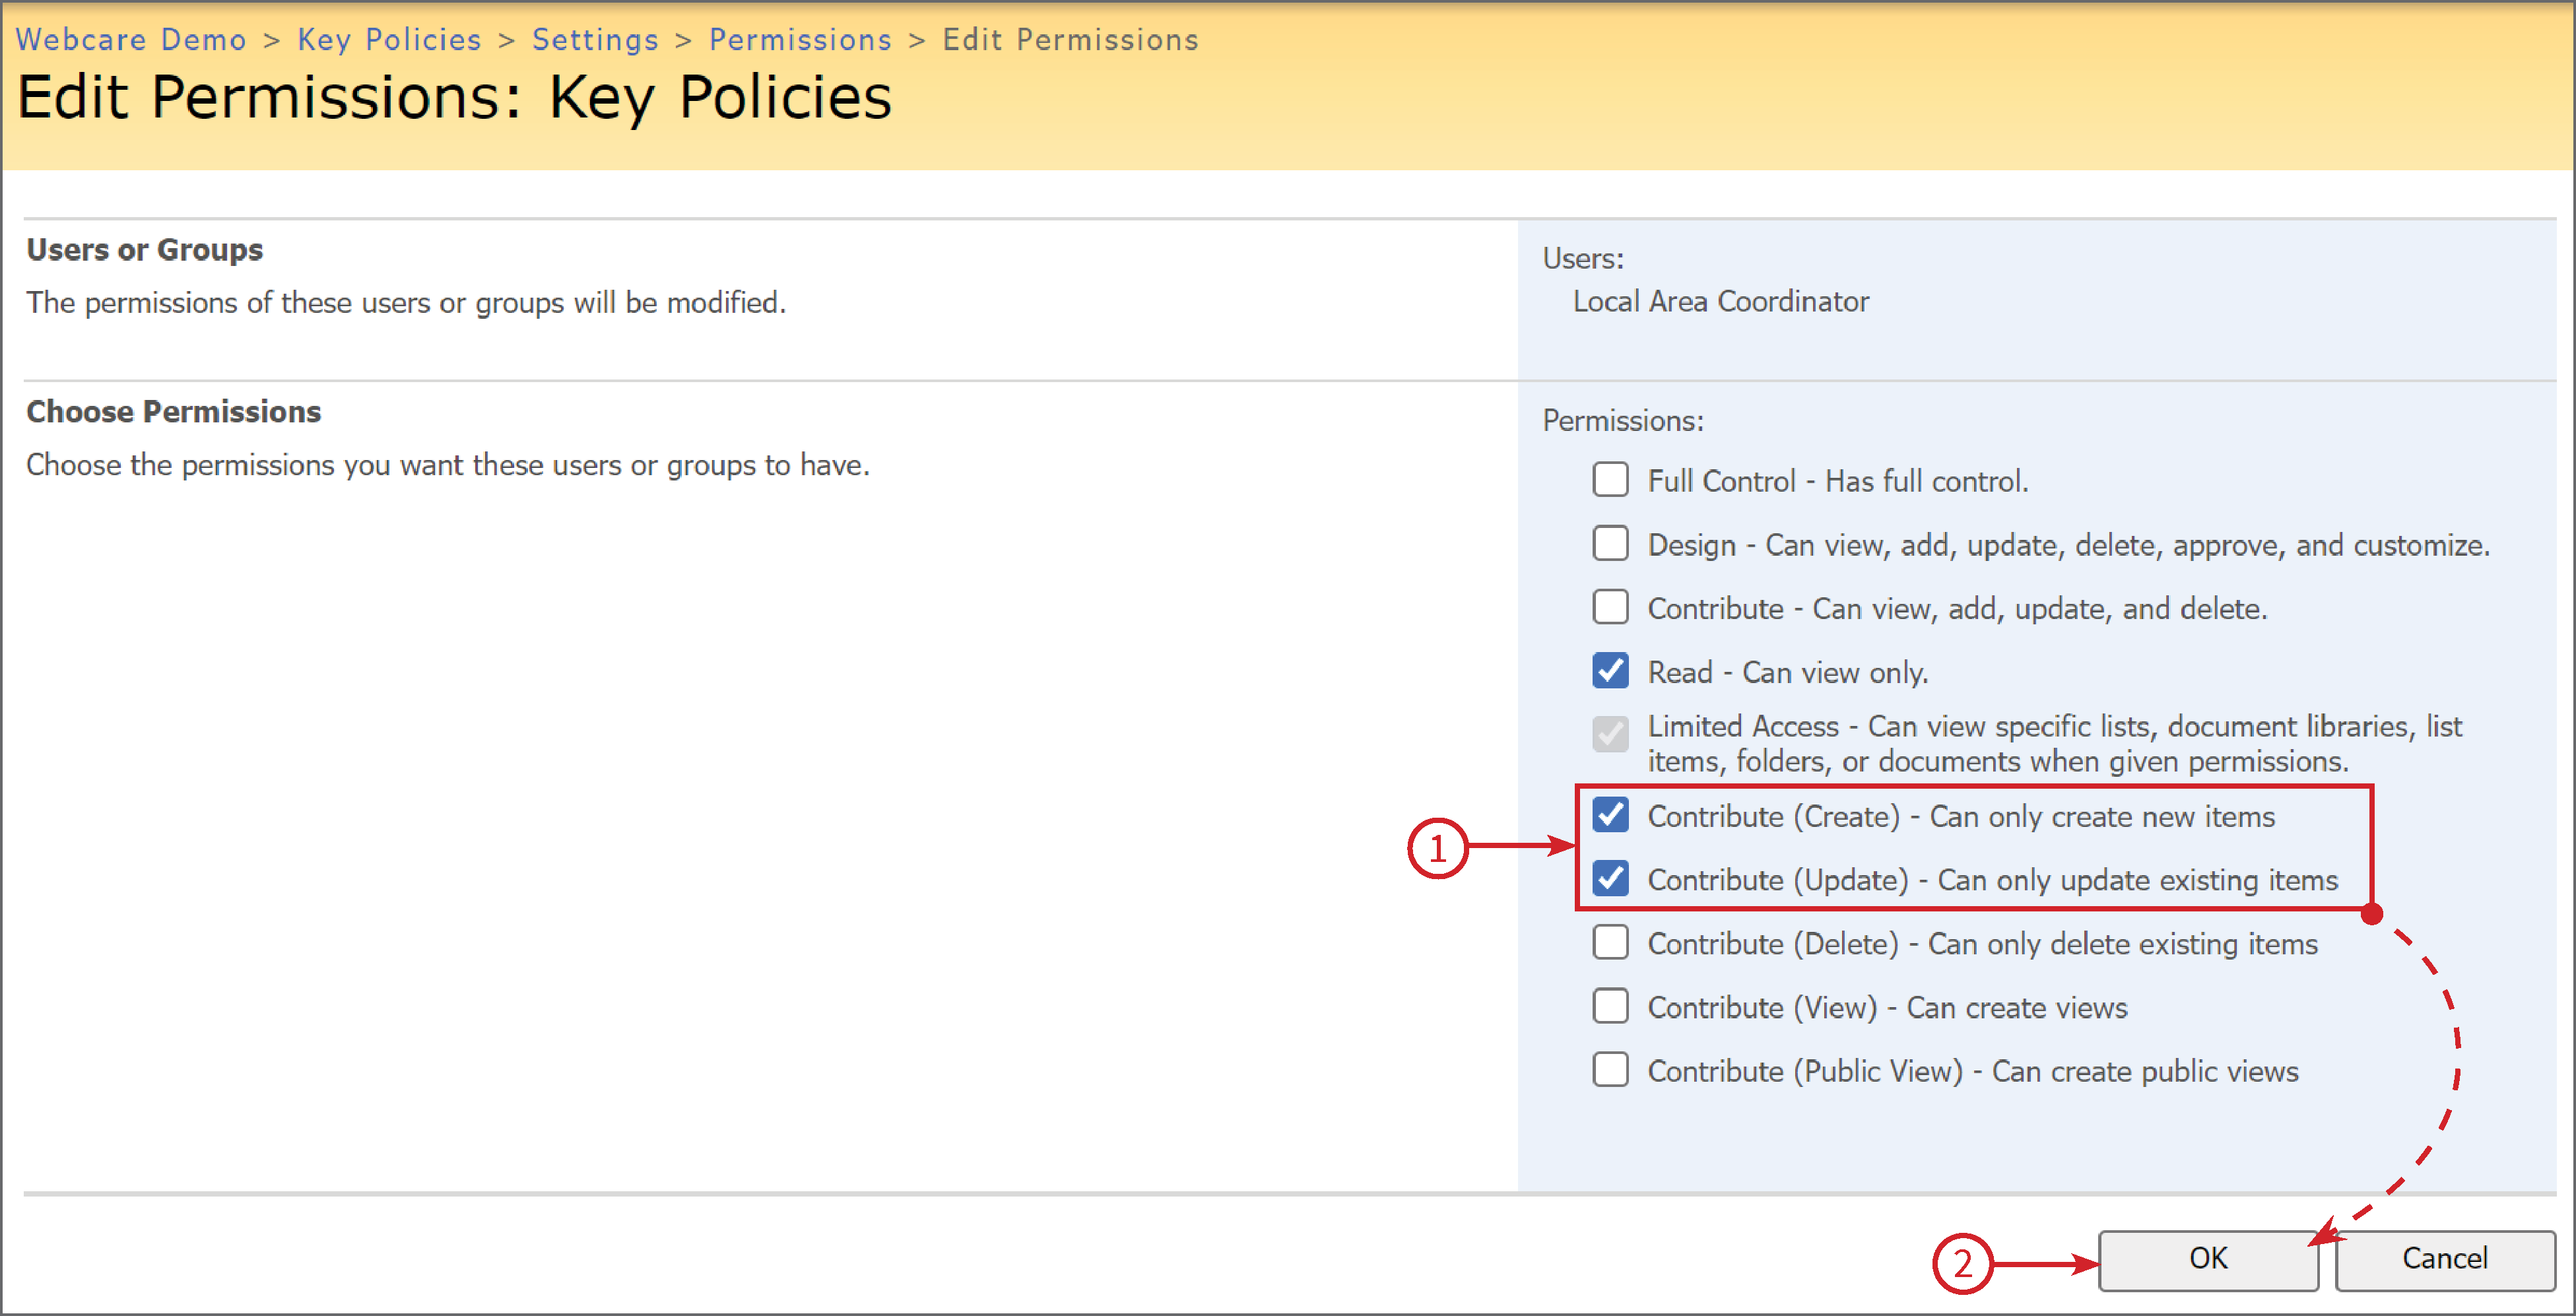
As an example, you can see the Local Area Coordinator has a Permission level of Read (1). To change this permission level, click on the the Role name Local Area Coordinator.
Here you can edit the permissions. We have left Read ticked and added Contribute (Create) (1) and Contribute (Update) (1). Click OK (2)
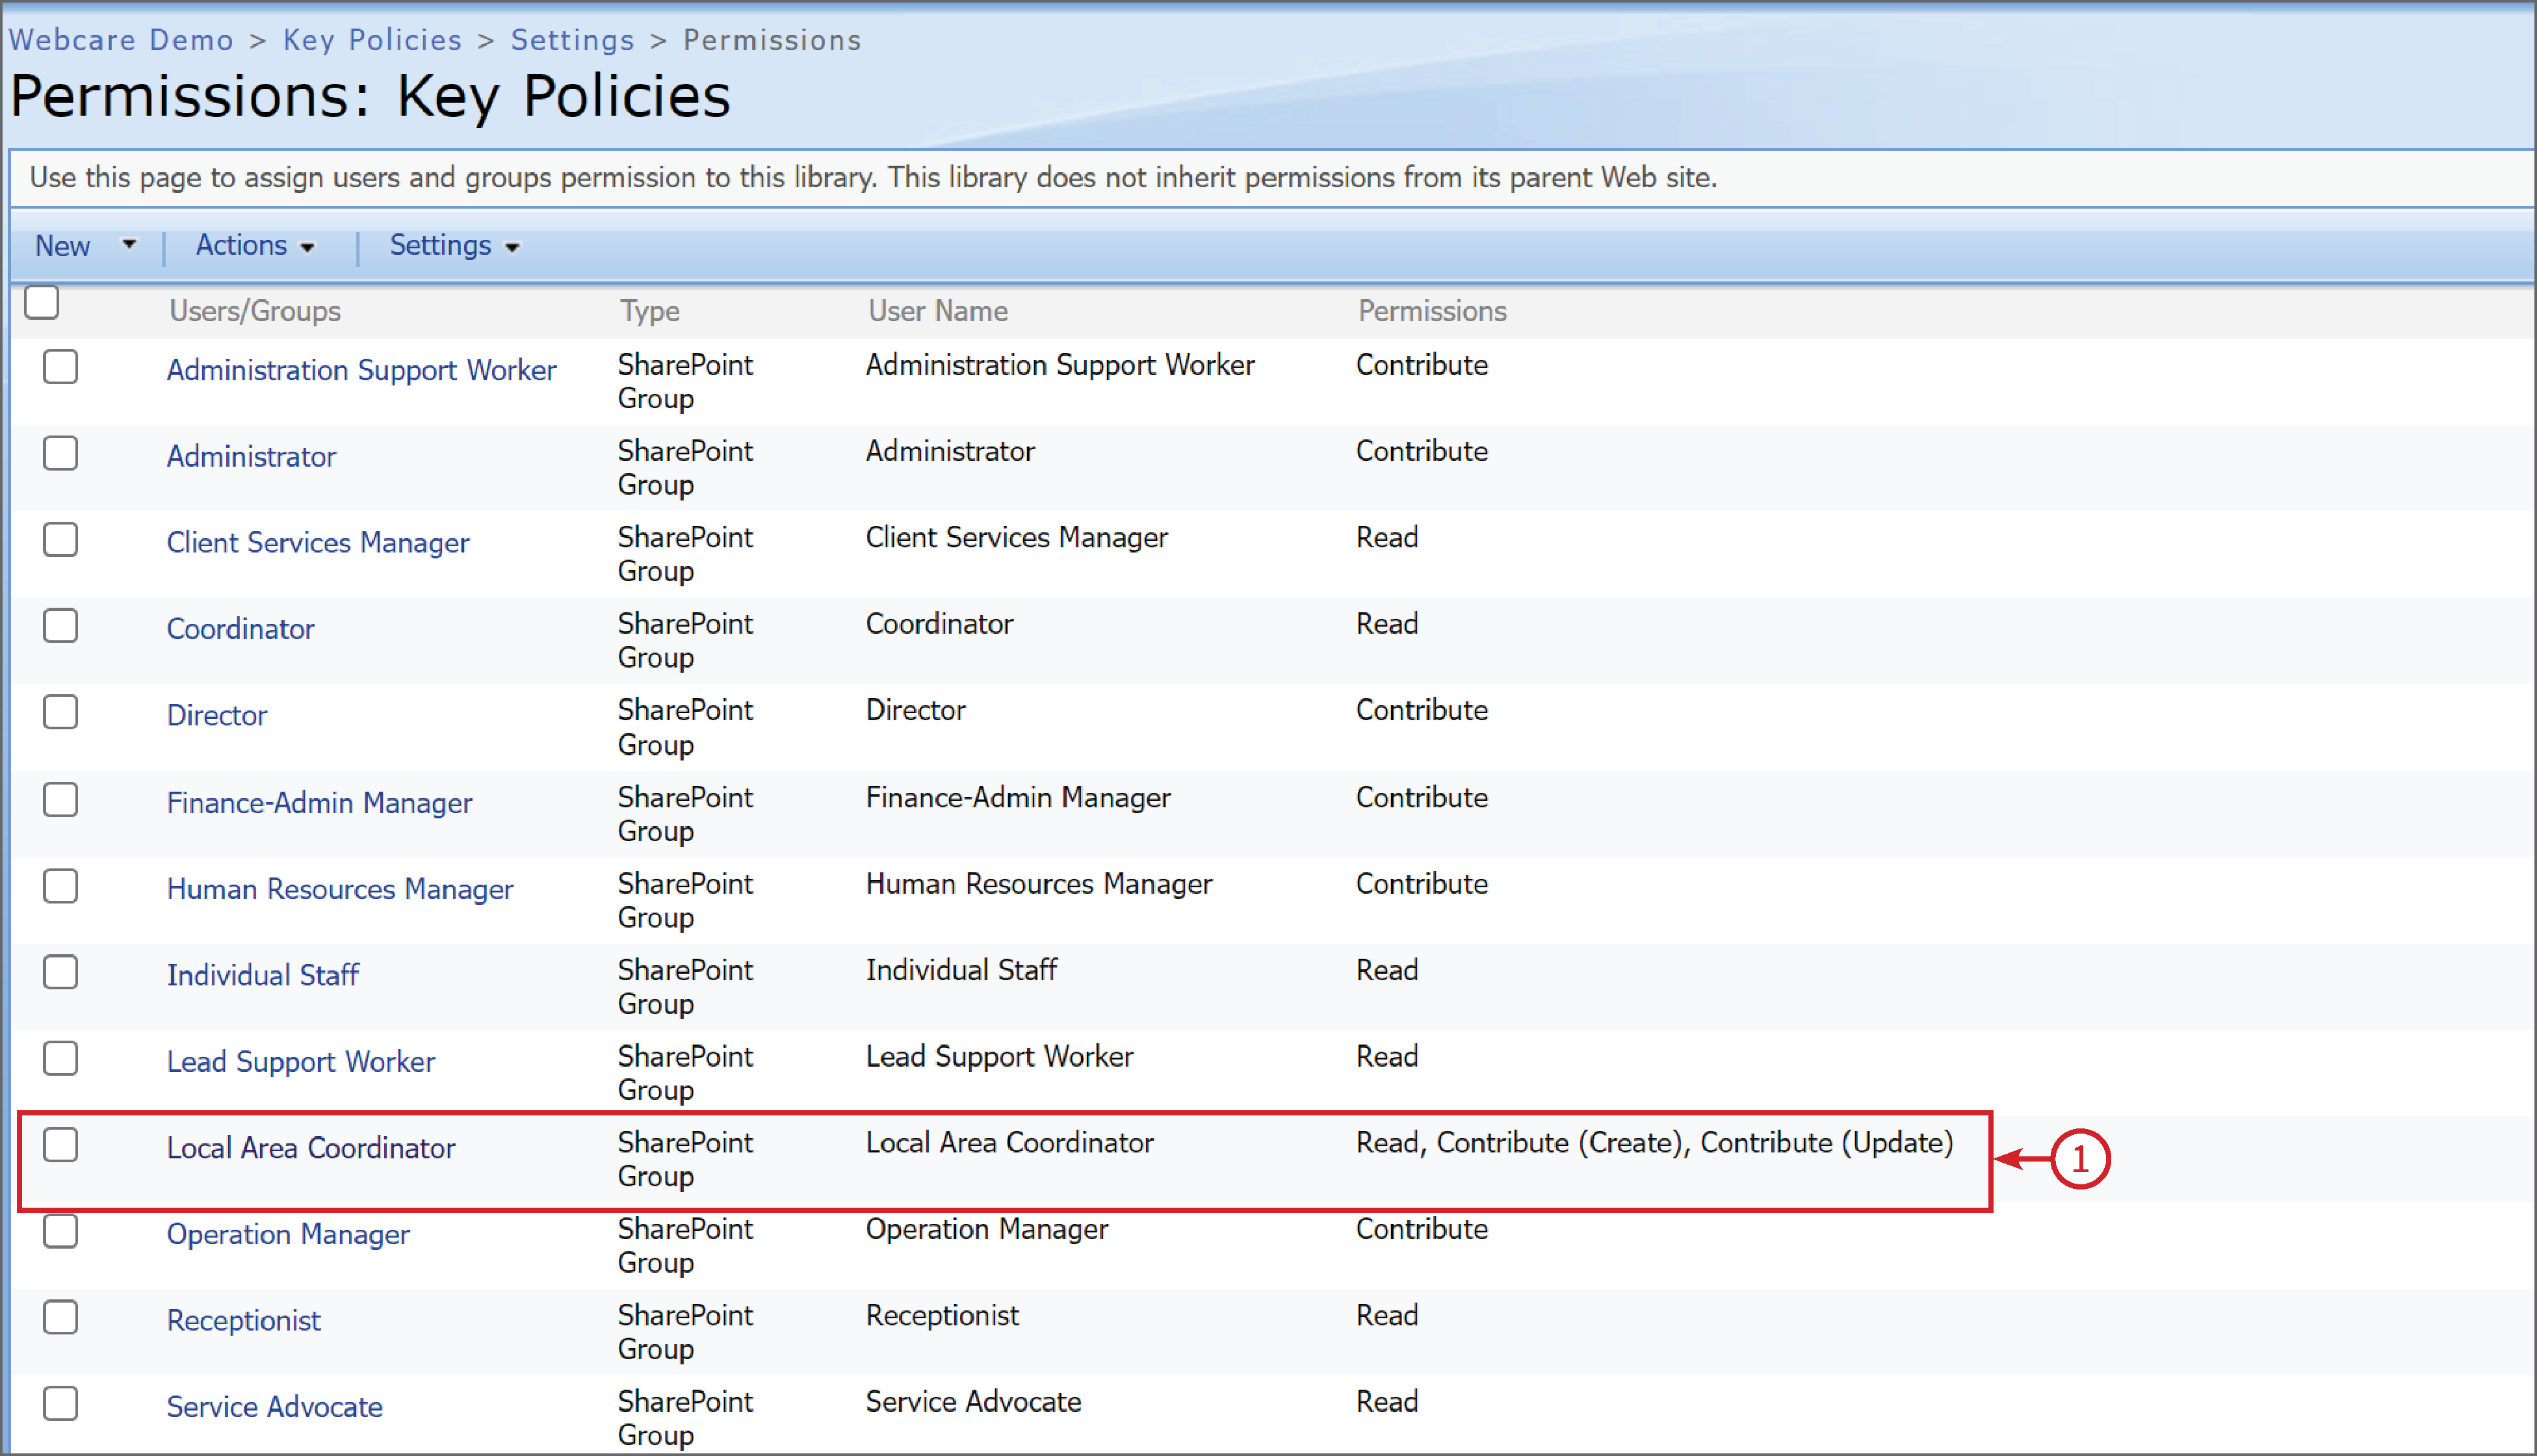
Now you can see below that the Permission level of the Local Area Coordinator role is Read, Contribute (Create), Contribute (Update) (1).
Remove User Permissions
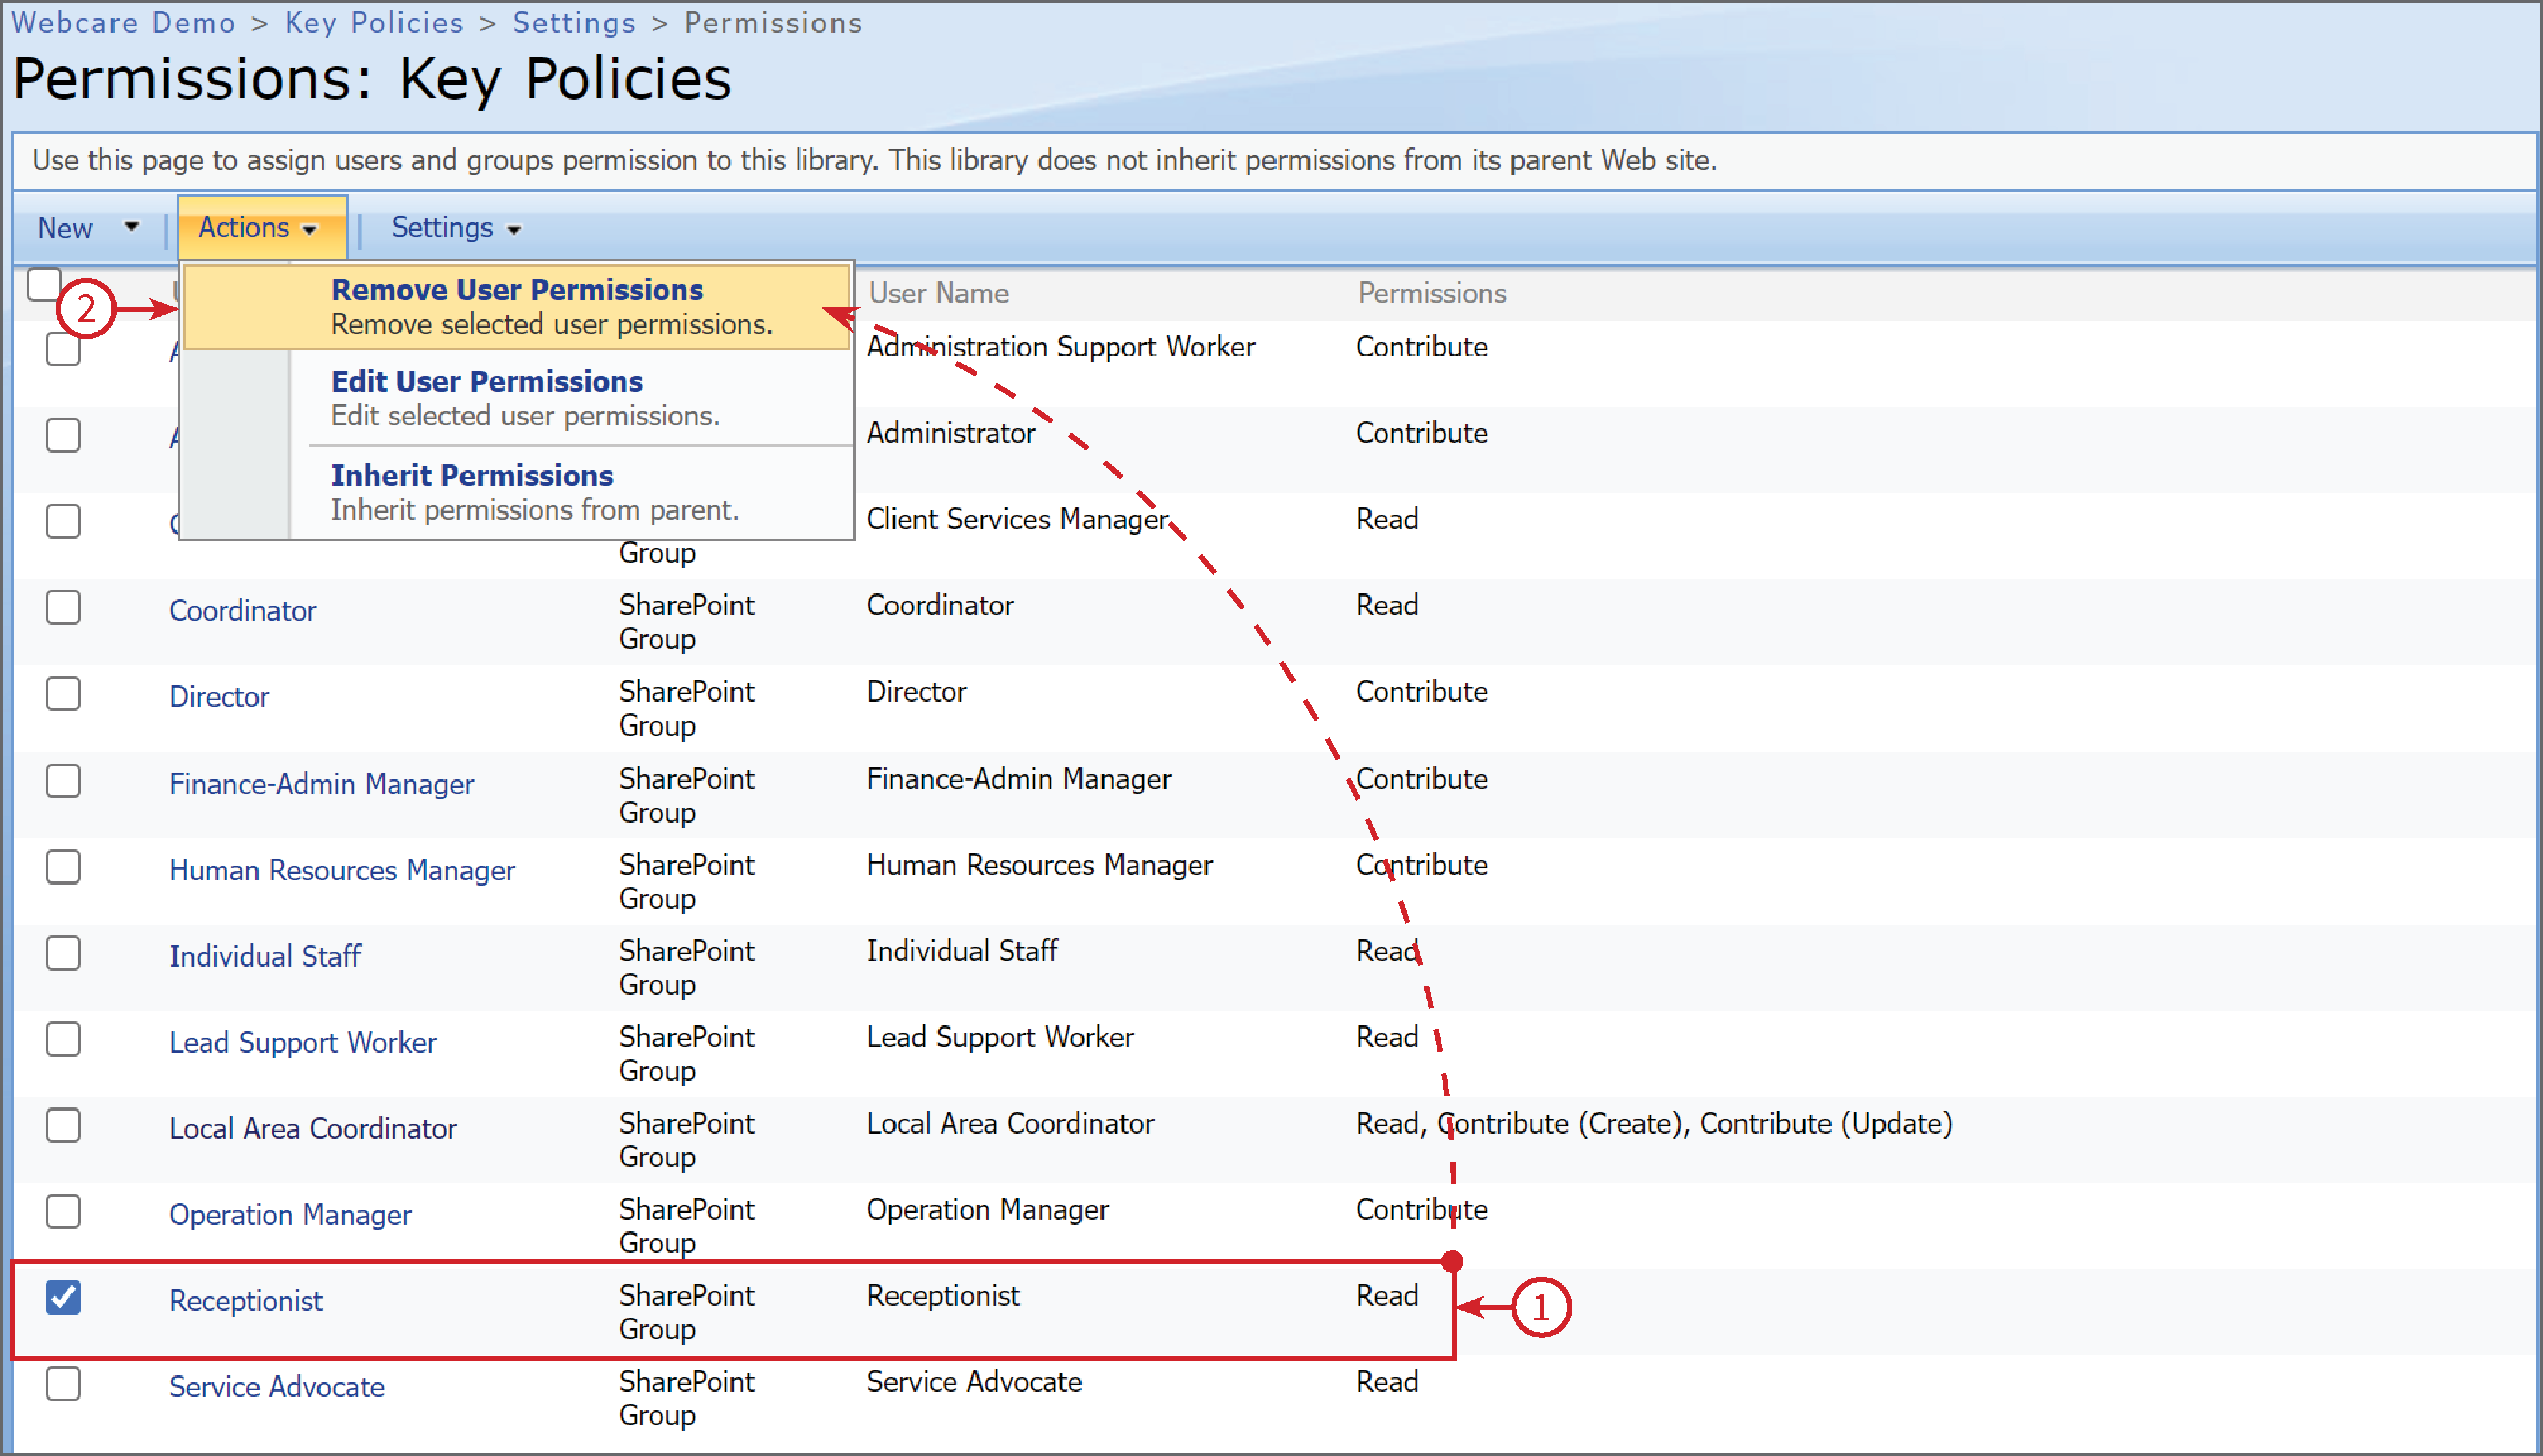
Following the steps above, navigate to the Permissions page. Select the user you want to remove by clicking the tick box next to that role, In the example below we are deleting the Receptionist (1), then from the Actions drop down menu, select Remove User Permissions (2).
A warning box will pop up confirming user removal, select OK (1). The Receptionist permissions will now be removed.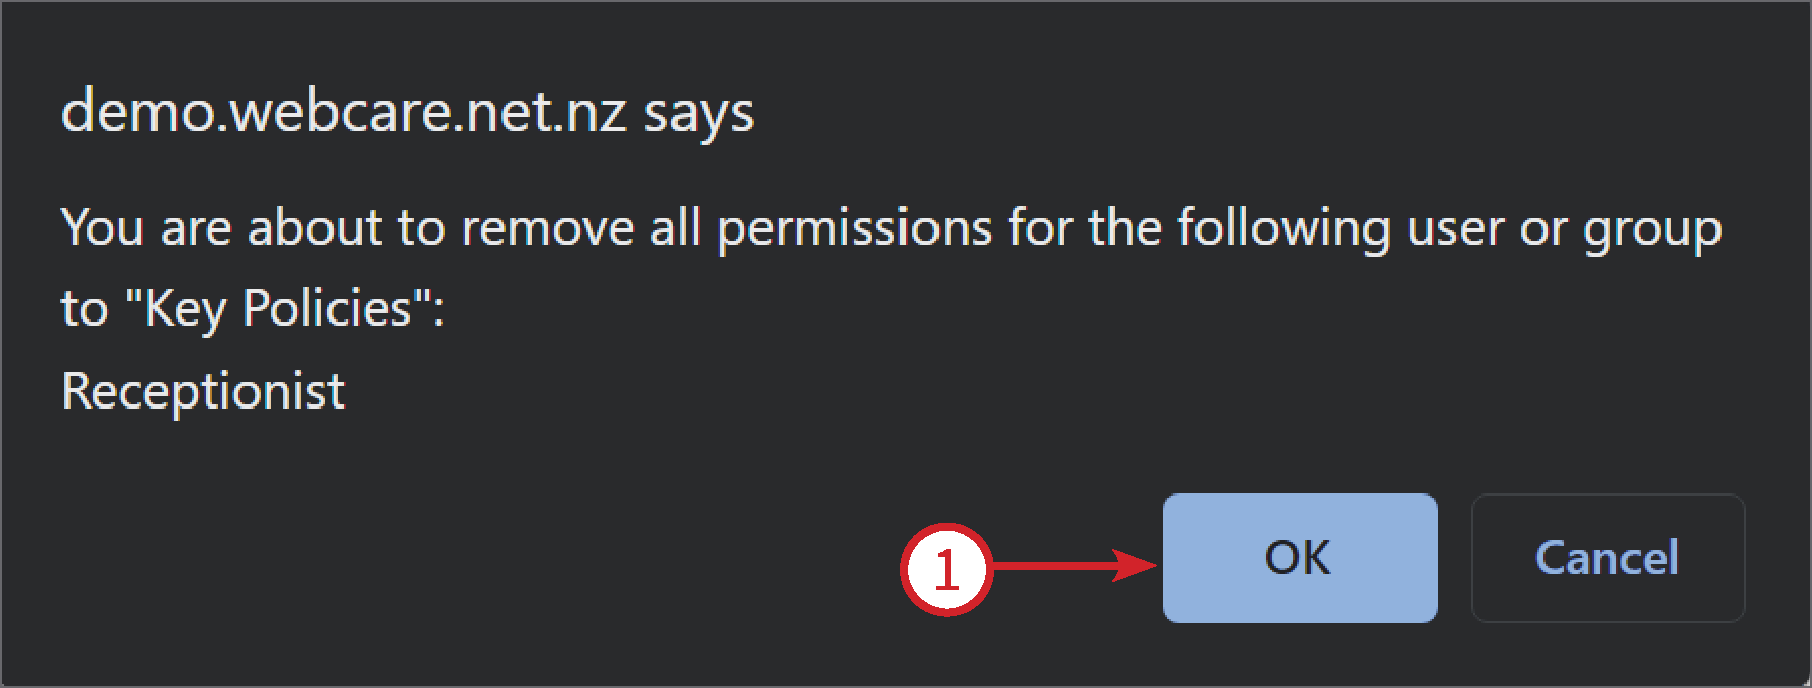
Adding a User
Following the steps above, navigate to the Permissions page. Select from the New drop down menu, Add Users (1).
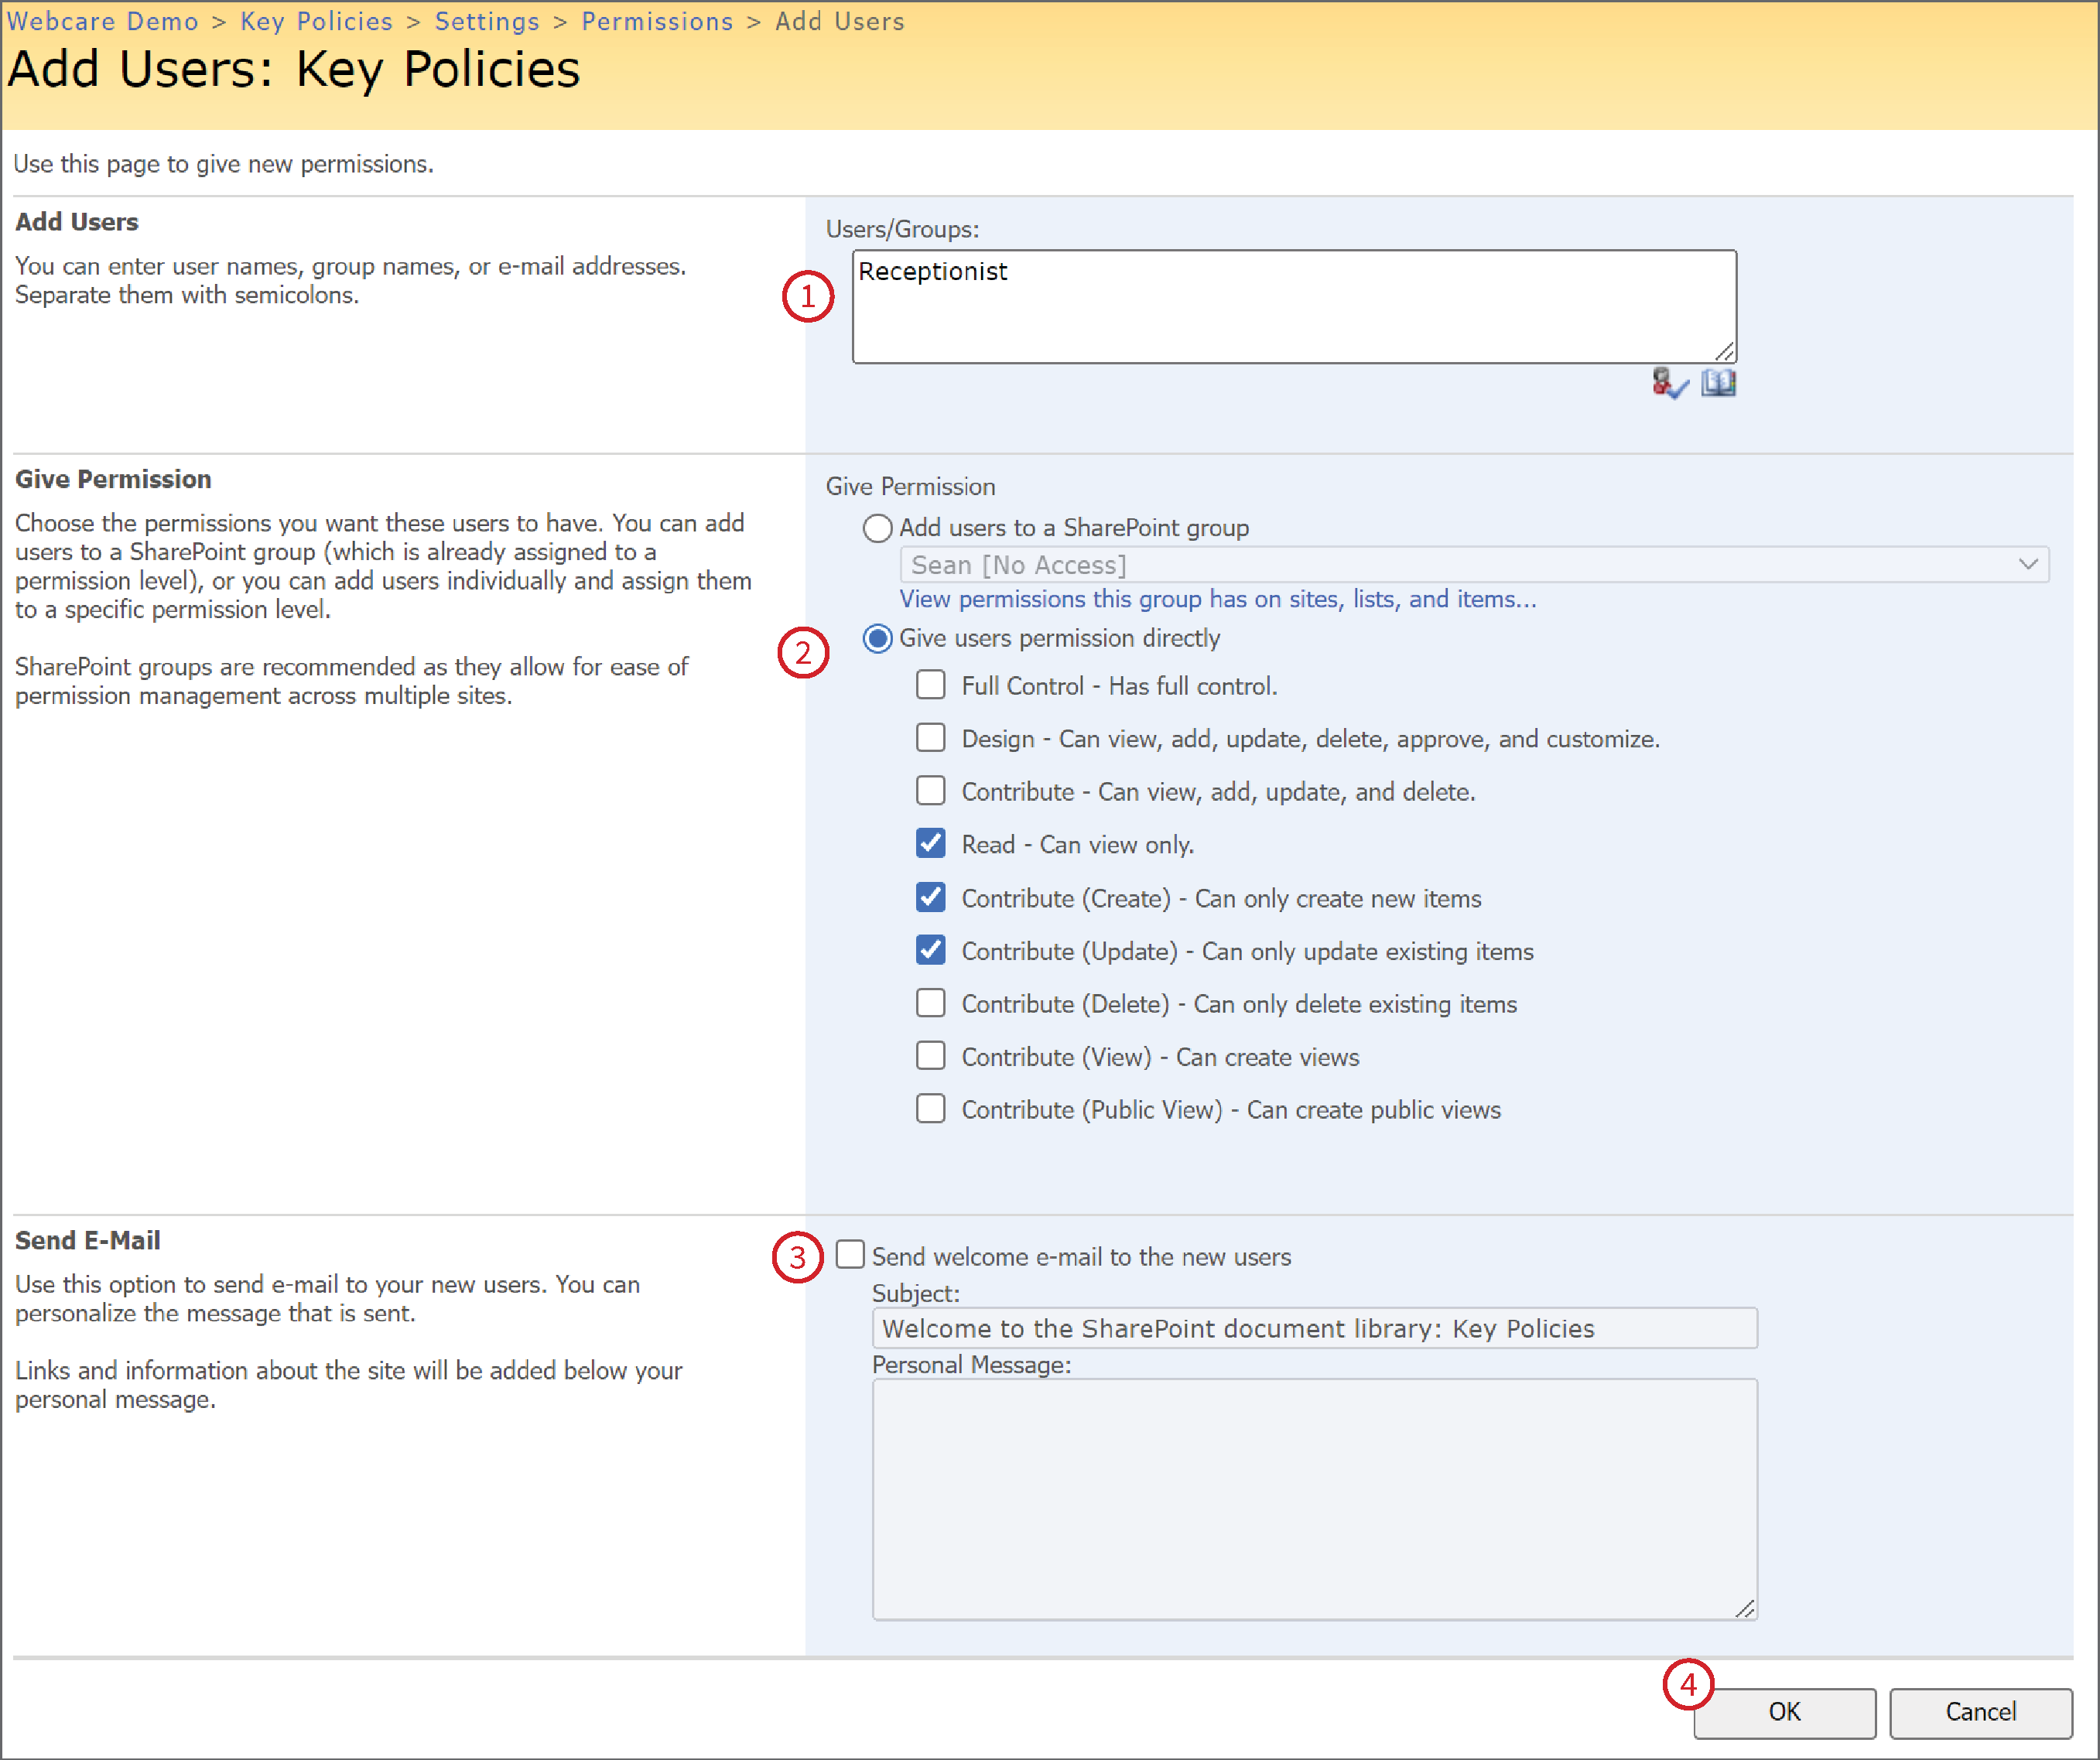
1 - Enter the user. (Please note: the role must already be set up in Role Manager, find how to do this here) In the example below we are adding Receptionist back into the permissions list. You can also search for the role by clicking on the address book icon at the bottom right hand corner of the text box.
2 - Select the users permissions. You must define permissions to add a new user.
3 - You can send an email to the new users who have this role assigned to them.
4 - Click OK to save.
An organisation can have multiple document libraries.
Each document library has its own specific permissions (i.e. 'Key Policies' library can be accessed by all roles, but 'MoH Related Documents' library can only be accessed by Service Managers roles).
The roles are available in the Staff Login tab, see below. 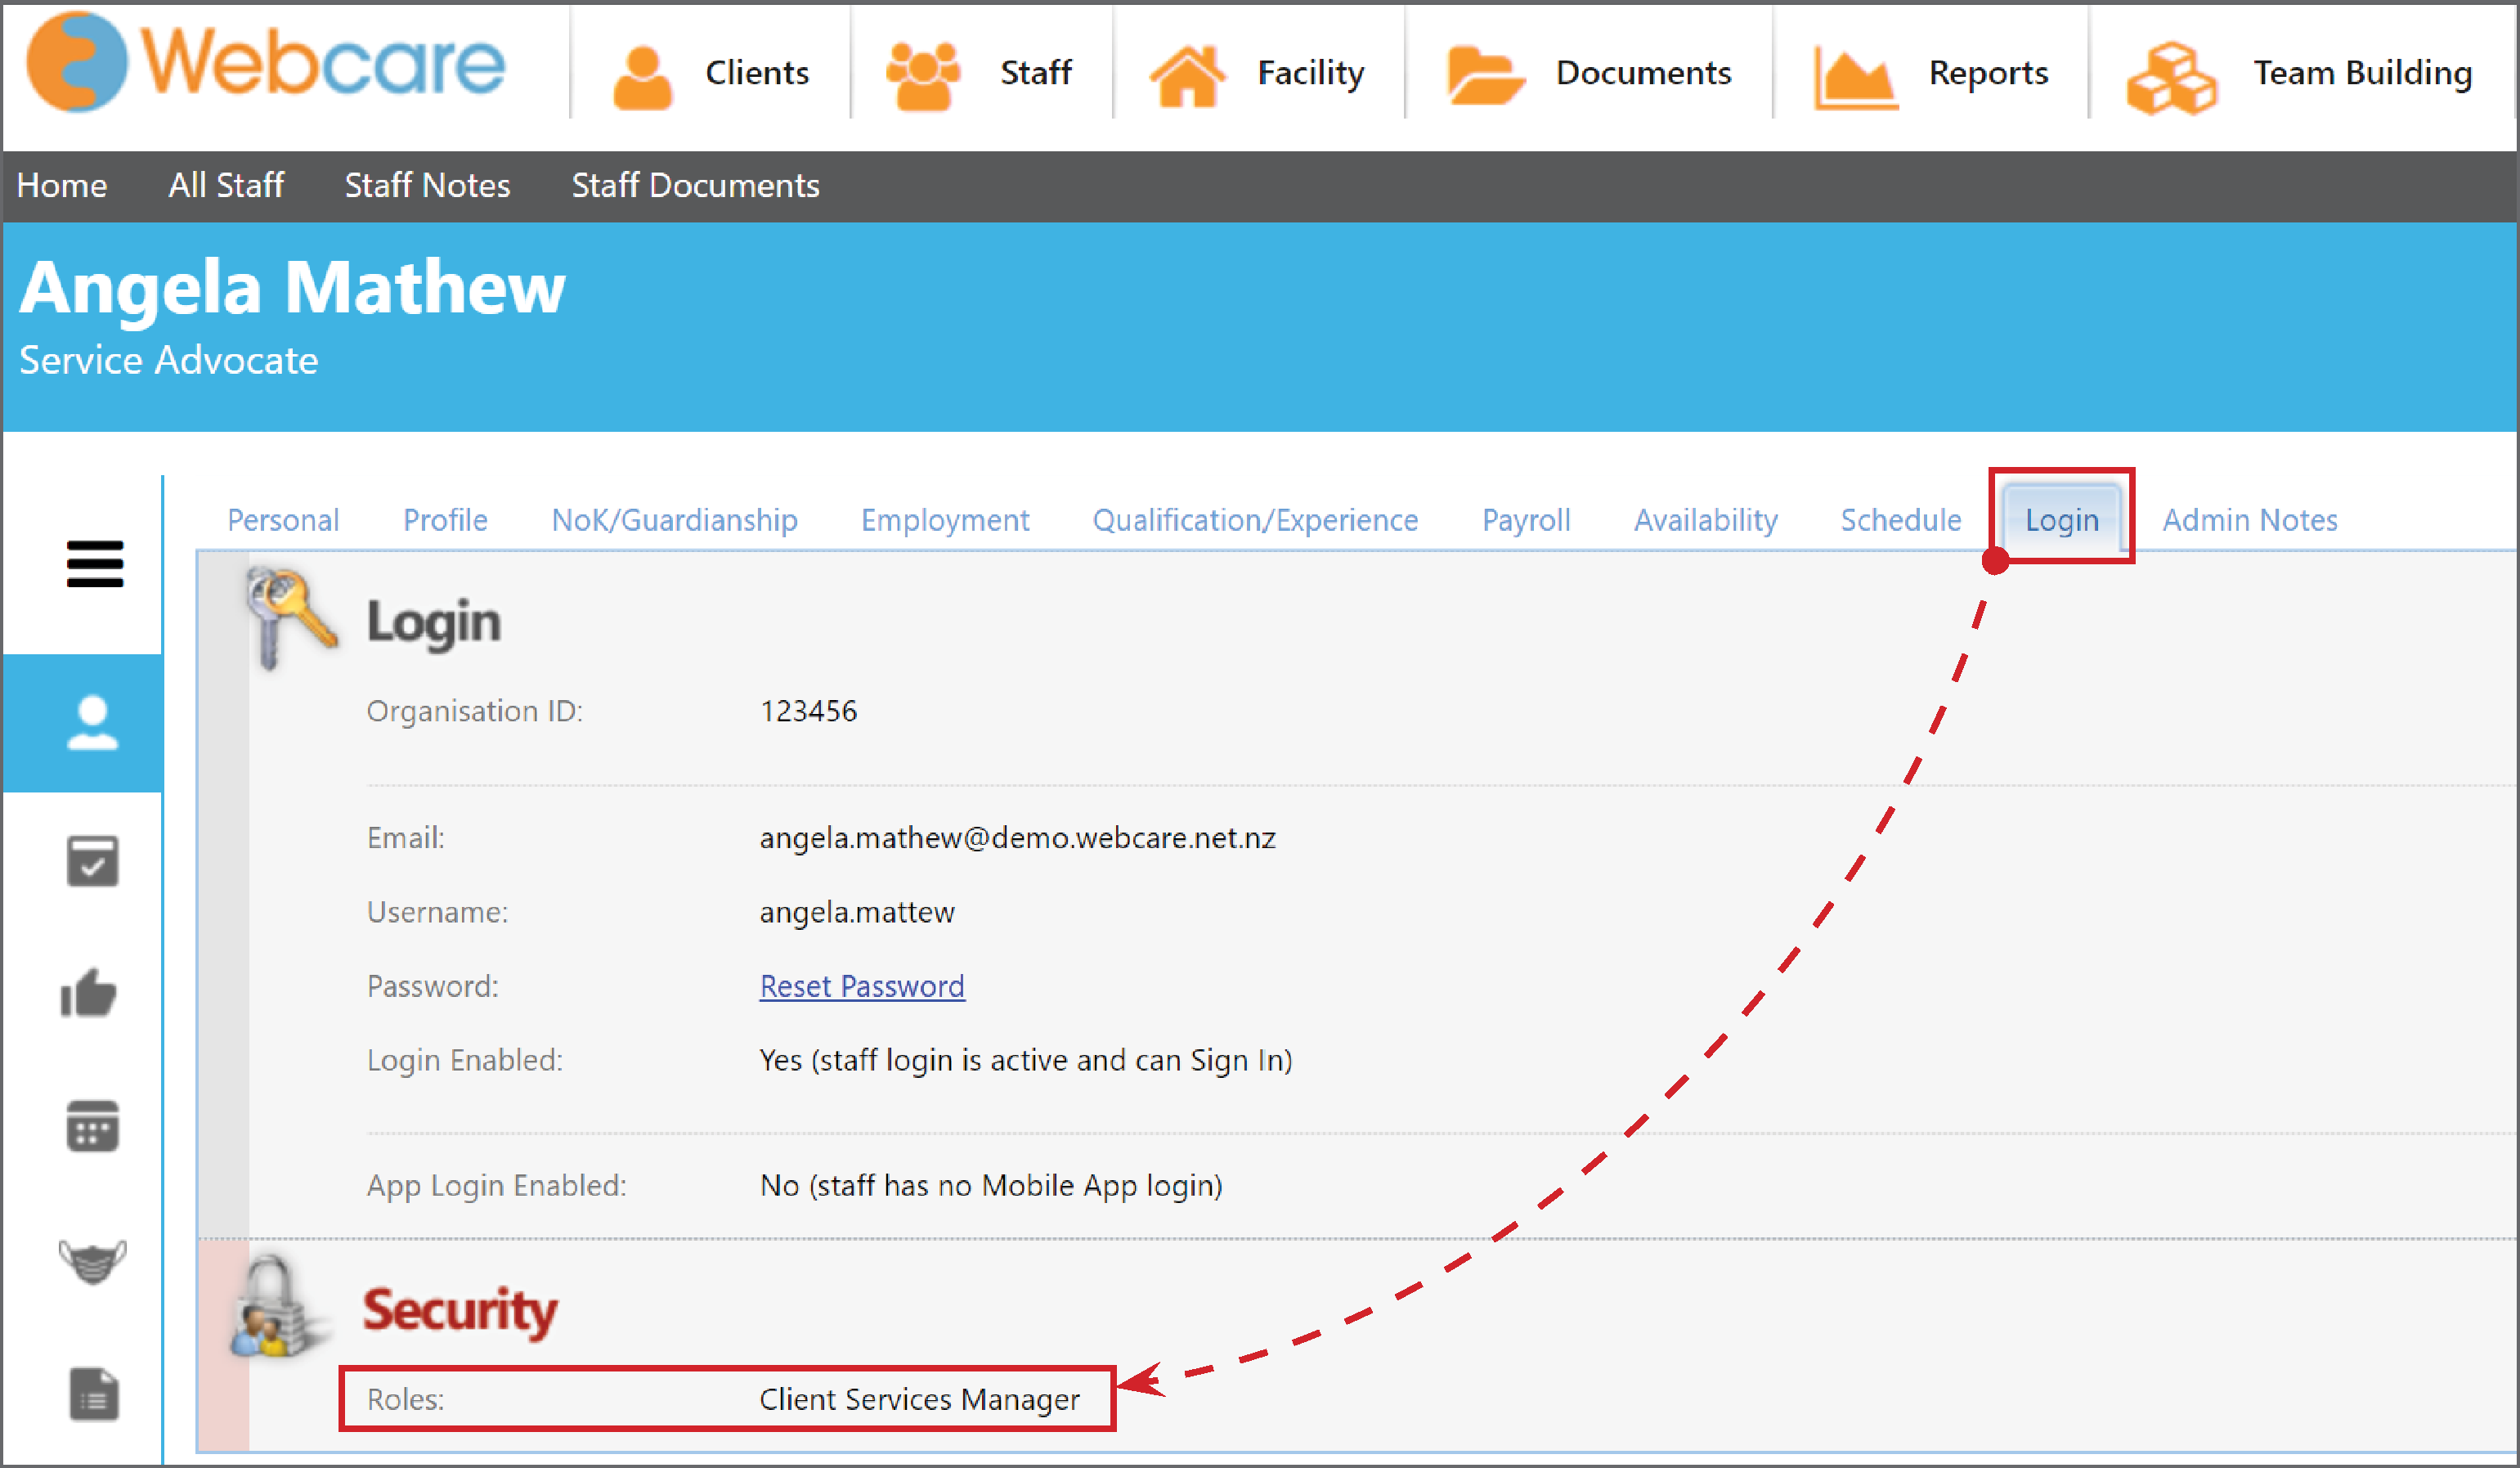
A staff member can be assigned to multiple roles. If a staff member is assigned to conflicting roles then the higher role takes precedence.
For instance, if a staff member is assigned to the Service Advocate role which has Read-only access, and the Operation Manager role which has Read, Create, Update, and Delete permissions, then that staff member can read, create, update, and delete the files.
Related Article: Manage Documents