This article contains information regarding:
Accessing Facility Roster | Rostering a shift | Deleting a shift | Deleting Multiple Shifts | Changing a shift Changing Multiple Shifts
Accessing Facility Roster
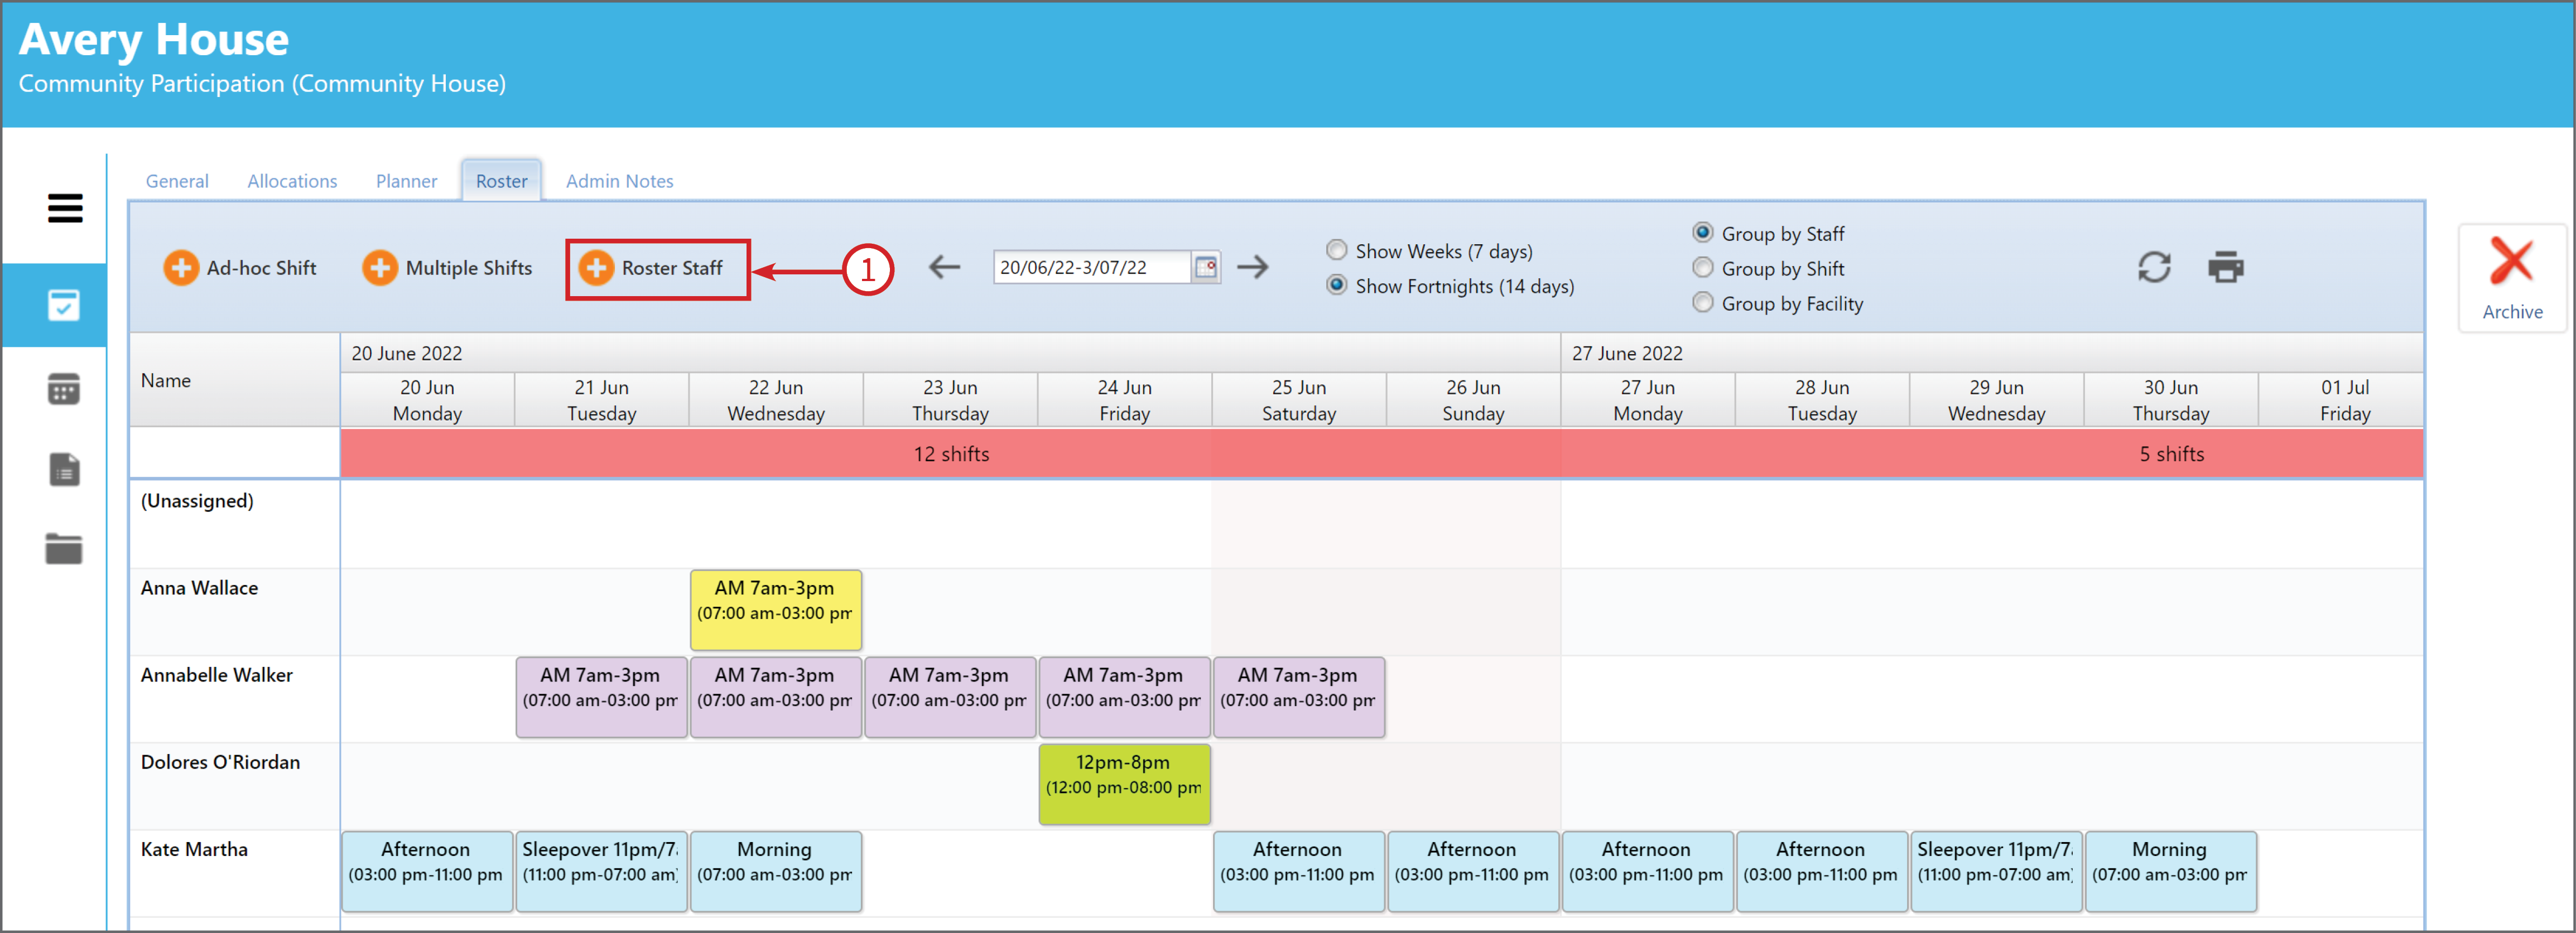
Click on Facility along the menu bar.

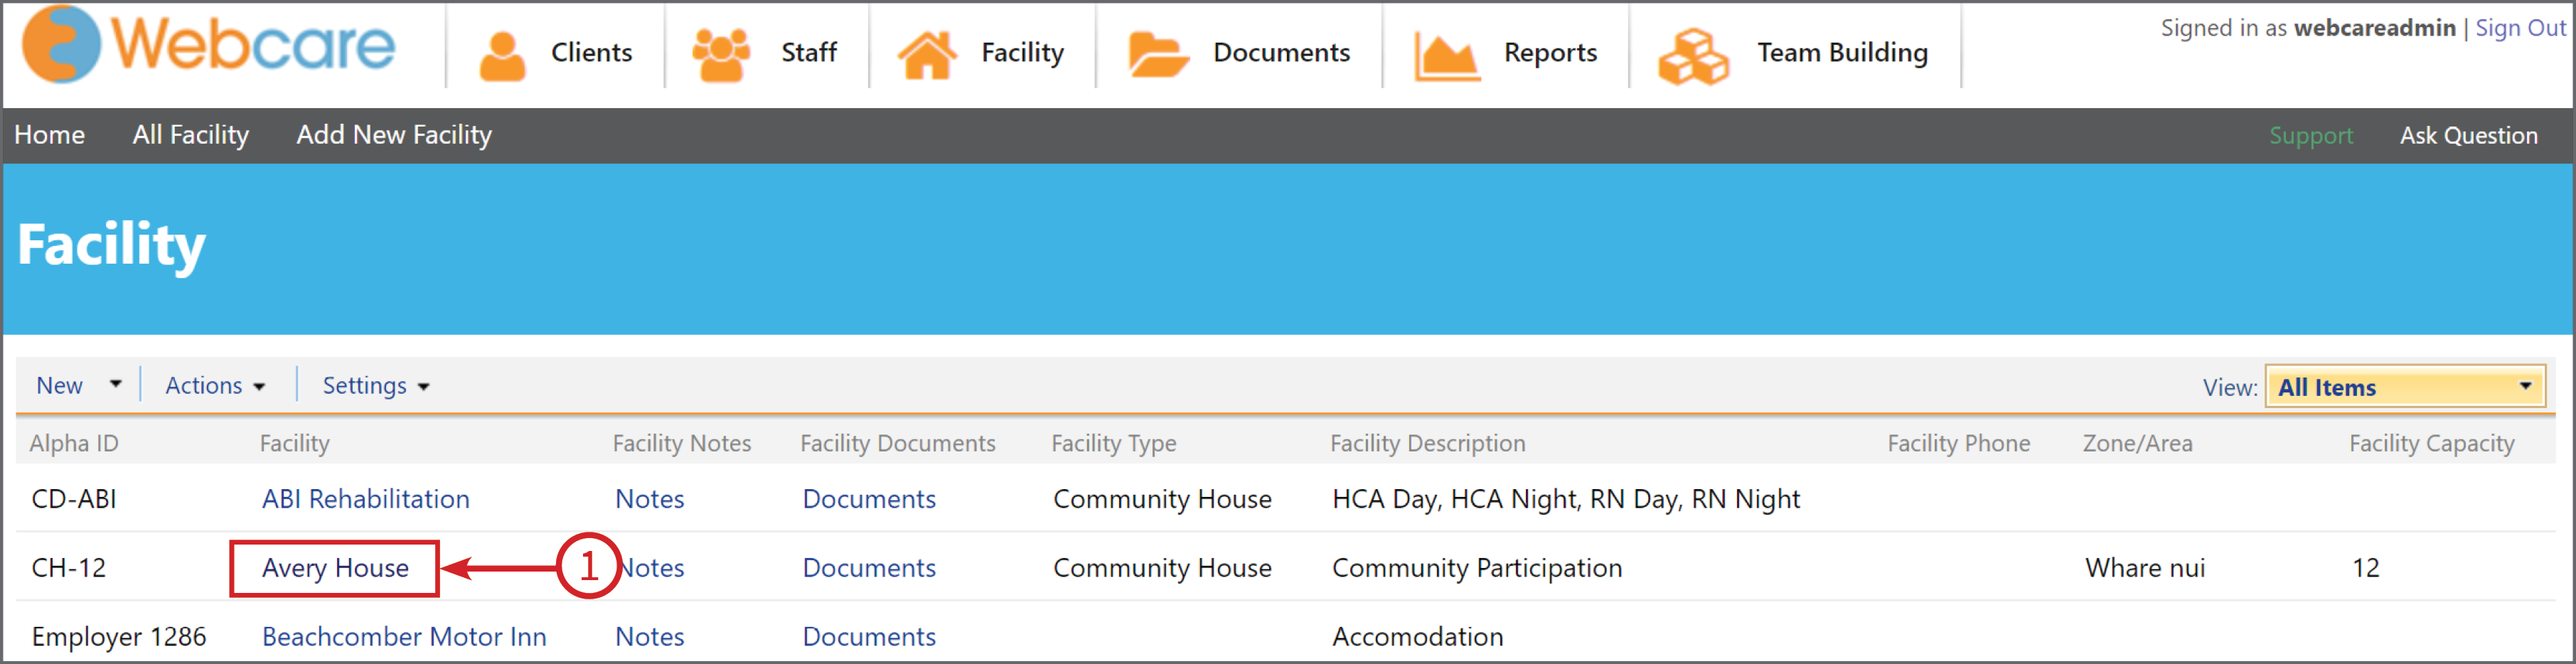
In Facility (1), click on the facility which you require. In this instance we are selecting 'Avery House'.
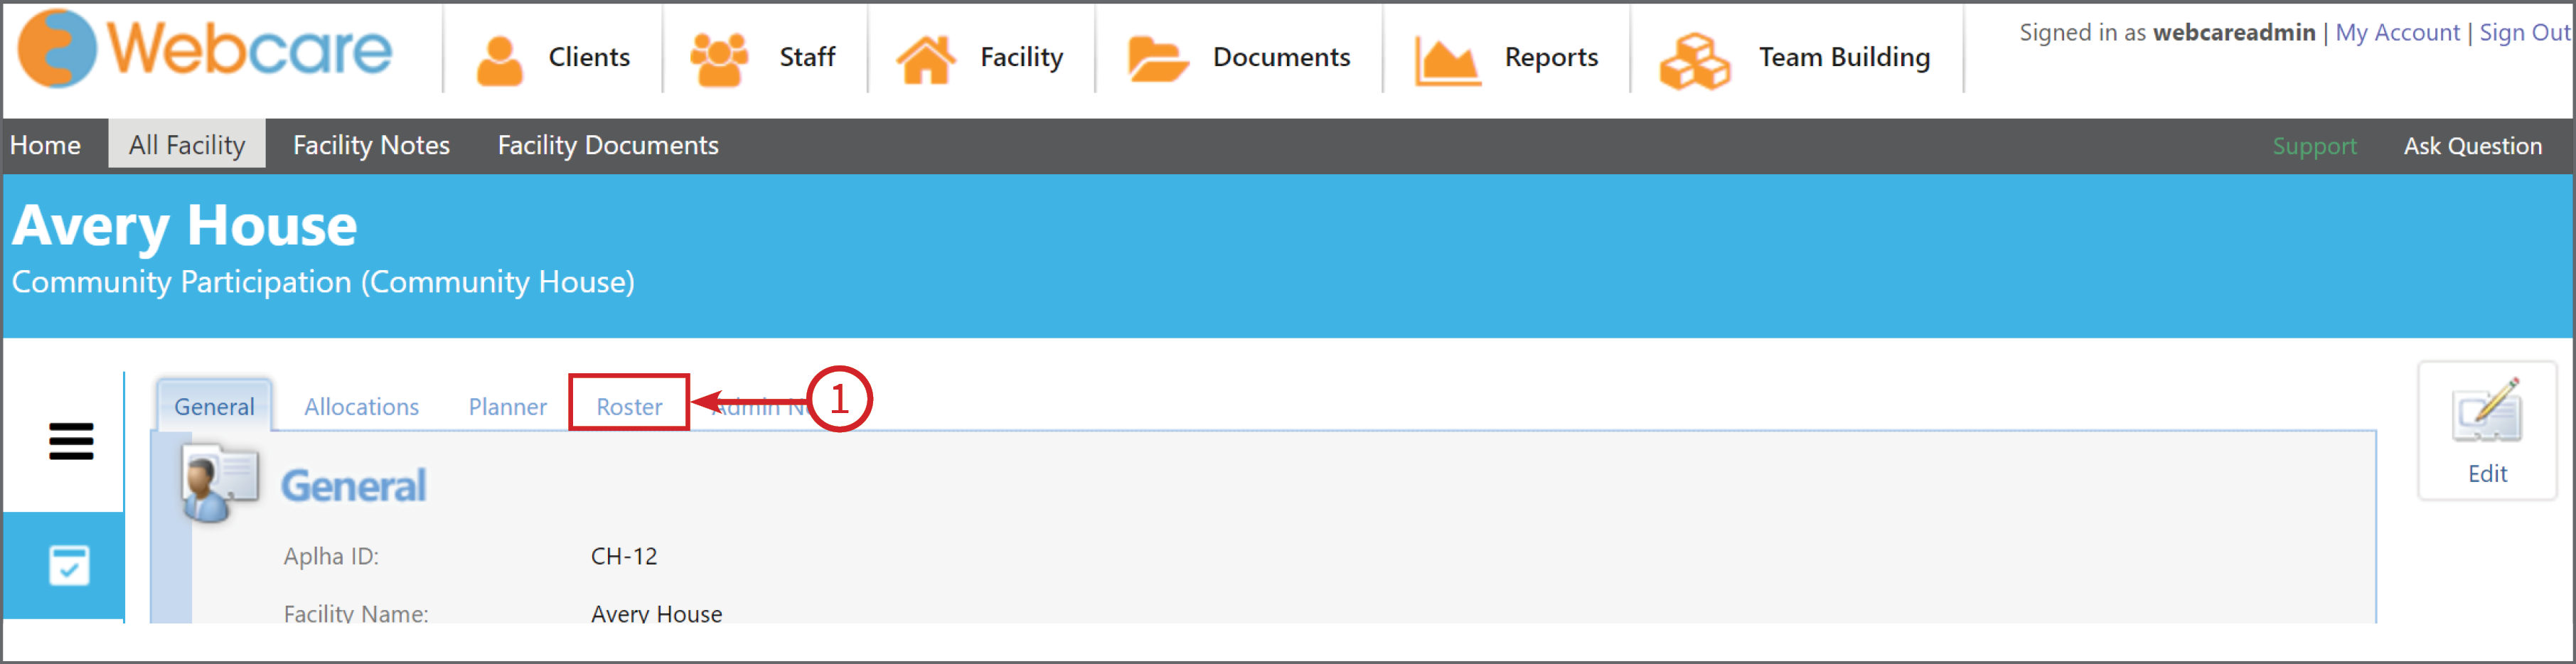
Once you are in the facility click on the Roster Tab (1).
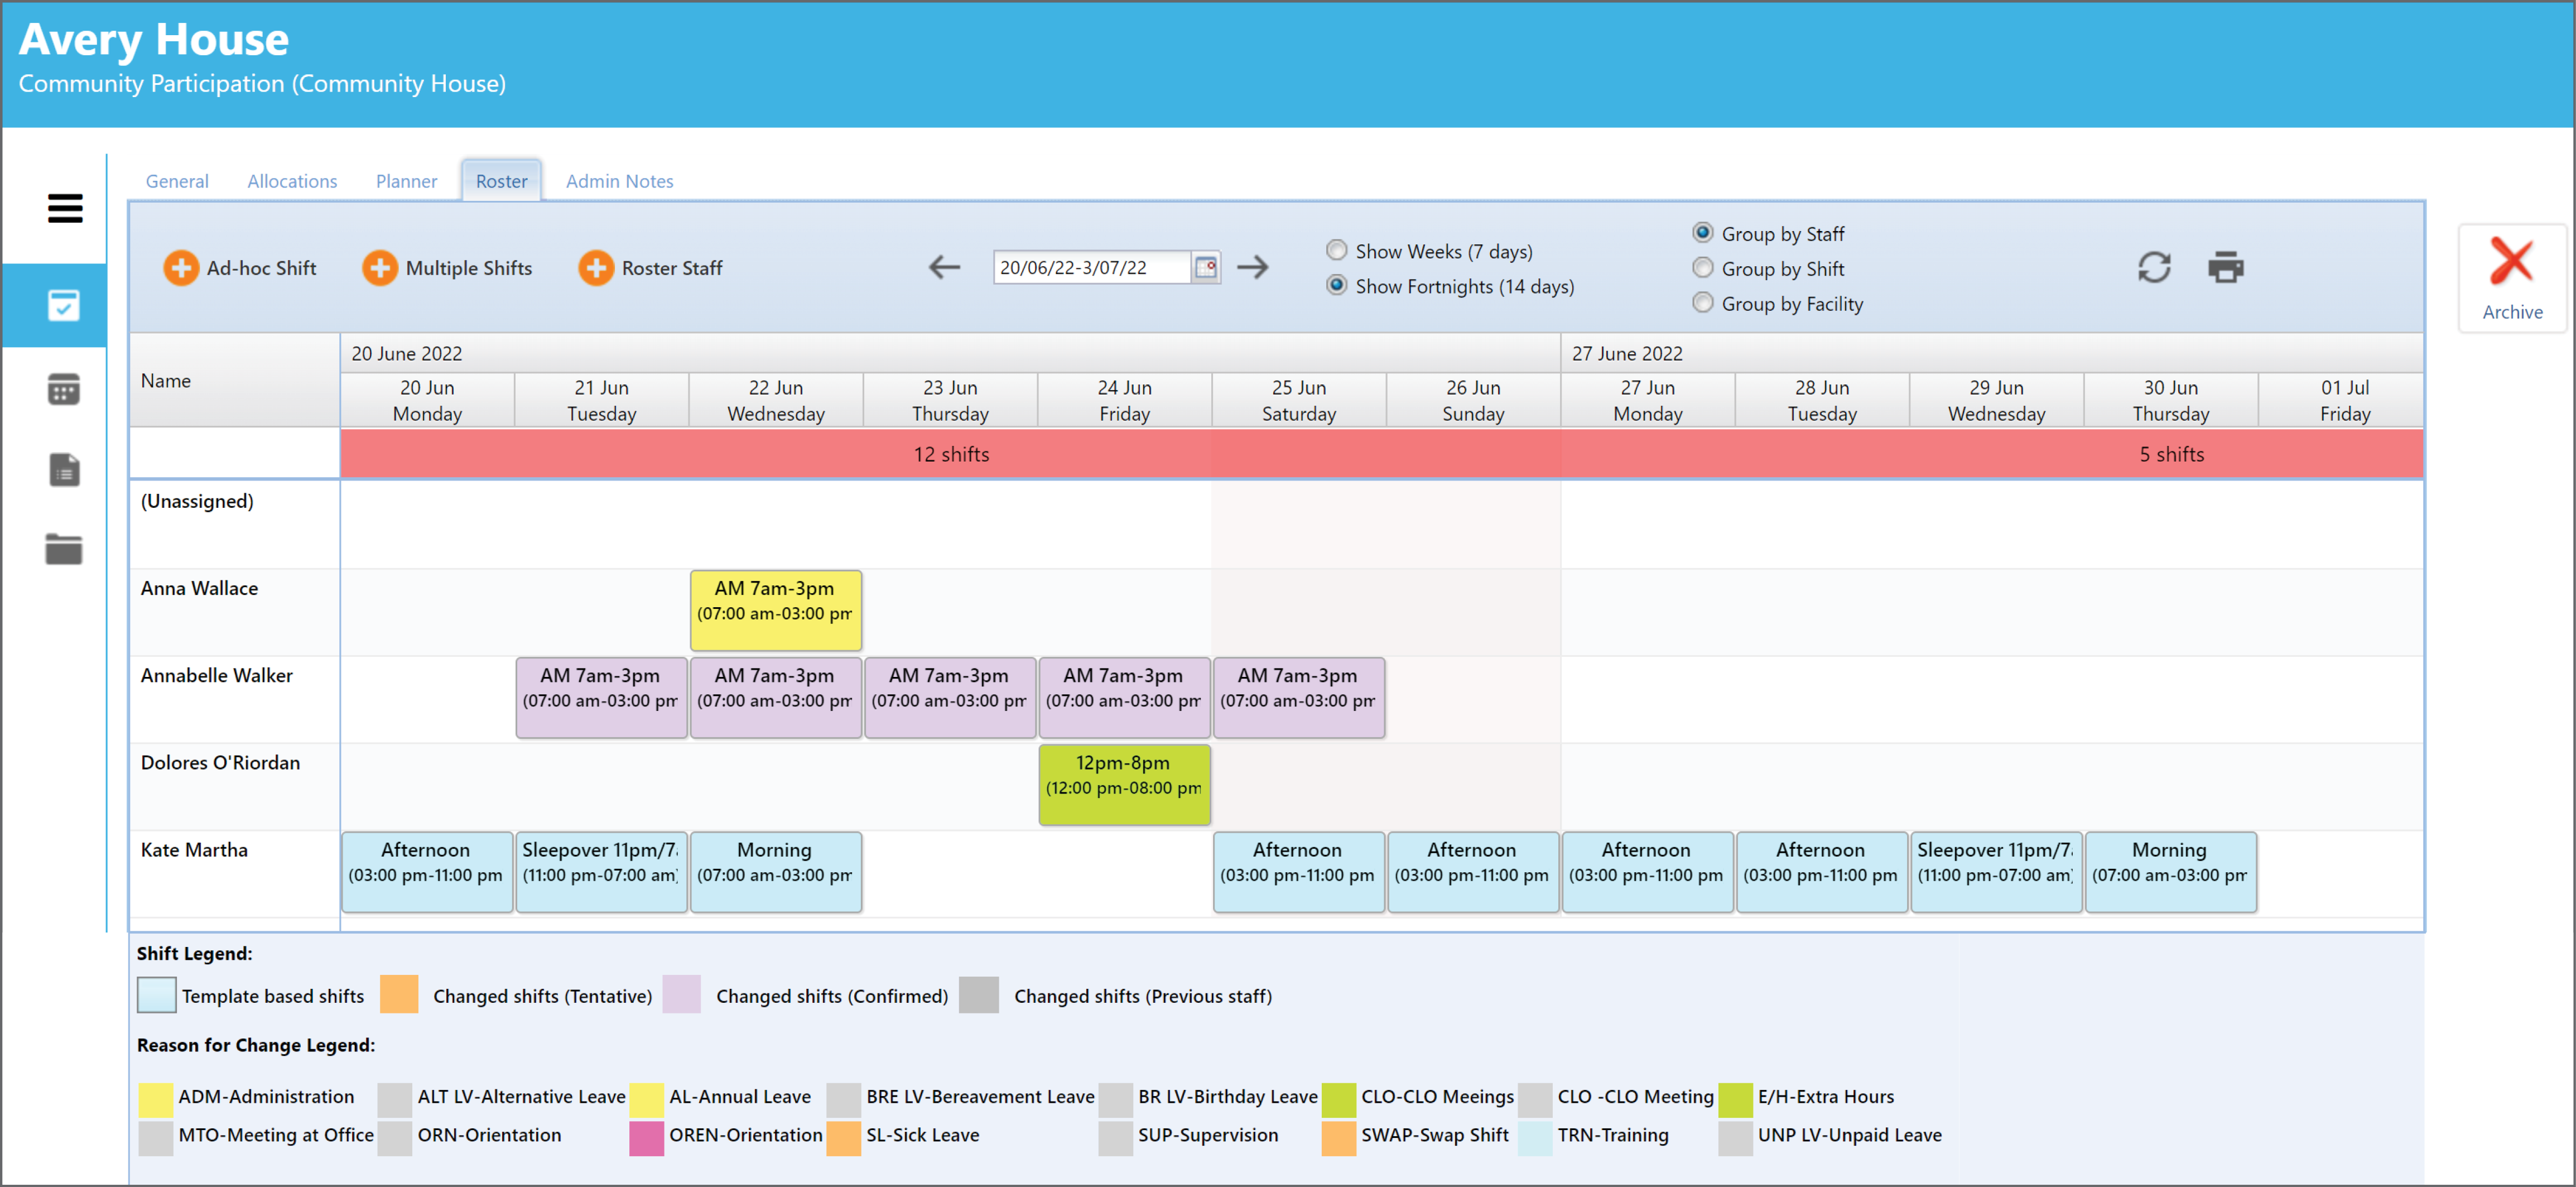
Clicking on the Roster tab will show the current rosters for this facility.
Rostering a Shift
Once you have accessed the Roster to add a shift which is prepared click on +Roster Staff (1)
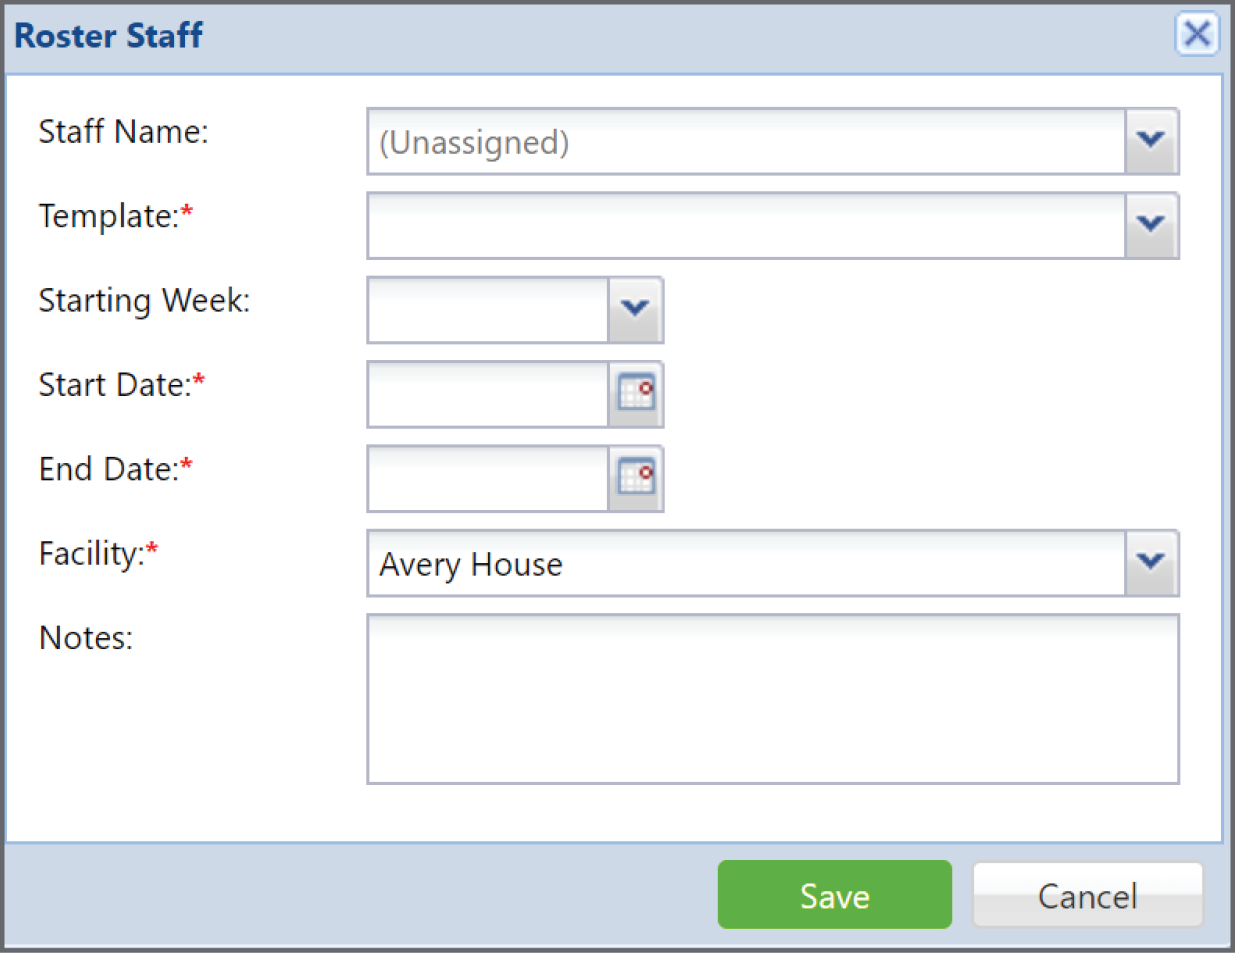
Once you have clicked on Roster Staff a dialogue box will open.
Enter the required information and click Save.
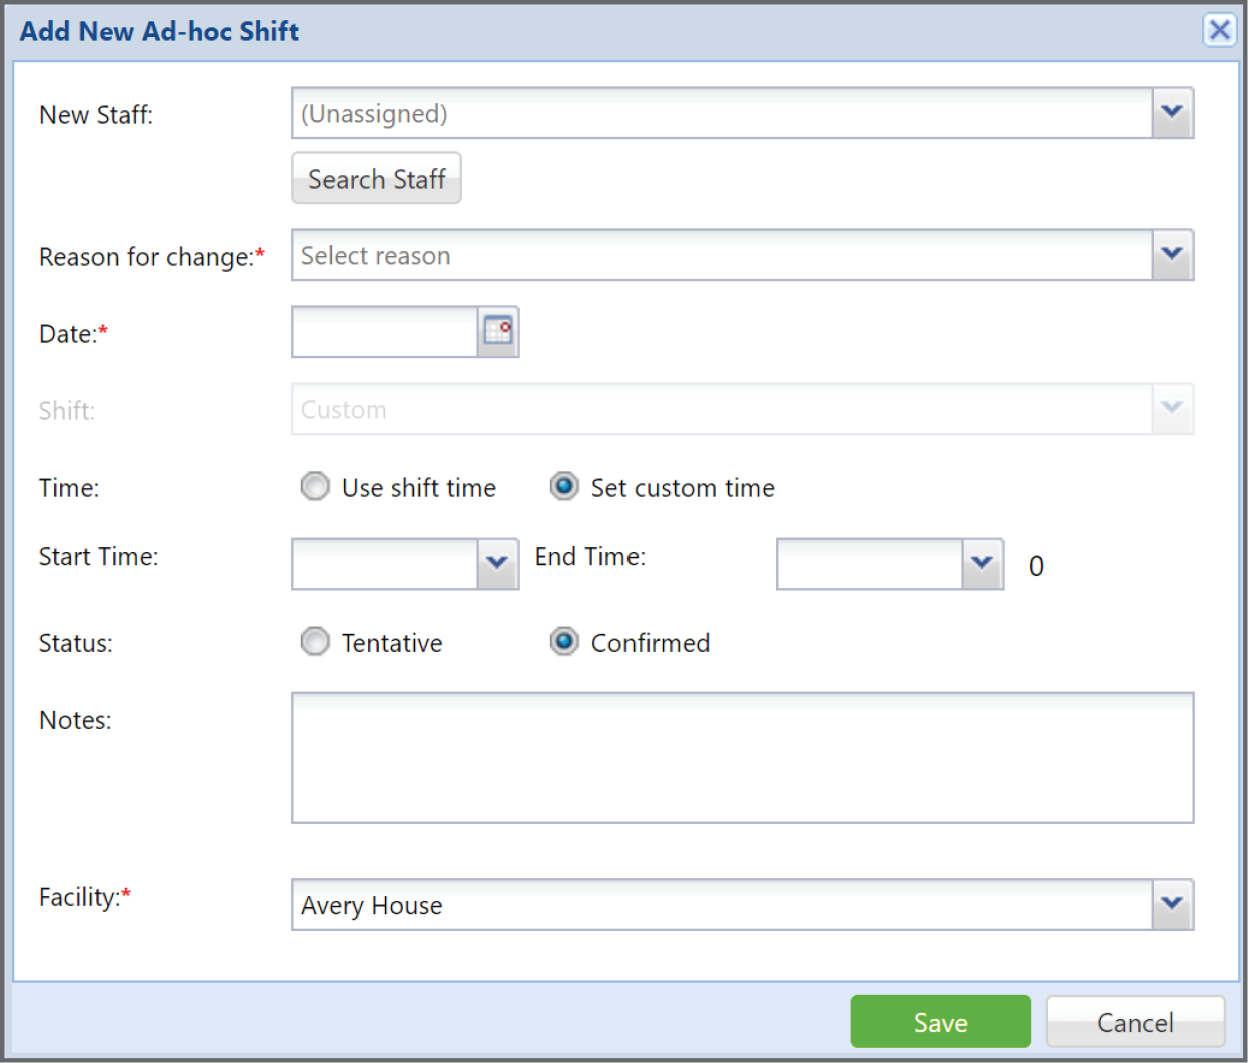
To add a once off or Ad-hoc Shift, click on the +Ad-hoc Shift (1) button.

Once you have done that, a new dialogue box will open.
Enter the details of the new shift either for a custom time or a previously saved shift time, add any notes required and click save.
To delete a shift
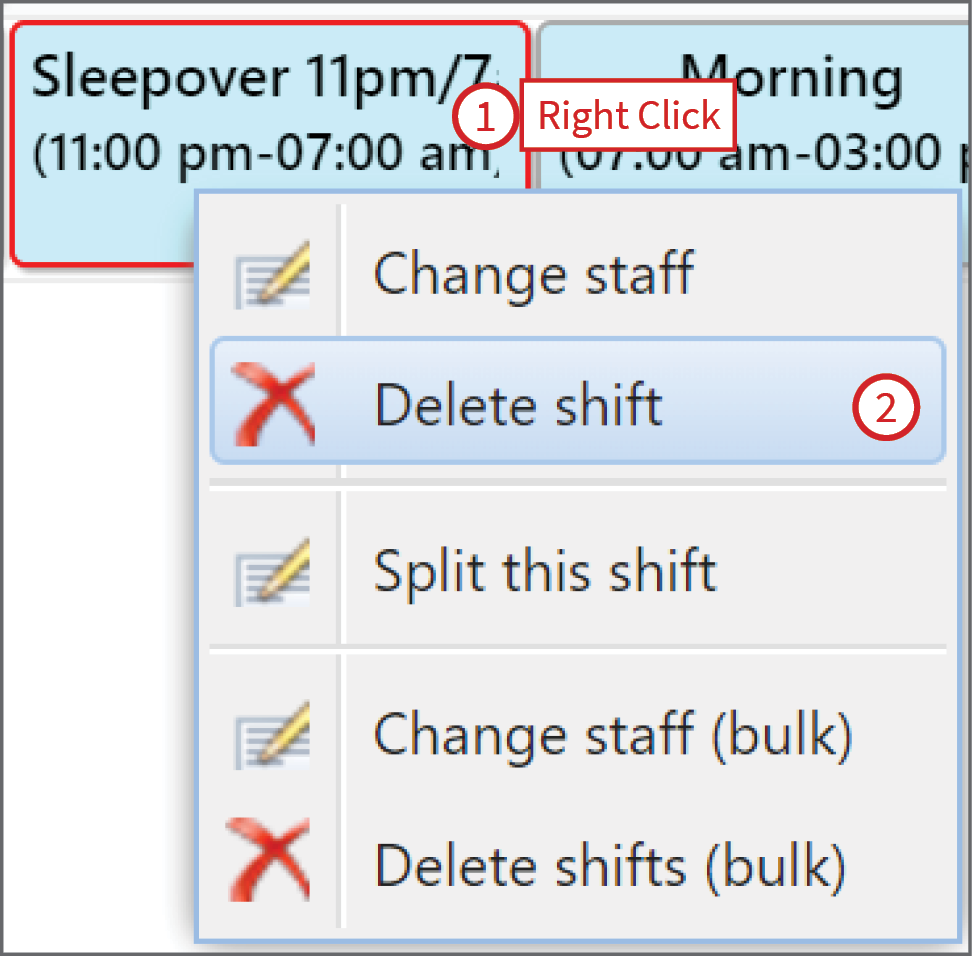
To delete a shift right click on the shift and then click on delete shift.
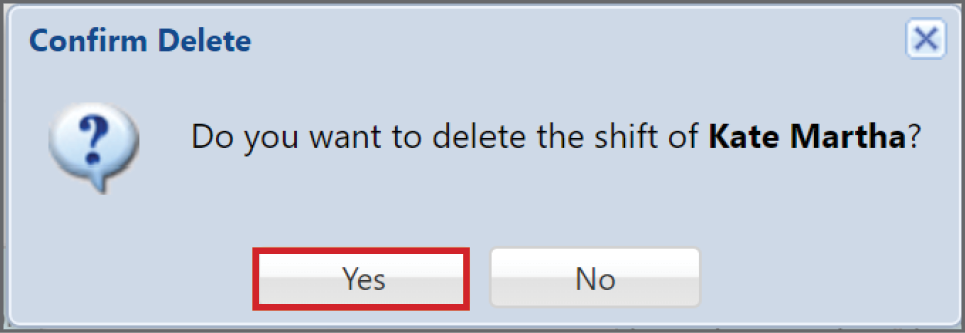
Once you have done this a dialogue box will open asking you to confirm you wish to delete the shift.
Deleting Multiple Shifts
Deleting multiple shifts at a time is useful for an employee, for example if they are taking an extended holiday period or maternity leave.
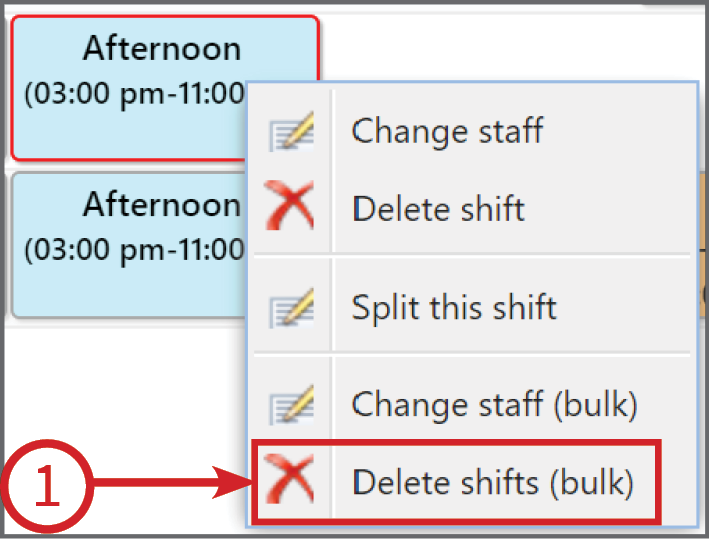
To delete multiple shifts, right click on a shift you want delete and then click on Delete shift (bulk) (1).
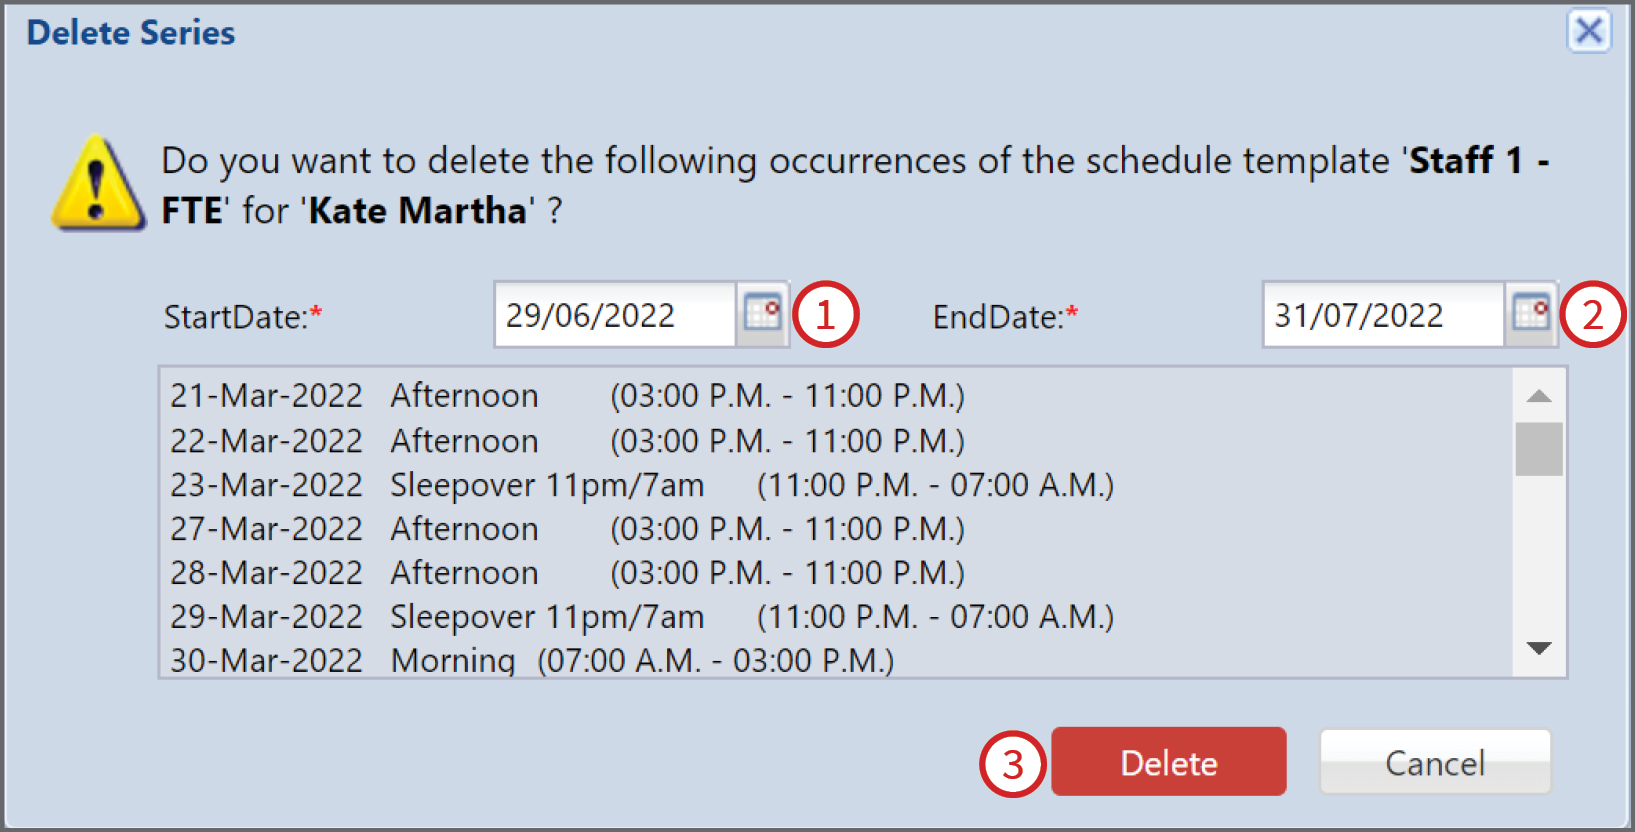
Once you have done this a dialogue box will open asking you to confirm that you wish to delete this shift series.
Once this box opens, enter the period you want to delete the shifts for;
- Click on the Start Date and enter the end date. You can do this by either typing xx/xx/xx or click on the calendar and click on the start date. If you calendar isn't showing and you want it to.
To learn how to add this - click here - Click on End Date and enter the date you want the shift to start again, or if you want the shift deleted for good the date that is preprogrammed into End Date is the last date of the shift so there is no need to do anything.
- Click Delete to confirm or cancel to cancel.
To change a shift
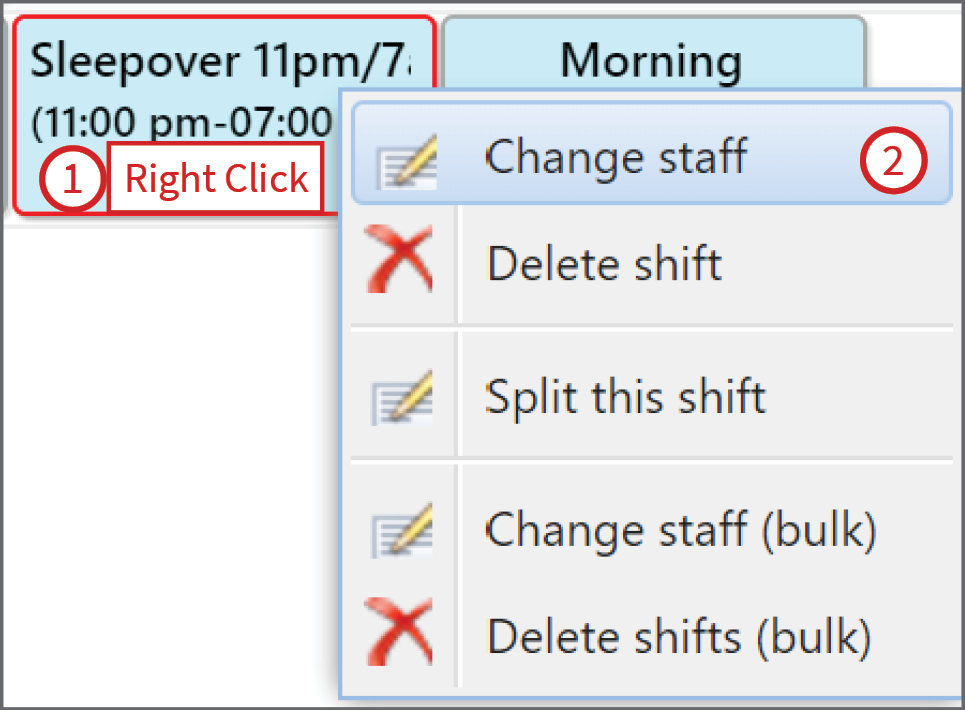
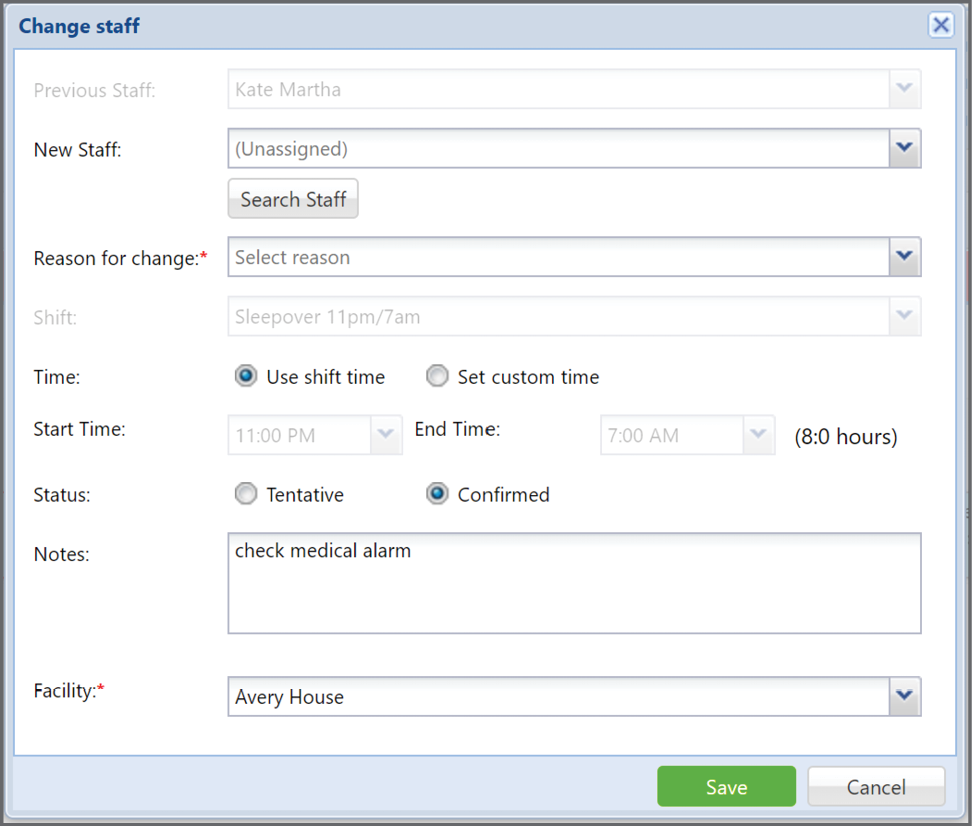
To change a shift right click on the shift you would like to change and then click Change staff.
A further dialogue box will open where you enter all of the details of the change of shift. click on the down arrow for New Staff and Reason for change add all of the other additional required information and click Save.
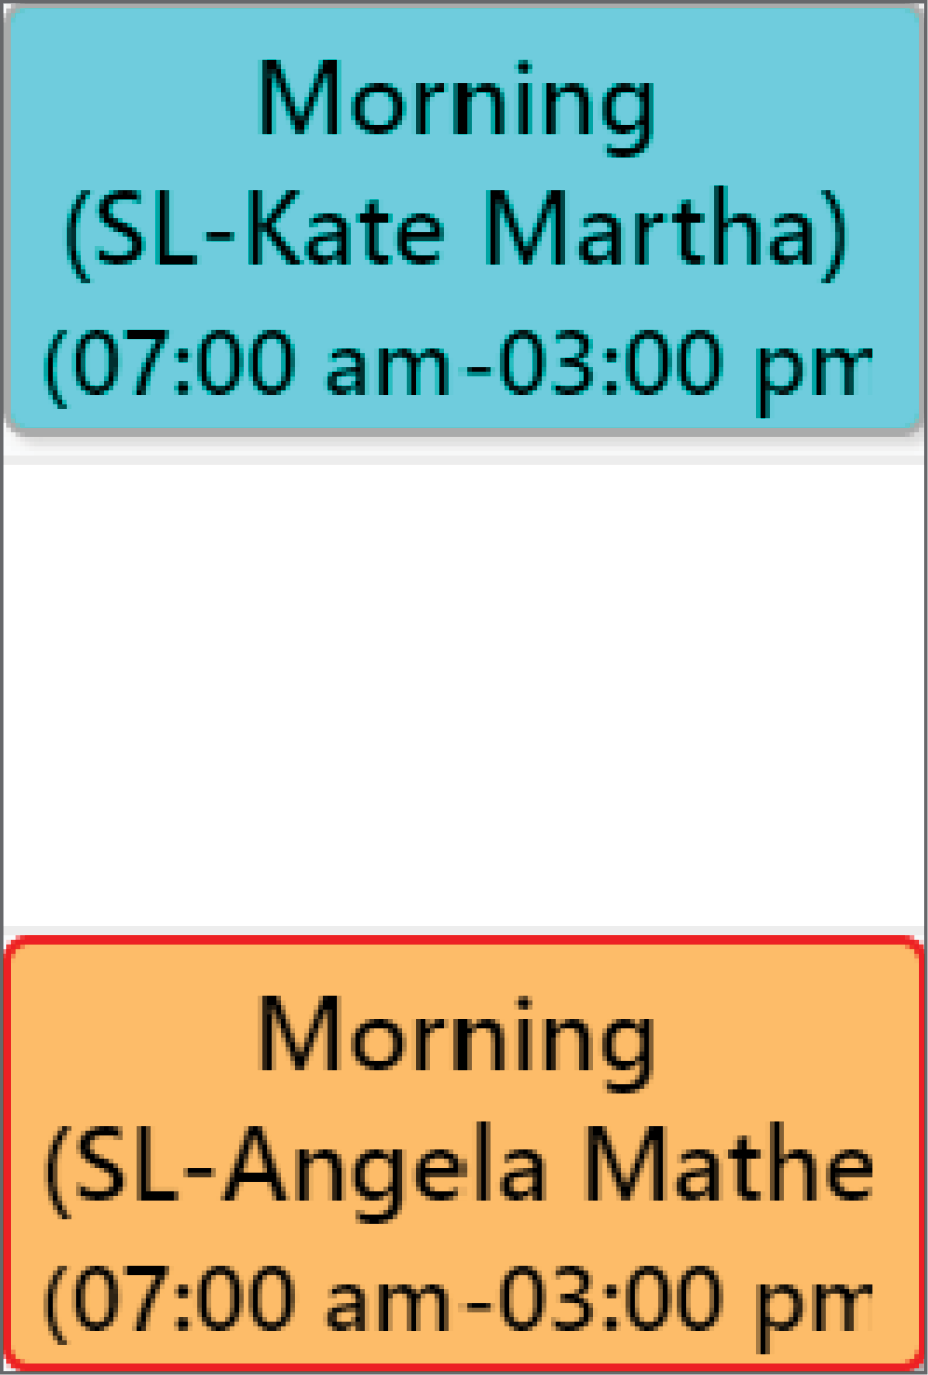
Once you have clicked on Save, the shift will appear with a different color to show the changes.
The original shift will stay there, this is so the administrators can see the original shift; the changes and the reasons for the changes at first glance.
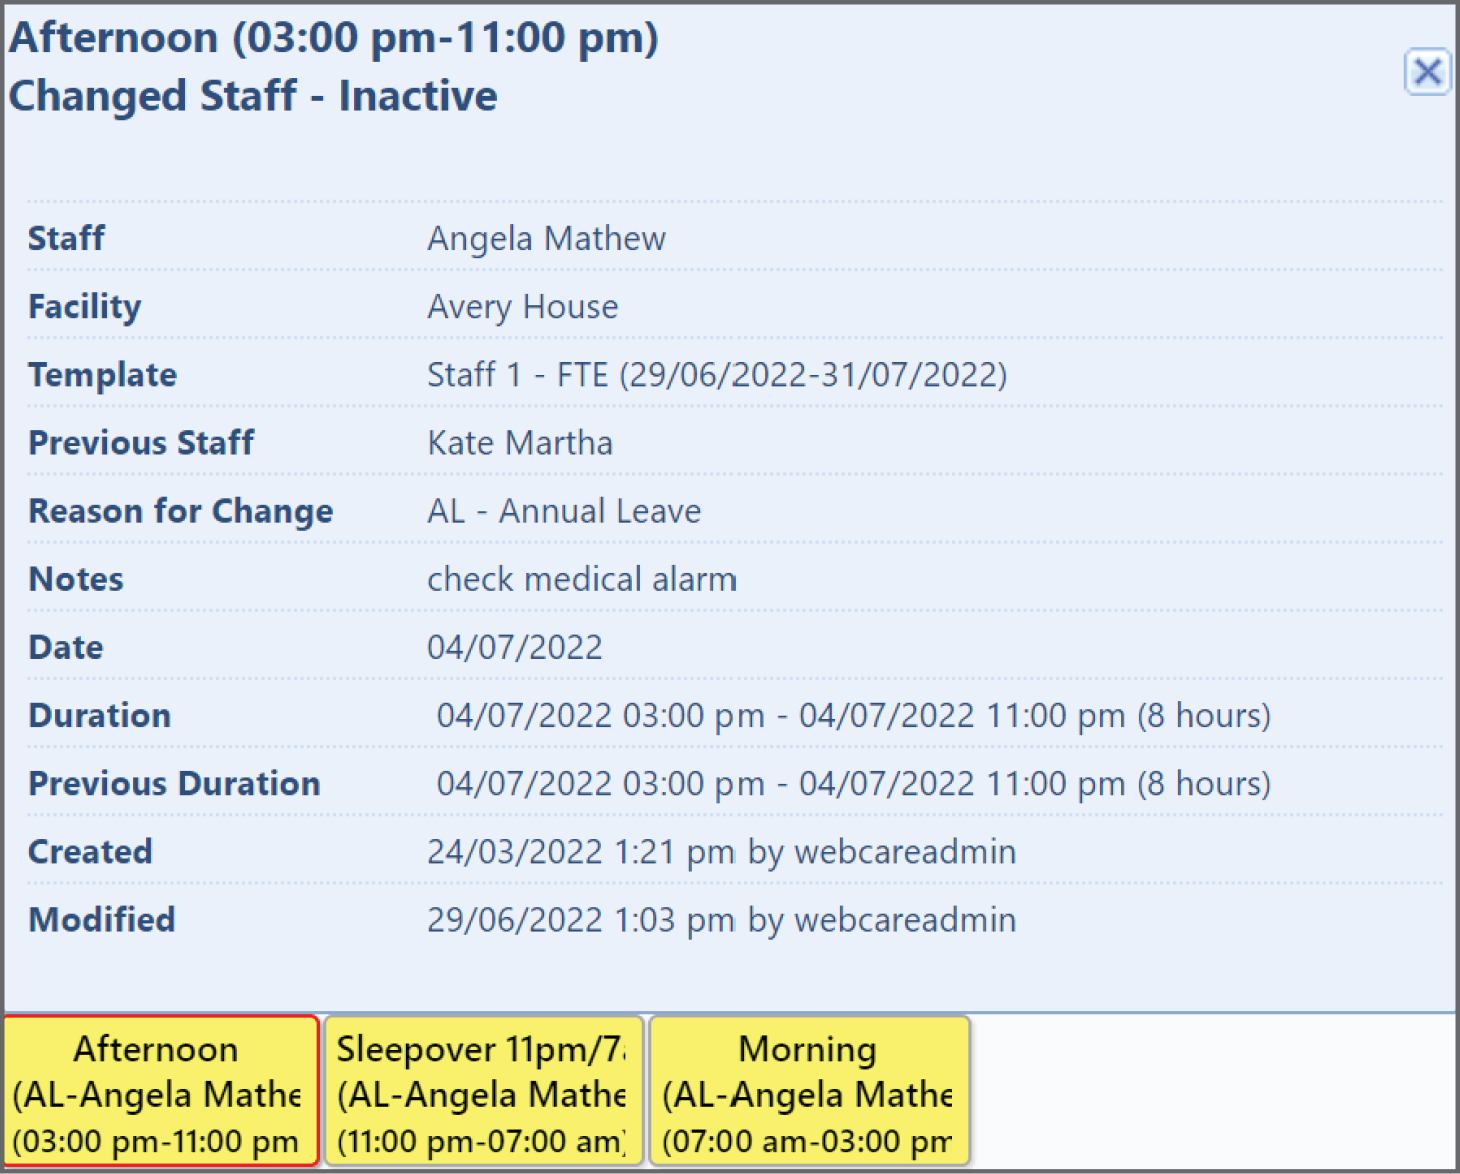
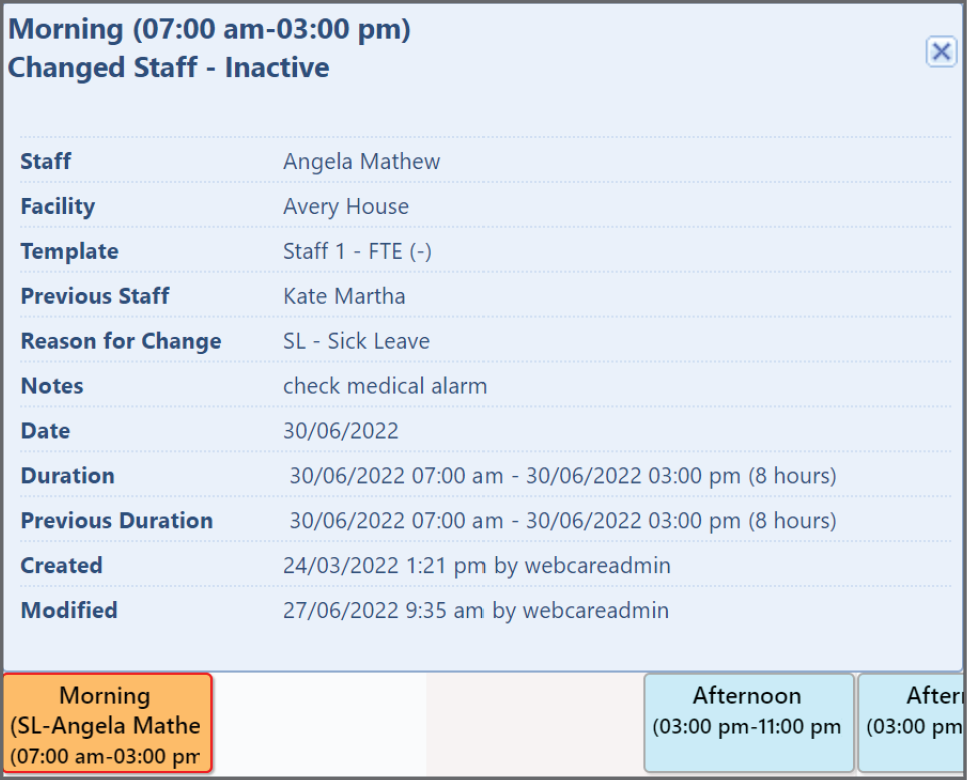
To see the details of the shift change click on the shift and that will bring up all of the information.
To find out how to change multiple shifts for example if a worker is going on maternity leave or an extended holiday - Click here
Changing Multiple Shifts
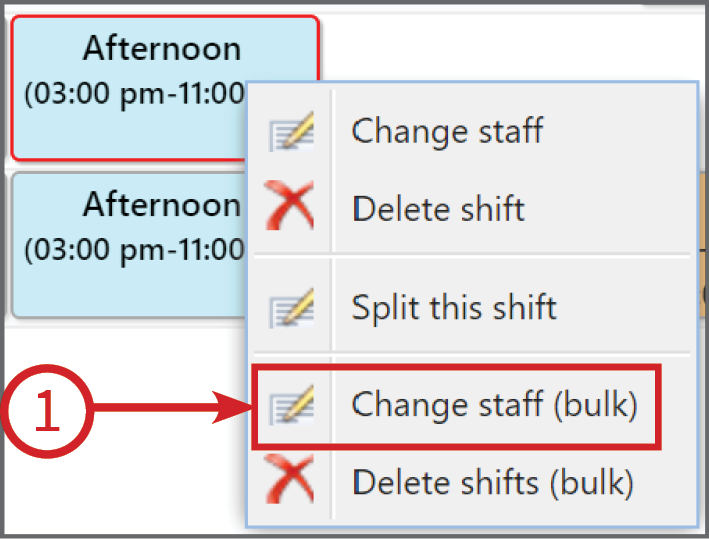
To Change Multiple Shifts right click on the shift you would like to change and then click Change staff (bulk) (1)
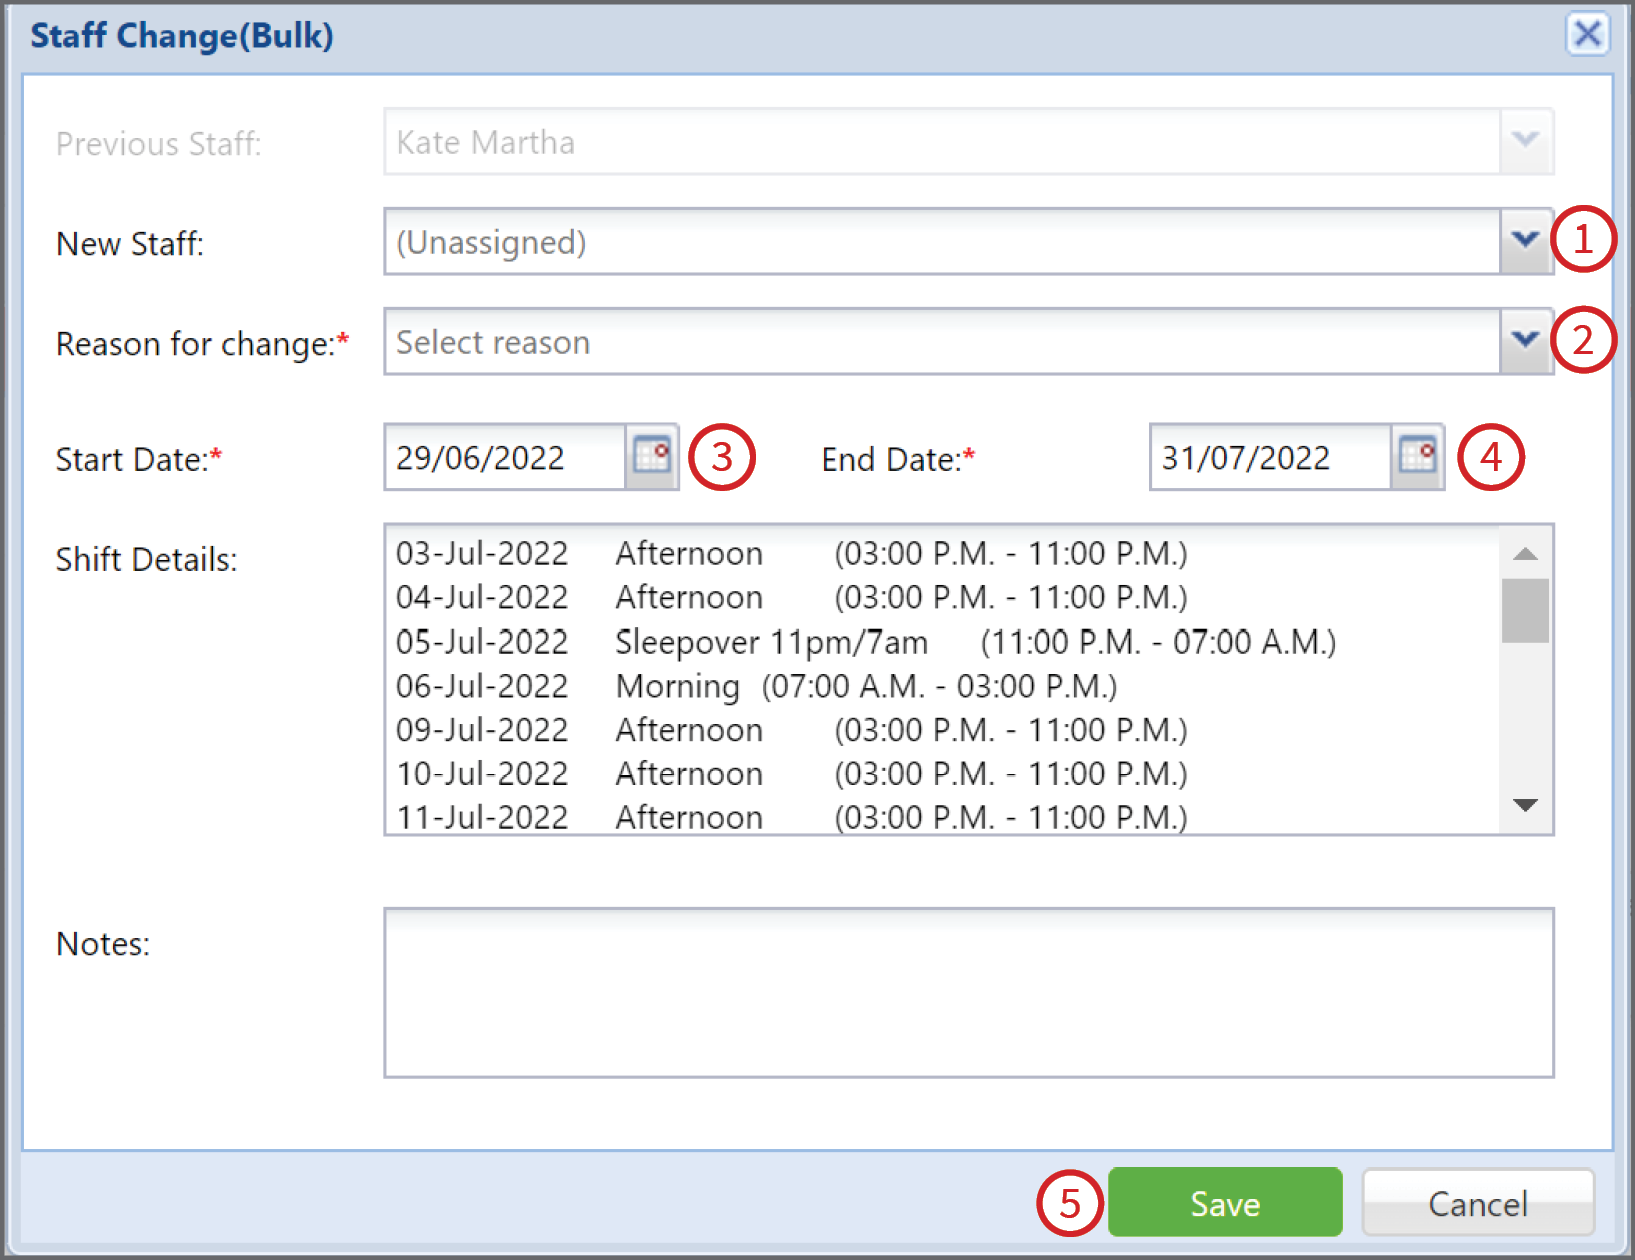
A further dialogue box will open where you enter all of the details of the change of shift. click on the down arrow for New Staff and Reason for change add all of the other additional required information and click Save.
- Click down on the down arrow to select a staff member to cover this shift or leave unassigned.
- Click on the down arrow and select the reason for the shift change.
- Click on the Start Date and enter the date for the period you want the break to take affect from. You can do this by either typing xx/xx/xx or click on the calendar and click on the start date.
- Click on End Date and enter the date you want the shift to start again, or if you want the shift deleted for good the date that is preprogrammed into End Date is the last date of the shift so there is no need to do anything.
- Click delete to confirm or cancel to cancel.
Once you have clicked on Save the shift will appear with a different color to show the changes. The original shift will stay there, so that the administrators can see the original shift, the changes and the reasons for the changes at first glance.
The color of the codes are predefined and are set out below the roster. To learn how to change the color coding, see below.
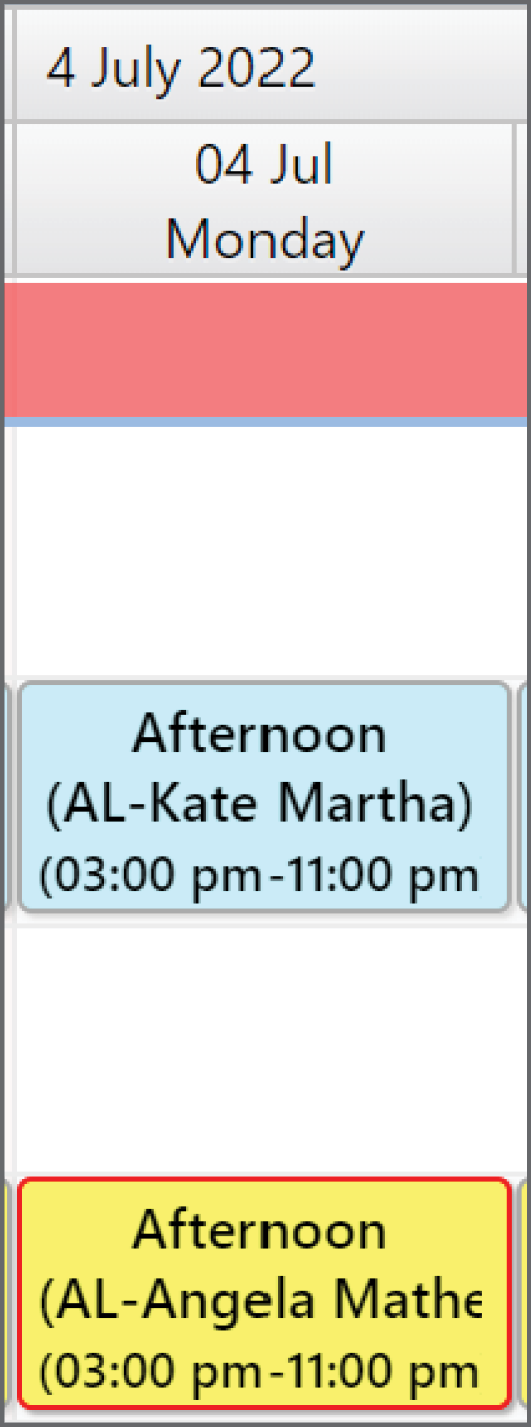
To see the details of the shift change click on the shift and that will bring up all of the information.